
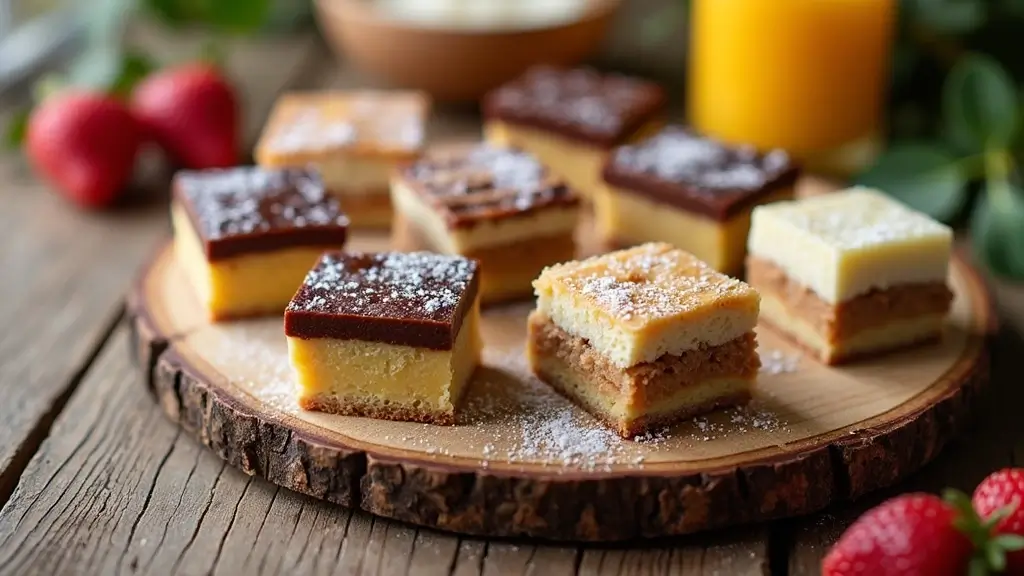
Are you ever hit with a sweet craving, but your pantry looks like a barren wasteland? Trust me, I’ve been there. Sometimes, you just want a treat that doesn’t require a scavenger hunt for ingredients. That’s why I put together this list of 25 simple 3-ingredient dessert recipes you can whip up anytime. Whether it’s a last-minute dinner guest or just a personal indulgence, these recipes have you covered.
If you’re someone who loves desserts but hates complicated steps, you’re in the right place. You don’t need to be a master chef to impress your friends or satisfy your own sweet tooth. These recipes are designed for everyone—from busy parents to college students, or anyone who just wants a quick and easy treat.
What can you expect? I’ve gathered a collection of easy, delicious desserts that come together with minimal fuss. You won’t need to spend hours in the kitchen or break the bank on fancy ingredients. Each recipe is straightforward and perfect for those days when you want something sweet without all the hassle.
So, grab your mixing bowl and a few basic ingredients. Let’s dive into these delightful desserts that you can make in no time at all. Your taste buds will thank you!
1. Chocolate Peanut Butter Fudge

Indulge in a delightful treat with this easy Chocolate Peanut Butter Fudge. Imagine rich chocolate mingling with creamy peanut butter, creating a dessert that melts in your mouth. With just three ingredients—chocolate chips, peanut butter, and sweetened condensed milk—you can whip up this luxurious fudge in minutes. It’s so simple, you’ll wonder how it can taste so good!
In just 10 minutes of prep time, you can have this fudge ready to chill. Simply let it sit in the fridge for a couple of hours, and you’ll have a sweet treat perfect for any gathering. Cut it into squares and watch it vanish quickly! The combination of smooth peanut butter and rich chocolate is a match made in dessert heaven.
Recipe Overview:
– Servings: 16 squares
– Prep Time: 10 minutes
– Cook Time: 0 minutes
– Total Time: 2 hours (chill time)
– Calories: 150
Nutrition Information:
– Total Fat: 10g
– Saturated Fat: 3g
– Carbohydrates: 15g
– Protein: 3g
Ingredients:
– 1 cup chocolate chips
– 1 cup peanut butter
– 1 can (14 oz) sweetened condensed milk
Instructions:
1. In a saucepan, combine chocolate chips and sweetened condensed milk over low heat. Stir until the mixture is smooth.
2. Remove from heat and mix in the peanut butter until fully blended.
3. Pour the mixture into a greased 8×8 inch pan, smoothing the top with a spatula.
4. Refrigerate for at least 2 hours to set. Once firm, cut into squares and serve.
For an extra twist, sprinkle some sea salt on top before chilling. If you’re feeling adventurous, swap peanut butter for almond butter for a new flavor!
Frequently Asked Questions:
– Can I use dark chocolate? Yes! Dark chocolate chips work wonderfully for a richer taste.
– How long does it last? This fudge keeps well in the fridge for up to a week.
This Chocolate Peanut Butter Fudge is not just easy to make; it’s a crowd-pleaser that will satisfy your sweet tooth. Enjoy the process of creating this tasty treat!
Chocolate Peanut Butter Fudge
Editor’s Choice

USA Pan Bakeware Nonstick Square Cake Pan, 8 Inch, Aluminized Steel

5 Pieces Silicone Spatula Set, Food Grade Rubber Spatula, Upgrade Strong…
2. No-Bake Strawberry Cheesecake

Get ready for a taste of summer with this easy No-Bake Strawberry Cheesecake. It’s fresh, creamy, and simple to make with just three main ingredients: cream cheese, whipped cream, and strawberries. You can whip it up in a flash, and the best part? No oven needed! Just mix, chill, and enjoy a delightful dessert that’s perfect for any gathering or a sweet treat at home.
The tangy cream cheese pairs beautifully with the sweet strawberries, creating a light and refreshing flavor. This cheesecake is not heavy, making it a fantastic choice for warm days. Serve it in pretty cups for individual treats, or go for a classic pie dish to share. Either way, it’s sure to impress your friends and family!
Recipe Overview:
– Servings: 8
– Prep Time: 15 minutes
– Chill Time: 4 hours
– Calories: 200 per serving
Nutrition Information:
– Total Fat: 12g
– Saturated Fat: 7g
– Carbohydrates: 20g
– Protein: 3g
Ingredients:
– 1 package (8 oz) cream cheese, softened
– 2 cups whipped cream
– 1 cup fresh strawberries, sliced
Instructions:
1. Start by beating the softened cream cheese in a bowl until it’s smooth.
2. Gently fold in the whipped cream and the sliced strawberries until well combined.
3. Pour the mixture into a pie dish or individual cups.
4. Chill in the refrigerator for at least 4 hours before serving.
To make it even more special, top your cheesecake with extra strawberries or try adding a mix of blueberries or raspberries for a fruity twist!
Frequently Asked Questions:
– Can I use frozen strawberries? Yes, just make sure to thaw and drain them well for the best results.
– Is this recipe gluten-free? Absolutely! You don’t need to make any changes; it’s naturally gluten-free.
This No-Bake Strawberry Cheesecake is a simple yet impressive dessert that brings joy to any occasion. Enjoy creating this delicious treat!
No-Bake Strawberry Cheesecake
Editor’s Choice

WHYSKO Meal Prep Stainless Steel Mixing Bowl (5-Piece Set) Home, Refrige…

Mora Ceramic Deep Fluted Pie Dish for Baking – 9 inch Porcelain Pie Plat…

NileHome Stainless Steel Whisk Set 8″ 10″ 12″ Kitchen Whisk Balloon Whis…
3. Nutella Banana Bites

Craving something sweet and simple? Try these delightful Nutella Banana Bites. They combine the creamy richness of Nutella with the natural sweetness of ripe bananas, creating a treat that’s perfect for satisfying your cravings anytime. This easy recipe keeps things fun and delicious with just three ingredients!
To make these bites, slice two ripe bananas into thick rounds. Spread a generous layer of Nutella on half of the slices. Then, top each with another slice to create a tasty banana sandwich. For that extra crunch, roll the edges in crushed nuts like almonds or walnuts. These bites are not only a quick snack but also a hit at parties, adding a playful twist to your dessert table!
Recipe Overview:
– Servings: 4
– Prep Time: 5 minutes
– Cook Time: 0 minutes
– Total Time: 5 minutes
– Calories: 120
Nutrition Information:
– Total Fat: 7g
– Saturated Fat: 4g
– Carbohydrates: 14g
– Protein: 2g
Ingredients:
– 2 ripe bananas
– 1/2 cup Nutella
– 1/4 cup crushed nuts (almonds, walnuts, or hazelnuts)
Instructions:
1. Slice the bananas into thick rounds.
2. Spread Nutella on half of the banana slices.
3. Top with another slice to create a sandwich.
4. Roll the edges in crushed nuts for a delightful crunch.
For a fun twist, drizzle honey or caramel over your bites. You can also experiment with different nuts for a variety of flavors!
Frequently Asked Questions:
– How can I make these healthier? Use natural nut butter instead of Nutella.
– Can I store these? They taste best fresh but can last in the fridge for a day.
Enjoy these Nutella Banana Bites anytime you want a quick, tasty treat!
Nutella Banana Bites
Editor’s Choice

Hazelnut Spread With Cocoa For Breakfast, 13 Oz Jar (Pack of 2)


Amazon Brand – Happy Belly Chopped Walnuts, 16 Ounce
4. Coconut Macaroons

Coconut macaroons are a delightful treat that you can whip up with just three simple ingredients: shredded coconut, sweetened condensed milk, and vanilla extract. These little bites pack a punch of flavor, offering a crispy outside and a wonderfully chewy inside. If you love coconut, these macaroons are sure to become your new favorite indulgence!
The beauty of coconut macaroons lies in their ease of preparation. You can mix the ingredients in minutes and bake them to a beautiful golden brown. Enjoy them with your morning coffee or as a sweet afternoon snack. They’re perfect for any occasion—think parties, holidays, or just because!
Let’s get down to the recipe:
Recipe Overview:
– Servings: 12
– Prep Time: 10 minutes
– Cook Time: 25 minutes
– Total Time: 35 minutes
– Calories: 90 per macaroon
Nutrition Information:
– Total Fat: 5g
– Saturated Fat: 4g
– Carbohydrates: 10g
– Protein: 1g
Ingredients:
– 2 1/2 cups shredded coconut
– 1/2 cup sweetened condensed milk
– 1 tsp vanilla extract
Instructions:
1. Preheat your oven to 325°F (160°C).
2. In a mixing bowl, combine the shredded coconut, sweetened condensed milk, and vanilla extract. Stir until everything is well mixed.
3. Scoop the mixture onto a lined baking sheet, forming small mounds about an inch apart.
4. Bake in the preheated oven for 25 minutes, or until the edges turn golden brown.
For a fun twist, try dipping the cooled macaroons in melted chocolate. They make a delightful gift or a special treat to share. Store any leftovers in an airtight container for up to a week.
Frequently Asked Questions:
– Can I use unsweetened coconut? Yes! Just add a little extra sugar to sweeten it up.
– Do I need to chill the mixture? Nope! You can bake them right away.
Now, you’re ready to enjoy these tasty coconut macaroons whenever you like!
Coconut Macaroons
Editor’s Choice

Baker’s Angel Flake Coconut Sweetened 7 Ounce (2-pack)


Amazon Basics Silicone Rectangular Baking Mat, Non-Stick Reusable Oven B…
5. Rice Krispie Treats

Nothing brings back childhood memories quite like Rice Krispie treats! These gooey, sweet squares are a breeze to make with just three simple ingredients: rice cereal, marshmallows, and butter. You can whip them up in under 15 minutes, making them the perfect snack for any occasion.
Imagine melting butter and marshmallows together until they create a silky mixture. Then, you mix in the crispy rice cereal, coating every piece in that sweet goodness. Spread the mixture into a pan, let it cool, and you’ll have a delightful treat that everyone adores. Want to take it up a notch? Toss in chocolate chips or colorful sprinkles for a fun twist! These treats shine at parties, fit perfectly in lunchboxes, or serve as a quick pick-me-up during the day.
Here’s how to make them:
Recipe Overview:
– Servings: 12
– Prep Time: 5 minutes
– Cook Time: 10 minutes
– Total Time: 15 minutes
– Calories: 150 per serving
Nutritional Information:
– Total Fat: 5g
– Saturated Fat: 3g
– Carbohydrates: 25g
– Protein: 1g
Ingredients:
– 3 cups Rice Krispies cereal
– 4 cups mini marshmallows
– 3 tablespoons butter
Instructions:
1. In a large pot, melt the butter over low heat.
2. Stir in the marshmallows until they are completely melted and smooth.
3. Remove from heat and quickly fold in the Rice Krispies, making sure every piece is coated.
4. Press the mixture into a greased 9×9 inch pan. Let it cool before cutting into squares.
Want to elevate the flavor? Add a pinch of salt to the melted mix. Or, swap half of the Rice Krispies for chocolate cereal to create a tasty twist!
Frequently Asked Questions:
– Can I use regular marshmallows instead of mini ones? Yes, just keep the same amount.
– How long do they last? Store them in an airtight container for about three days.
Now you have a classic dessert that’s easy, quick, and oh-so-satisfying! Enjoy making and sharing these treats with friends and family!
Rice Krispie Treats
Editor’s Choice

La Tourangelle, All Purpose Baking Spray, Gluten-Free, Non-Stick, Chemic…

Cuisinart 9-Inch Chef’s Classic Nonstick Bakeware Square Cake Pan, Silver
5 Pieces Silicone Spatula Set, Food Grade Rubber Spatula, Upgrade Strong…
6. Chocolate Avocado Mousse

Craving something sweet but want to keep it healthy? Look no further than this delicious Chocolate Avocado Mousse. It’s a simple, guilt-free dessert that combines the creamy goodness of ripe avocados with rich cocoa powder and a touch of honey or maple syrup. Your friends and family won’t believe their taste buds when they discover the secret ingredient!
This mousse is not just easy to make; it’s also packed with nutrients. The avocados provide healthy fats, making this dessert both satisfying and indulgent. Blend everything until it’s smooth and velvety, then chill it for a refreshing treat. Serve it in elegant cups, topped with whipped cream or fresh berries for that extra flair.
Here’s how to whip it up in no time:
Recipe Overview:
– Servings: 4
– Prep Time: 10 minutes
– Cook Time: 0 minutes
– Total Time: 10 minutes
– Calories: 180
Nutrition Information:
– Total Fat: 10g
– Saturated Fat: 1g
– Carbohydrates: 24g
– Protein: 2g
Ingredients:
– 2 ripe avocados
– 1/2 cup unsweetened cocoa powder
– 1/4 cup honey or maple syrup
Instructions:
1. In a blender or food processor, add the ripe avocados, cocoa powder, and honey or maple syrup.
2. Blend until everything is smooth, stopping to scrape down the sides as needed.
3. Taste the mousse and adjust sweetness according to your preference.
4. Chill in the refrigerator for at least 30 minutes before serving.
Want to elevate the flavor? Add a splash of vanilla extract! For a delightful finish, garnish with shaved chocolate or crushed nuts.
Frequently Asked Questions:
– Can I use chocolate syrup instead of honey? Yes, but remember to adjust the amount to your taste.
– How long does it last in the fridge? Enjoy it fresh for up to two days.
With this Chocolate Avocado Mousse, you can satisfy your sweet tooth while staying on the healthy side. Dive in and enjoy this creamy delight that’s sure to impress!
Chocolate Avocado Mousse
Editor’s Choice

Ninja BL660 Professional Compact Smoothie & Food Processing Blender, 110…

Viva Naturals Organic Cacao Powder, 1lb – Unsweetened Cacao Powder With …

Nate’s Organic 100% Pure, Raw & Unfiltered Honey – USDA Certified Organi…
7. Lemon Sorbet

Craving a cool treat that’s both simple and delicious? Look no further than Lemon Sorbet! This zesty dessert requires just three ingredients: fresh lemon juice, sugar, and water. The bright, tangy flavor paired with sweetness makes it the ultimate refresher, especially on hot days. You’ll love how easy it is to whip up—perfect for any occasion.
In just 10 minutes, you can prepare the mixture. Then, let it freeze for a few hours, and voilà! You have a delightful sorbet ready to savor. Serve it in chic bowls or alongside a slice of your favorite cake for an eye-catching dessert that impresses.
Recipe Overview:
– Servings: 4
– Prep Time: 10 minutes
– Cook Time: 0 minutes
– Total Time: 4 hours (freeze time)
– Calories: 90
Nutrition Information:
– Total Fat: 0g
– Saturated Fat: 0g
– Carbohydrates: 24g
– Protein: 0g
Ingredients:
– 1 cup fresh lemon juice (about 4-6 lemons)
– 1 cup sugar
– 2 cups water
Instructions:
1. In a saucepan, mix the sugar and water. Heat over medium until the sugar dissolves completely.
2. Remove from heat and allow it to cool.
3. Stir in the fresh lemon juice until well combined.
4. Pour the mixture into a shallow dish. Freeze for at least 4 hours, scraping with a fork every hour for a light, fluffy texture.
Want to dress it up? Add lemon slices or fresh mint as a garnish. If you’re feeling adventurous, substitute lime juice for a refreshing lime sorbet twist.
Frequently Asked Questions:
– Can I use bottled lemon juice? Fresh is best, but bottled works in a pinch.
– How long will it last in the freezer? Up to two weeks, but it’s best enjoyed fresh!
Now you have everything you need to create a refreshing Lemon Sorbet. Enjoy your homemade treat!
Pro tip: with simple dessert recipes 3 ingredients, Lemon Sorbet is ready in 10 minutes—just lemon juice, sugar, and water. Freeze for a few hours, and you’ve got a refreshing treat that’s easy, bright, and totally doable.
Lemon Sorbet
Editor’s Choice

Ouddy Life Popsicle Molds Set of 2, Ice Pop Molds Silicone 4 Cavities Ic…

Deiss PRO Citrus Lemon Zester & Cheese Grater — Parmesan Cheese, Lemon, …
8. Peanut Butter Cookies

Craving something sweet but short on time? These Peanut Butter Cookies are your answer! With just three simple ingredients, you can whip up a batch of chewy, flavorful cookies in no time. Imagine the rich aroma of peanut butter filling your kitchen as they bake. Perfect for snacks, desserts, or even as a treat for unexpected guests, these cookies are a crowd-pleaser!
To make these delightful cookies, gather your ingredients:
Ingredients:
– 1 cup peanut butter
– 1 cup sugar
– 1 egg
Instructions:
1. Preheat your oven to 350°F (175°C).
2. In a mixing bowl, combine the peanut butter, sugar, and egg. Stir until smooth and well mixed.
3. Use a tablespoon to scoop out the dough and roll it into balls. Place them on a baking sheet lined with parchment paper.
4. Flatten each ball with a fork to create that classic crisscross design.
5. Bake for about 10 minutes or until golden brown. Allow to cool on the baking sheet for a few minutes before transferring them to a wire rack.
Want to mix things up? Try adding some chocolate chips or chopped nuts for extra flavor and texture. These cookies stay fresh for about a week when stored in an airtight container, making them perfect for meal prep or as a sweet treat anytime!
Frequently Asked Questions:
– Can I use crunchy peanut butter? Yes! It adds a delightful crunch.
– How long will they last? Store them in an airtight container for up to a week.
With just a few simple steps, you’ll have delicious Peanut Butter Cookies ready to enjoy. So, grab your ingredients and start baking today!
Peanut Butter Cookies
Editor’s Choice

Silicone Baking Mat, 3 Pack Reusable Baking Mat, Non-Stick, Food Safe Si…

Umite Chef Mixing Bowls with Airtight Lids Set, 8PCS Stainless Steel Kha…

Ice Cream Scoop, 18/8 Stainless Steel Cookie Scoop, Cookie Scoops for Ba…
9. Chocolate-Dipped Fruit

Treat yourself to a delightful classic: Chocolate-Dipped Fruit! This easy dessert never fails to impress. With just three simple ingredients—your favorite fresh fruits, chocolate, and a little coconut oil—you can create a stunning treat that looks as good as it tastes.
Imagine juicy strawberries or slices of banana coated in rich, smooth chocolate. The addition of coconut oil makes the chocolate glossy and helps it harden perfectly. This dessert is not just beautiful; it’s versatile too! You can mix and match fruits like apples, pears, or even orange segments for a colorful platter. Pinterest is buzzing with ideas on how to make this treat even more fun and fancy!
Ready to make your own Chocolate-Dipped Fruit? Here’s how you can do it without breaking the bank. Use seasonal fruits to save money and enjoy the freshest flavors. This dessert is perfect for gatherings, movie nights, or simply as a sweet snack to brighten your day. Just picture yourself sharing these delightful bites with friends, making every moment special.
Ingredients:
– 2 cups of fresh fruit (like strawberries, bananas, or pineapple)
– 1 cup of chocolate chips (dark, milk, or white)
– 1 tablespoon of coconut oil
Instructions:
1. In a microwave-safe bowl, combine the chocolate chips and coconut oil. Microwave in 30-second bursts, stirring between each, until the mixture is completely smooth.
2. Dip the fruit pieces into the melted chocolate, allowing excess to drip off. Place them on a parchment-lined baking sheet.
3. Chill in the refrigerator for about 15 minutes until the chocolate is firm and set.
Want to add a touch of flair? Drizzle with white chocolate for a beautiful contrast. Or experiment with different fruits for exciting flavors!
Frequently Asked Questions:
– Can I use almond bark instead of chocolate? Absolutely! Almond bark works well and is easy to melt.
– How should I store leftovers? Keep them in the fridge in an airtight container for up to two days.
This Chocolate-Dipped Fruit is your go-to for a simple yet elegant dessert that everyone will love!
Chocolate-Dipped Fruit
Editor’s Choice

GHIRARDELLI Premium Baking Semi-Sweet Chocolate Chips, 12 oz Bag (6 Bags)

Handcraft Blends Fractionated Coconut Oil – 16 Fl Oz – 100% Pure and Nat…
10. Easy Fruit Popsicles

Create a delightful escape on hot days with these Easy Fruit Popsicles. They are not only a treat for your taste buds but also a fun way to beat the heat! With just three simple ingredients—fruit juice, yogurt, and your choice of fresh fruits—you can whip up a refreshing dessert that’s bursting with natural flavors. Imagine biting into a cool, fruity popsicle that’s both satisfying and healthy!
Making these popsicles is a breeze. Start by mixing your favorite fruit juice with yogurt in a bowl. Feel free to get creative! Layer this mixture with diced fruits in your popsicle molds. Once filled, pop them in the freezer and wait for them to transform into icy goodness. This treat is perfect for getting kids involved in the kitchen, letting them pick their favorite fruit combinations.
Here’s how to make them:
Recipe Overview:
– Servings: 6
– Prep Time: 10 minutes
– Total Time: 6 hours (including freezing)
– Calories: 80 per popsicle
Nutrition Information:
– Total Fat: 2g
– Saturated Fat: 1g
– Carbohydrates: 15g
– Protein: 1g
Ingredients:
– 1 cup fruit juice (like orange, apple, or mixed berry)
– 1 cup yogurt (plain or your favorite flavor)
– 1 cup diced fruit (such as strawberries, peaches, or mango)
Instructions:
1. In a bowl, mix the fruit juice and yogurt until smooth and well blended.
2. Layer the fruit mixture and diced fruits into popsicle molds, creating colorful layers.
3. Insert sticks into the molds and freeze for at least 6 hours or until completely solid.
4. To serve, run warm water over the outside of the molds for a few seconds to help release the popsicles.
You can also experiment with different juice and fruit combos! Try adding a splash of lemon juice for a tangy twist or use Greek yogurt for a creamier texture.
Frequently Asked Questions:
– Can I use frozen fruit? Yes! Just thaw and chop it before mixing.
– How long do they last in the freezer? These popsicles can be stored for up to a month!
Enjoy your delicious and healthy popsicles anytime! They make for a guilt-free snack that everyone will love.
Easy Fruit Popsicles
Editor’s Choice

Popsicle Molds Set 6 Pieces Ice Popsicle Maker-BPA Free,Easy-Release Ice…

11. Chocolate Oatmeal Cookies

Craving a sweet treat that won’t derail your healthy eating goals? Look no further than these delightful Chocolate Oatmeal Cookies! With just three simple ingredients—oats, ripe bananas, and cocoa powder—you can create a chewy and satisfying dessert that’s gluten-free and guilt-free. These cookies are not only quick to make but are also bursting with flavor.
Imagine the warm aroma of chocolate and bananas filling your kitchen as you whip these up in under 15 minutes. The oats provide a hearty bite, while the bananas bring natural sweetness. Enjoy them as a quick breakfast or a tasty snack throughout your day. They’re sure to become a favorite!
Here’s how to make these delicious cookies:
Recipe Overview:
– Servings: 10
– Prep Time: 5 minutes
– Cook Time: 0 minutes
– Total Time: 15 minutes
– Calories: 80 per cookie
Nutrition Information:
– Total Fat: 2g
– Saturated Fat: 0g
– Carbohydrates: 15g
– Protein: 2g
Ingredients:
– 2 cups oats
– 1 ripe banana, mashed
– 1/4 cup cocoa powder
Instructions:
1. In a mixing bowl, combine the oats, mashed banana, and cocoa powder. Stir until everything is well blended.
2. Drop spoonfuls of the mixture onto a parchment-lined baking sheet.
3. Chill in the refrigerator for about 10 minutes to help them firm up before enjoying.
Want to take them up a notch? Add chocolate chips or nuts for extra texture and flavor! Store your cookies in an airtight container in the fridge for up to a week.
Frequently Asked Questions:
– Can I use quick oats? Yes, but traditional rolled oats will give a better texture.
– How long will they last? They stay fresh in the fridge for about a week.
These cookies are perfect for a sweet craving that feels good to indulge in!
Chocolate Oatmeal Cookies
Editor’s Choice

Quaker Old Fashioned Rolled Oats, Non GMO Project Verified, Two 64oz Bag…

HERSHEY’S Natural Unsweetened Cocoa Powder Can, 8 oz

Rubbermaid Brilliance 16-Cup Airtight Food Storage Container with Lid Cl…
12. Berry Yogurt Bark

Berry Yogurt Bark is a delightful treat that satisfies your sweet tooth without the guilt. It’s simple to make and requires just three ingredients: creamy yogurt, fresh berries, and a touch of honey. You’ll love how colorful and refreshing it looks, making it perfect for a warm day or a mid-afternoon snack.
Start by spreading yogurt on a baking sheet lined with parchment paper. Next, drizzle honey over the yogurt and scatter your favorite berries on top. Once it’s all set, pop it in the freezer. After a couple of hours, you’ll have a delicious frozen snack that’s easy to break into pieces and share with friends or enjoy all by yourself.
This treat is not just pretty; it’s packed with nutrients too! Each bite delivers a burst of flavor and the goodness of fruit, making it a guilt-free indulgence.
Recipe Overview:
– Servings: 6
– Prep Time: 10 minutes
– Cook Time: 0 minutes
– Total Time: 2 hours (freeze time)
– Calories: 70
Nutrition Information:
– Total Fat: 3g
– Saturated Fat: 2g
– Carbohydrates: 9g
– Protein: 4g
Ingredients:
– 2 cups Greek yogurt
– 1/4 cup honey
– 1 cup mixed berries (like strawberries and blueberries)
Instructions:
1. Line a baking sheet with parchment paper.
2. Spread Greek yogurt evenly over the surface.
3. Drizzle honey on top and sprinkle with mixed berries.
4. Freeze for 2 hours until solid, then break into pieces.
Feel free to experiment with other fruits too! Bananas, peaches, or mangoes are great substitutes.
Store your Berry Yogurt Bark in an airtight container in the freezer, and it will stay fresh for up to a month.
Frequently Asked Questions:
– Can I use regular yogurt? Yes, but Greek yogurt gives a thicker, creamier texture.
– How can I make it sweeter? Just add more honey to suit your taste!
Get ready to enjoy this easy, healthy dessert that will impress everyone!
Berry Yogurt Bark
Editor’s Choice

Nate’s 100% Pure, Raw & Unfiltered Honey – Award-Winning Taste, 32oz. Sq…

Amazon Basics Parchment Paper for Baking, Non-Stick, 90 Sq Ft Roll, 1 Pack
13. Marshmallow Chocolate Clusters

Looking for a sweet treat that’s quick and delicious? These Marshmallow Chocolate Clusters are just what you need! Perfect for movie nights, parties, or even a late-night snack, they combine chocolate, marshmallows, and nuts into irresistible bites. Imagine sinking your teeth into a chewy, chocolatey delight with a satisfying crunch.
Making them is a breeze. Just melt some chocolate chips, mix in mini marshmallows and your choice of nuts, and drop spoonfuls onto a baking sheet. After a quick chill in the fridge, you’ll have delightful clusters ready to enjoy. They’re not just tasty; they’re also super easy to whip up whenever a craving hits!
Recipe Overview:
– Servings: 12
– Prep Time: 5 minutes
– Cook Time: 0 minutes
– Total Time: 30 minutes (set time)
– Calories: 130 per cluster
Nutrition Information:
– Total Fat: 7g
– Saturated Fat: 4g
– Carbohydrates: 15g
– Protein: 1g
Ingredients:
– 1 cup chocolate chips
– 1/2 cup mini marshmallows
– 1/2 cup chopped nuts (like walnuts or almonds)
Instructions:
1. In a microwave-safe bowl, melt the chocolate chips until smooth.
2. Stir in the mini marshmallows and chopped nuts until evenly mixed.
3. Drop spoonfuls of the mixture onto parchment paper.
4. Chill in the refrigerator for about 30 minutes until set.
Feeling adventurous? Add dried fruit for a burst of flavor, or experiment with different nuts for a unique twist! Store your clusters in an airtight container, and they’ll stay fresh for up to a week.
Frequently Asked Questions:
– Can I use dark chocolate? Absolutely! Dark chocolate adds a richer flavor.
– How long do they last? They’ll stay tasty for about a week when stored properly.
Enjoy these delightful treats anytime you want a sweet, crunchy snack!
Marshmallow Chocolate Clusters
Editor’s Choice
GHIRARDELLI Premium Baking Semi-Sweet Chocolate Chips, 12 oz Bag (6 Bags)


Amazon Brand – Happy Belly California Walnuts Halves and Pieces, 40 ounce
14. No-Bake Chocolate Cream Pie

Craving a dessert that’s both delicious and effortless? Look no further than this No-Bake Chocolate Cream Pie. With just three simple ingredients, you can whip up a creamy, chocolatey delight that’s perfect for warm days when you want to skip the oven. Imagine the rich, velvety chocolate flavor melting in your mouth, paired with fluffy whipped cream and a buttery graham cracker crust. It’s a dessert that not only satisfies your sweet tooth but also wows your guests!
Making this pie is a breeze. Start by combining chocolate pudding and whipped cream in a bowl. Pour the luscious mixture into a pre-made graham cracker crust, then let it chill in the fridge until it’s perfectly set. It’s that easy! Whether you serve it at a party or enjoy it as a late-night treat, this pie is bound to be a hit.
Recipe Overview:
– Servings: 8
– Prep Time: 10 minutes
– Cook Time: 0 minutes
– Total Time: 4 hours (chill time)
– Calories: 250
Nutrition Information:
– Total Fat: 14g
– Saturated Fat: 9g
– Carbohydrates: 30g
– Protein: 3g
Ingredients:
– 2 cups chocolate pudding mix (prepared)
– 1 cup whipped cream (store-bought or homemade)
– 1 pre-made graham cracker crust
Instructions:
1. In a mixing bowl, combine the prepared chocolate pudding and whipped cream. Stir until smooth and well-blended.
2. Pour the mixture into the graham cracker crust. Use a spatula to smooth the top for a polished finish.
3. Cover the pie and refrigerate for at least 4 hours to allow it to set properly.
Want to add a special touch? Top with shaved chocolate or a dollop of extra whipped cream before serving. You can also experiment by using flavored pudding for a fun twist!
Frequently Asked Questions:
– Can I use homemade pudding? Absolutely! Homemade pudding adds an extra layer of flavor.
– How long does it last? Store in the fridge for up to 3 days for the best taste.
This No-Bake Chocolate Cream Pie is your go-to recipe when you need something sweet in a snap. Enjoy the deliciousness without the hassle!
No-Bake Chocolate Cream Pie
Editor’s Choice

Jell-O Chocolate Instant Pudding & Pie Filling Mix, 5.9 oz Box, As Seen …

365 By Whole Foods Market, Graham Cracker Pie Crust, 6 Ounce
15. Cinnamon Sugar Tortilla Chips

Craving a quick, tasty treat? Try making Cinnamon Sugar Tortilla Chips! With just three ingredients—flour tortillas, sugar, and cinnamon—you can create a crunchy delight in no time. These chips are not only fun to make, but they also pair perfectly with fresh fruit salsa or a rich chocolate dip. You’ll love the satisfying crunch without the guilt!
Start by cutting your tortillas into triangles. Coat them with a mixture of sugar and cinnamon, then bake until they turn crispy and golden brown. This homemade snack is an excellent option for sharing with friends or enjoying during a movie night. You can even swap in whole wheat tortillas for a healthier twist!
Recipe Overview:
– Servings: 6
– Prep Time: 10 minutes
– Cook Time: 10 minutes
– Total Time: 20 minutes
– Calories: 150
Nutrition Information:
– Total Fat: 6g
– Saturated Fat: 2g
– Carbohydrates: 20g
– Protein: 2g
Ingredients:
– 4 flour tortillas
– 1/4 cup sugar
– 1 tablespoon cinnamon
Instructions:
1. Preheat your oven to 350°F (175°C).
2. Cut the tortillas into triangle shapes and arrange them on a baking sheet.
3. In a bowl, mix together the sugar and cinnamon. Sprinkle this mixture generously over the tortillas.
4. Bake for about 10 minutes or until the chips are crispy and golden.
Serve your chips with fresh fruit or drizzle them with chocolate sauce for extra indulgence. They stay fresh for up to a week when stored in an airtight container, making them perfect for snacking throughout the week!
Frequently Asked Questions:
– Can I add cocoa powder for a chocolate twist? Yes, that’s a delicious idea!
– How long do they stay fresh? Keep them in an airtight container for up to a week.
Get ready to enjoy a delightful and easy dessert that will impress your family and friends. Happy snacking!
Cinnamon Sugar Tortilla Chips
Editor’s Choice
Amazon Basics Silicone Rectangular Baking Mat, Non-Stick Reusable Oven B…

GoodCook Everyday Nonstick Carbon Steel Baking Sheet Set, 3 Pack – Small…

16. Peanut Butter Banana Smoothie

When you’re in a rush but still want something delicious, a Peanut Butter Banana Smoothie is your perfect solution. This quick treat requires just three ingredients: ripe bananas, creamy peanut butter, and your choice of milk. It’s a satisfying blend that’s great for breakfast or as a sweet snack any time of day.
Simply toss everything into your blender and watch as it transforms into a smooth, creamy delight. This smoothie not only curbs your sweet cravings but also packs a nutritious punch. It’s ideal for those busy mornings when you need a quick meal or for an afternoon pick-me-up that keeps you energized.
Recipe Overview:
– Servings: 2
– Prep Time: 5 minutes
– Cook Time: 0 minutes
– Total Time: 5 minutes
– Calories: 220
Nutrition Information:
– Total Fat: 10g
– Saturated Fat: 2g
– Carbohydrates: 30g
– Protein: 6g
Ingredients:
– 1 ripe banana
– 2 tablespoons peanut butter
– 1 cup milk (dairy or non-dairy)
Instructions:
1. In a blender, add the banana, peanut butter, and milk.
2. Blend until you have a smooth consistency. If you want it thicker, add a bit more peanut butter or some ice.
3. Pour the smoothie into glasses and enjoy it right away.
Want to make it even healthier? Here are some tips:
– Add a handful of spinach for an extra nutrient boost.
– Freeze your bananas beforehand for a thicker, colder texture.
Frequently Asked Questions:
– Can I use almond milk? Absolutely! Any milk works just fine.
– What if I want it sweeter? A touch of honey or agave syrup can do wonders.
This Peanut Butter Banana Smoothie is not just easy to make; it’s also a fantastic way to start your day or recharge when you need a quick snack. Give it a try, and enjoy the creamy goodness!
Peanut Butter Banana Smoothie
Editor’s Choice
Ninja BL660 Professional Compact Smoothie & Food Processing Blender, 110…

Woodstock Organic Smooth Peanut Butter, Salt Added, 35 oz

Sunseeke Silicone Straws Reusable – Odorless, 12 Standard Drinking Straw…
17. Chocolate Chip Cookie Dough Bites

Craving something sweet but want to skip the oven? These no-bake Chocolate Chip Cookie Dough Bites are your answer! With just three simple ingredients, you can enjoy the rich taste of cookie dough without any eggs. Imagine indulging in soft, chewy bites filled with chocolatey goodness. They’re perfect for satisfying your sweet tooth or sharing with friends during a movie night.
Making these bites is a breeze! All you need to do is mix almond flour, maple syrup, and chocolate chips in a bowl. Roll the mixture into small balls and chill them until firm. In just 10 minutes, you’ll have a delicious treat that’s gluten-free and utterly delightful!
Recipe Overview:
– Servings: 10
– Prep Time: 10 minutes
– Cook Time: 0 minutes
– Total Time: 10 minutes
– Calories per serving: 150
Nutrition Information:
– Total Fat: 8g
– Saturated Fat: 1g
– Carbohydrates: 18g
– Protein: 2g
Ingredients:
– 1 cup almond flour
– 1/4 cup maple syrup
– 1/2 cup chocolate chips
Instructions:
1. In a mixing bowl, combine almond flour, maple syrup, and chocolate chips until well blended.
2. Use your hands to scoop and roll the mixture into small balls.
3. Place the bites on a plate and chill in the refrigerator for about 30 minutes before enjoying.
Want to switch things up? You can substitute almond flour with oat flour for a different flavor. Or, add a pinch of salt to enhance the sweetness.
Frequently Asked Questions:
– Can I use honey instead of maple syrup? Yes, honey works just fine!
– How long can I store them? Keep these bites in the fridge for up to a week.
These cookie dough bites are not just a treat; they’re a quick solution for your dessert cravings—ready in minutes and oh-so-satisfying!
Chocolate Chip Cookie Dough Bites
Editor’s Choice

Bob’s Red Mill Fine Almond Flour, 16oz (Pack of 1) – Non-GMO, Gluten Fre…

Butternut Mountain Farm Pure Vermont Maple Syrup, Grade A, Dark Color, R…

Hershey’s Premier White Baking Chips – 12 oz – 2 pk
18. No-Bake Pumpkin Pie

Fall is the perfect season for cozy treats, and this No-Bake Pumpkin Pie is a simple way to bring those flavors to your table. Made with just three ingredients—pumpkin puree, cream cheese, and sugar—you can whip this dessert together in no time. It’s a creamy delight that’s ideal for Thanksgiving or any autumn gathering.
Imagine slicing into a smooth, velvety pie, topped with fluffy whipped cream and a sprinkle of cinnamon. It’s not just easy; it’s a show-stopper that will impress your guests. Plus, since it sets in the fridge, you can prepare it ahead of time and enjoy more quality moments with family and friends.
Let’s dive into the recipe!
Recipe Overview:
– Servings: 8
– Prep Time: 10 minutes
– Chill Time: 4 hours
– Total Time: 4 hours (chill time)
– Calories per serving: 230
Nutrition Information:
– Total Fat: 12g
– Saturated Fat: 7g
– Carbohydrates: 29g
– Protein: 3g
Ingredients:
– 1 cup pumpkin puree
– 8 oz cream cheese, softened
– 3/4 cup sugar
Instructions:
1. In a mixing bowl, beat the softened cream cheese until smooth and creamy.
2. Add the pumpkin puree and sugar, mixing until everything is well combined.
3. Pour the mixture into a pre-made pie crust, smoothing the top with a spatula.
4. Chill the pie in the refrigerator for at least four hours until it sets properly.
Before serving, don’t forget to garnish with a generous dollop of whipped cream and a sprinkle of cinnamon. This pie can be made up to three days in advance, making it a practical choice for any festive occasion!
Frequently Asked Questions:
– Can I use fresh pumpkin? Yes, just cook and puree it properly for the best flavor.
– How long does it keep? It stays fresh in the fridge for about three days.
Did you know simple dessert recipes 3 ingredients can cut prep time by half? No-Bake Pumpkin Pie proves it: pumpkin puree, cream cheese, and sugar do the work. Easy, creamy autumn flavor that wows guests without turning on the oven.
No-Bake Pumpkin Pie
Editor’s Choice

Pillsbury Premade Refrigerated Pie Crust, Two Pie Crusts, 14.1 oz

EurKitchen Professional Aluminum Whipped Cream Dispenser – Leak-Free Whi…

Simply Organic Ceylon Ground Cinnamon, 2.08 Ounce, Non-GMO Organic Cinna…
19. Chocolate Hazelnut Pudding

Dive into the creamy delight of Chocolate Hazelnut Pudding, a treat that satisfies your sweet cravings without any fuss! This dessert is perfect for those moments when you want something rich and chocolatey but don’t want to spend hours in the kitchen. With only three simple ingredients—hazelnut spread, milk, and cornstarch—you can whip up this indulgent pudding in no time.
Imagine a bowl of silky pudding, warm and inviting, or chilled for a refreshing finish. Top it off with a dollop of whipped cream or a sprinkle of crushed hazelnuts for that extra flair. This dessert not only tastes amazing but also looks gorgeous on any table!
Recipe Overview:
– Servings: 4
– Prep Time: 5 minutes
– Cook Time: 10 minutes
– Total Time: 15 minutes
– Calories: 180
Nutrition Information:
– Total Fat: 8g
– Saturated Fat: 3g
– Carbohydrates: 25g
– Protein: 3g
Ingredients:
– 1/2 cup hazelnut spread
– 2 cups milk
– 3 tablespoons cornstarch
Instructions:
1. In a medium saucepan, whisk together the hazelnut spread, milk, and cornstarch until the mixture is smooth.
2. Place the saucepan over medium heat and stir continuously. Keep stirring until it thickens, about 5-10 minutes.
3. Once thickened, remove from heat. Let it cool for a few minutes before pouring into bowls.
– Top with crushed hazelnuts or chocolate shavings for a gourmet touch.
– Store any leftovers in the refrigerator for up to a week.
Frequently Asked Questions:
– Can I use almond milk instead of regular milk? Yes! Any type of milk works beautifully.
– How can I make it sweeter? Just add a bit more hazelnut spread to taste!
Treat yourself to this easy Chocolate Hazelnut Pudding. It’s a quick way to bring joy to your day!
Chocolate Hazelnut Pudding
Editor’s Choice

Amazon Grocery, Hazelnut Spread With Cocoa, 26.5 Oz (Previously Amazon F…

Earthborn Elements Corn Starch 2 Gallon Bucket, Thickening Agent, Cookin…
NileHome Stainless Steel Whisk Set 8″ 10″ 12″ Kitchen Whisk Balloon Whis…
20. Cherry Coconut Energy Bites

Craving a tasty snack that won’t ruin your healthy eating goals? Look no further than these delightful Cherry Coconut Energy Bites! With just three simple ingredients—dried cherries, shredded coconut, and almond butter—you can whip up a treat that’s both sweet and satisfying. These little bites are chewy, packed with energy, and perfect for when you need a quick boost.
Making them is a breeze. Just mix everything together, roll into small balls, and let them chill in the fridge. In about 20 minutes, you’ll have a nutritious snack that’s great for any time of day, whether it’s post-workout or an afternoon pick-me-up. Plus, they’re naturally sweetened and gluten-free, so you can indulge without guilt!
Here’s how to make your own Cherry Coconut Energy Bites:
Ingredients:
– 1 cup dried cherries
– 1 cup shredded coconut
– 1/2 cup almond butter
Instructions:
1. In a mixing bowl, combine the dried cherries, shredded coconut, and almond butter.
2. Stir until all ingredients are well combined.
3. Roll the mixture into bite-sized balls.
4. Place them in the refrigerator for about 20 minutes to firm up.
These energy bites can be stored in an airtight container for up to a week, making them an easy grab-and-go snack. Want to mix it up? Try adding a dash of cinnamon or a splash of vanilla extract for extra flavor!
Frequently Asked Questions:
– Can I use other dried fruits? Absolutely! Feel free to swap in your favorites.
– How long do they last? They’ll stay fresh in the fridge for about a week!
So, next time you need a quick treat, remember these Cherry Coconut Energy Bites. They’re easy to make and satisfy your sweet tooth without the hassle. Enjoy!
Cherry Coconut Energy Bites
Editor’s Choice

Herbaila Dried Cherries Tart Cherry, Montmorency Tart Cherries, Dried So…

Anthony’s Organic Shredded Coconut, 2 lb, Unsweetened, Gluten Free, Non …

MaraNatha Natural Creamy Almond Butter, No Stir, No Sugar or Salt Added,…
21. Easy Chocolate Bark

Imagine indulging in a sweet treat that’s not only delicious but also super simple to make. Easy Chocolate Bark is your answer! With just three ingredients, you can create a stunning dessert that’s perfect for any occasion. Whether you’re hosting friends or just treating yourself, this bark is a delightful choice.
To make this treat, you will melt chocolate and spread it out on a baking sheet. Top it with your favorite nuts and dried fruits, then let it set. The result? A beautiful, crunchy snack that’s as pleasing to the eye as it is to your taste buds. Best of all, you can customize it to fit your mood or pantry! Pinterest loves this recipe for its versatility and ease.
Now, let’s dive into the recipe details so you can whip this up at home:
Recipe Overview:
– Servings: 12
– Prep Time: 10 minutes
– Cook Time: 0 minutes
– Total Time: 1 hour (set time)
– Calories: 150
Nutrition Information:
– Total Fat: 9g
– Saturated Fat: 5g
– Carbohydrates: 17g
– Protein: 2g
Ingredients:
– 2 cups chocolate chips
– 1/2 cup nuts (like almonds or walnuts)
– 1/2 cup dried fruit (such as cranberries or apricots)
Instructions:
1. Melt the chocolate chips in a microwave-safe bowl, stirring until smooth.
2. Pour the melted chocolate onto a parchment-lined baking sheet and spread it evenly.
3. Sprinkle your chosen nuts and dried fruit over the chocolate while it’s still warm.
4. Allow it to cool at room temperature, or pop it in the fridge for about 30 minutes until set. Once firm, break it into pieces.
Feel free to get creative! Add seeds or coconut for extra flavor and crunch. Store your chocolate bark in an airtight container for up to two weeks, making it perfect for snacking or gifting.
Frequently Asked Questions:
– Can I use white chocolate? Absolutely! It gives a lovely twist to the flavor.
– How long does it take to set? About 30 minutes in the fridge should do the trick!
With this easy recipe, you can impress your friends and satisfy your sweet tooth. Enjoy making your chocolate bark today!
With simple dessert recipes 3 ingredients, anyone can wow friends in minutes. Melt chocolate, sprinkle nuts and dried fruit, and you’ve got a crowd-pleaser—no bake, no fuss, just delicious.
Easy Chocolate Bark
Editor’s Choice
Amazon Basics Silicone Rectangular Baking Mat, Non-Stick Reusable Oven B…

Pyrex Essentials (3-Piece) Glass Mixing Bowls Set For Prepping, Baking a…

Wilton Candy Melts Melting Pot, Perfect for Dipping, Drizzling & Decorat…
22. Creamy Coconut Pudding

Indulge in the tropical delight of Creamy Coconut Pudding. With just three simple ingredients—coconut milk, sugar, and cornstarch—this dessert is a breeze to make. Picture a silky, smooth pudding with a rich coconut flavor that takes your taste buds on a mini-vacation. Whether you enjoy it warm or chilled, it’s a treat for any occasion.
This pudding is incredibly versatile. You can top it with toasted coconut flakes or fresh fruit for extra flair. It’s perfect for a quick dessert after dinner or a sweet snack during the day. Plus, it’s a great way to impress your friends with minimal effort!
Here’s how to make it:
Ingredients:
– 1 cup coconut milk
– 1/4 cup sugar
– 3 tablespoons cornstarch
Instructions:
1. In a medium saucepan, mix coconut milk and sugar over medium heat.
2. Gradually whisk in the cornstarch until the mixture is smooth and begins to thicken.
3. Remove from heat and pour into individual serving dishes.
4. Chill in the refrigerator until set or enjoy it warm!
Feel free to add your favorite toppings like sliced bananas or chopped nuts for a delightful crunch. This pudding can be stored in the refrigerator for up to three days, making it a convenient dessert option.
FAQs:
– Can I substitute regular milk? You can, but to maintain that coconut flavor, stick with coconut milk!
– How can I add more flavor? A splash of vanilla extract or a sprinkle of citrus zest can elevate the taste beautifully!
Enjoy this simple yet delicious dessert that’s always a crowd-pleaser. You’ll be transported to a tropical paradise with every creamy spoonful!
Creamy Coconut Pudding
Editor’s Choice

Thai Kitchen Gluten Free Unsweetened Coconut Milk, 13.66 fl oz (Pack of 12)

Clabber Girl Non-GMO Corn Starch, Gluten Free, 6.5 Ounce
NileHome Stainless Steel Whisk Set 8″ 10″ 12″ Kitchen Whisk Balloon Whis…
23. Chocolate Chip Energy Bites

Indulge in a quick and delicious treat with these Chocolate Chip Energy Bites. They’re perfect for busy days when you need a sweet snack without the fuss. Made with just three simple ingredients—oats, honey, and chocolate chips—these bites pack a flavorful punch and are super easy to prepare. In just ten minutes, you can create a healthy snack that everyone will love.
Imagine reaching into your fridge for a delightful energy boost. These no-bake bites are not only quick to make, but they’re also a hit with kids and adults alike. They make fantastic additions to lunch boxes or perfect after-school snacks. Plus, you can easily store them for a week, so they’re always on hand when cravings strike.
Here’s how to make them:
Recipe Overview:
– Servings: 12
– Prep Time: 10 minutes
– Cook Time: 0 minutes
– Total Time: 10 minutes
– Calories: 150
Ingredients:
– 1 cup oats
– 1/2 cup honey
– 1/2 cup chocolate chips
Instructions:
1. In a medium bowl, combine the oats, honey, and chocolate chips. Stir until well mixed.
2. Use your hands to scoop the mixture and roll it into small balls.
3. Place the balls on a plate and chill them in the refrigerator for about 30 minutes before enjoying.
Want to add a twist? Add a pinch of cinnamon or nutmeg for extra flavor. Store your energy bites in an airtight container for up to a week to keep them fresh and tasty.
Frequently Asked Questions:
– Can I use maple syrup instead of honey? Yes, maple syrup works beautifully!
– How long will they last? They’ll stay fresh for about a week in the fridge.
These energy bites are not just a treat; they’re a convenient way to satisfy your sweet tooth while staying healthy.
Chocolate Chip Energy Bites
Editor’s Choice
Quaker Old Fashioned Rolled Oats, Non GMO Project Verified, Two 64oz Bag…
Nate’s 100% Pure, Raw & Unfiltered Honey – Award-Winning Taste, 32oz. Sq…

Amazon Fresh, Chocolate Baking Chips, Semi Sweet, 24 Oz, 1.5 Lb (Pack of…
24. No-Bake Chocolate Pudding Cups

Dive into the delightful world of No-Bake Chocolate Pudding Cups! This dessert is rich, creamy, and incredibly simple to prepare. With just three ingredients—chocolate pudding mix, milk, and whipped cream—you can create a treat that looks as wonderful as it tastes. Imagine layering the smooth, velvety pudding with fluffy whipped cream in cute cups or jars. It’s a sweet masterpiece that will impress your friends and family!
Making these pudding cups is a breeze. In only about 10 minutes, you can have them ready to chill in the fridge. They’re perfect for parties or a quick dessert fix after dinner. Plus, you can prepare them in advance, making your life easier when hosting guests. Just think about how refreshing it will be to enjoy a dessert that requires no baking and minimal fuss!
Recipe Overview:
– Servings: 4
– Prep Time: 10 minutes
– Cook Time: 0 minutes
– Total Time: 30 minutes (includes chill time)
– Calories: 180 per serving
Nutrition Information:
– Total Fat: 10g
– Saturated Fat: 5g
– Carbohydrates: 22g
– Protein: 3g
Ingredients:
– 1 package (3.4 oz) chocolate pudding mix
– 2 cups milk
– 1 cup whipped cream (store-bought or homemade)
Instructions:
1. In a mixing bowl, whisk together the chocolate pudding mix and milk until smooth and thickened.
2. In your cups or jars, alternate layers of chocolate pudding and whipped cream.
3. Add a final touch by topping with chocolate shavings or fresh berries.
Want to switch it up? Try using different flavored pudding mixes for a fun twist! You can also add crushed cookies between the layers for a crunchy surprise.
Frequently Asked Questions:
– Can I make it in advance? Yes, these can be made a day ahead!
– How long do they last? Store in the fridge for up to two days.
Now you have a quick, no-bake dessert that’s sure to delight everyone. Enjoy your chocolate pudding cups!
No-Bake Chocolate Pudding Cups
Editor’s Choice
Jell-O Chocolate Instant Pudding & Pie Filling Mix, 5.9 oz Box, As Seen …

Reddi-wip Original Whipped Dairy Cream Topping, 13 oz

320-Pack Dessert Cups with Spoons 5 oz Mini Plastic Dessert Cups for Par…
25. Sweet Potato Brownies

Dive into the world of guilt-free indulgence with these Sweet Potato Brownies. They are a perfect answer to your chocolate cravings while sneaking in some healthy goodness. With just three simple ingredients—sweet potatoes, cocoa powder, and honey—you can whip up a batch of fudgy, moist brownies that taste amazing without the guilt. Imagine the rich chocolate flavor melting in your mouth, all while knowing you’re enjoying a nutritious treat!
Making these brownies is a breeze. Start by mashing some cooked sweet potatoes until they’re nice and smooth. Then, mix in cocoa powder and honey until you have a rich batter. Pour this luscious mixture into a greased pan, pop it in the oven, and let the magic happen. In just 25 minutes, you’ll have a delightful dessert that’s perfect for any occasion.
Recipe Overview:
– Servings: 9
– Prep Time: 10 minutes
– Cook Time: 25 minutes
– Total Time: 35 minutes
– Calories: 120
Nutrition Information:
– Total Fat: 3g
– Saturated Fat: 1g
– Carbohydrates: 25g
– Protein: 2g
Ingredients:
– 1 cup cooked sweet potato, mashed
– 1/2 cup cocoa powder
– 1/4 cup honey
Instructions:
1. Preheat your oven to 350°F (175°C).
2. In a mixing bowl, combine the mashed sweet potato, cocoa powder, and honey. Stir until the mixture is smooth and well-blended.
3. Pour the batter into a greased 8×8 inch pan and spread it evenly.
4. Bake for 25 minutes or until a toothpick inserted in the center comes out clean.
Feel free to add nuts or chocolate chips for an exciting texture. You can also serve these brownies with a dollop of whipped cream for an extra treat!
Frequently Asked Questions:
– Can I use canned sweet potato? Yes, just ensure it is well-drained.
– How long do they last? Store them in the fridge for up to a week!
These brownies are not only easy to make, but they also offer a delicious way to enjoy something sweet while getting a boost of nutrients. Enjoy whipping up this quick treat whenever you need a chocolate fix!
Sweet Potato Brownies
Editor’s Choice
HERSHEY’S Natural Unsweetened Cocoa Powder Can, 8 oz

Nate’s Texas 100% Pure, Raw & Unfiltered Honey – 16 oz. Squeeze Bottle -…
USA Pan Bakeware Nonstick Square Cake Pan, 8 Inch, Aluminized Steel
Conclusion

These 25 simple dessert recipes with just three ingredients prove that delicious treats don’t have to be complicated! From creamy puddings to chewy cookies, each recipe is quick to whip up and guaranteed to satisfy your sweet cravings.
So next time you’re in the mood for something sweet, remember that magic can happen with minimal ingredients. Happy baking, and enjoy these delightful desserts!
Note: We aim to provide accurate product links, but some may occasionally expire or become unavailable. If this happens, please search directly on Amazon for the product or a suitable alternative.
This post contains Amazon affiliate links, meaning I may earn a small commission if you purchase through my links, at no extra cost to you.
Frequently Asked Questions
What Are Some Easy Dessert Ideas That Only Use 3 Ingredients?
Looking for easy dessert ideas? You can whip up delicious treats with just three ingredients! Think about making peanut butter cookies with peanut butter, sugar, and an egg, or a simple chocolate mousse using chocolate, whipped cream, and a splash of vanilla.
These minimal ingredient desserts are not only quick but also incredibly satisfying!
Are No-Bake Dessert Options Really Easy to Make?
Absolutely! No-bake dessert options are among the simplest ways to satisfy your sweet tooth. With just three ingredients, you can create treats like a no-bake cheesecake or energy bites using oats, nut butter, and honey.
These quick sweet treats save you time and effort while delivering delightful flavors!
Can I Customize These 3-Ingredient Dessert Recipes?
Definitely! The beauty of simple dessert recipes with 3 ingredients is their versatility. Feel free to swap ingredients based on what you have on hand or your taste preferences.
For instance, if you’re making a fruit-based dessert, you can substitute one type of fruit for another or add spices like cinnamon for an extra kick. Your creativity can lead to exciting new flavors!
What Are Some Fast Dessert Recipes for Last-Minute Guests?
When time is of the essence, fast dessert recipes come to the rescue! You can quickly prepare a 3-ingredient chocolate bark or banana ice cream by blending frozen bananas.
These treats are not only impressive but also require minimal effort, making them perfect for unexpected company!
Are These 3-Ingredient Desserts Healthy?
Many 3-ingredient desserts can be a healthier option, especially when you choose wholesome ingredients. For example, using natural sweeteners like honey or maple syrup instead of refined sugar can make your desserts guilt-free.
However, keep in mind that moderation is key. Enjoy these treats as part of a balanced diet, and you’ll find a way to satisfy your cravings without compromising your health!
Related Topics
simple dessert recipes
3 ingredients
no-bake desserts
easy dessert ideas
quick sweet treats
minimal ingredient desserts
fast dessert recipes
beginner-friendly desserts
last-minute desserts
seasonal treats
healthy dessert options
quick recipes