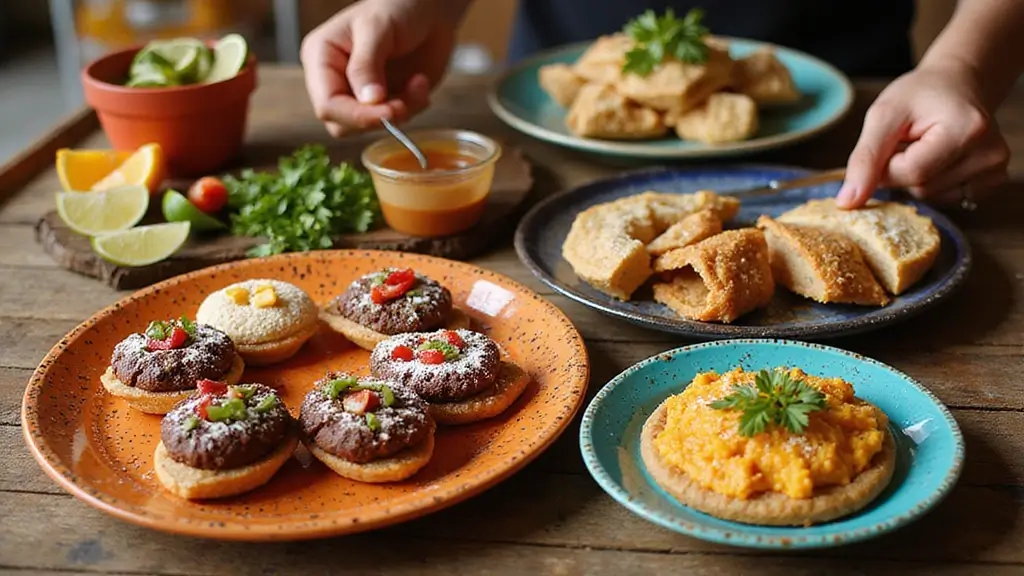
If you’ve been missing out on delightful desserts because of gluten sensitivities, you’re not alone. Many people are searching for delicious sweets that don’t leave them feeling bloated or uncomfortable. I created this post because I know how hard it can be to find gluten-free treats that are both satisfying and full of flavor.
This collection is perfect for anyone who loves sweet, indulgent desserts but needs to avoid gluten. Whether you’re a seasoned baker or a beginner in the kitchen, there’s something here for you. You might be hosting a get-together, wanting to impress friends, or simply craving something sweet. Whatever your reason, I’ve got you covered.
In this post, you’ll discover 27 gluten-free Mexican dessert recipes that are bursting with flavor and fun. From rich chocolate flans to sweet tres leches cake, these recipes are easy to follow and sure to please any crowd. Each recipe is designed to bring joy to your table while keeping your dietary needs in mind.
So grab your apron and get ready! You’re about to embark on a tasty adventure filled with vibrant flavors and comforting treats. These desserts will not only satisfy your sweet tooth but also make your kitchen feel like a fiesta. Let’s dive in and bring some joy back to your dessert table!
1. Tres Leches Cake
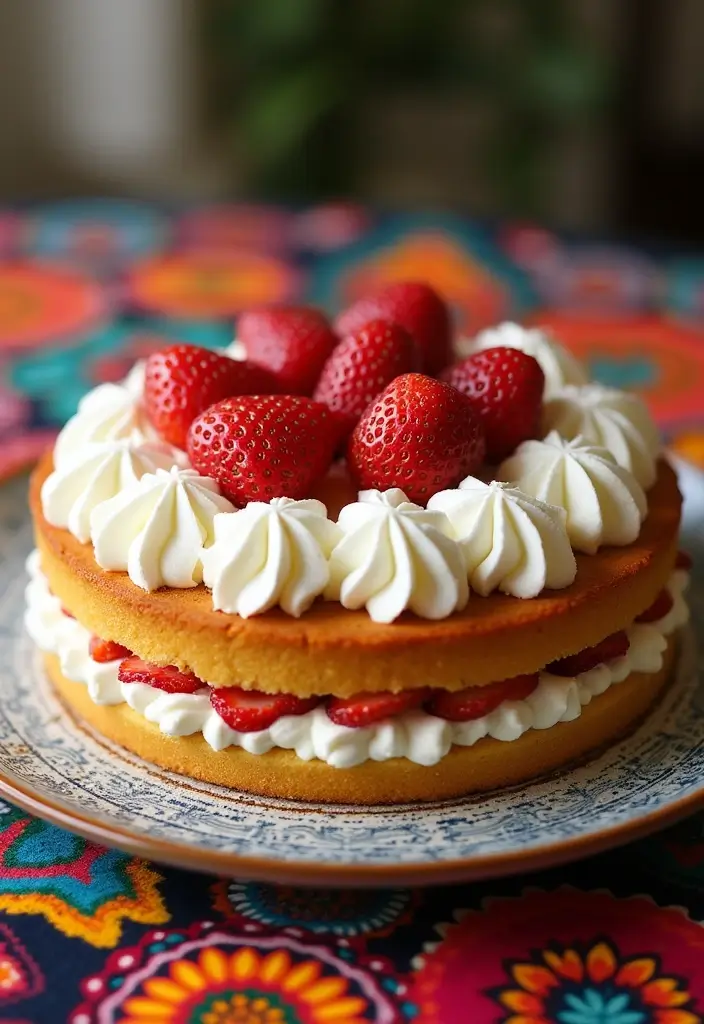
Indulge your sweet tooth with this delightful, gluten-free Tres Leches Cake. This classic Mexican treat has a twist that makes it both irresistible and safe for those avoiding gluten. Imagine a soft sponge cake soaked in a creamy blend of three milks, creating a texture that is moist and luscious with every bite. Topped with fluffy whipped cream and fresh fruit, it’s perfect for any celebration, whether it’s a birthday or a cozy family gathering.
When you make this cake, you’ll find it’s easier than you think to achieve this delicious dessert at home. The best part? You can impress your guests without breaking a sweat. Just follow these simple steps, and you’ll create a treat that everyone will rave about.
Recipe Overview:
– Servings: 8-10
– Prep Time: 30 minutes
– Cook Time: 25 minutes
– Total Time: 55 minutes
– Calories: 300 per slice
Ingredients:
– 1 cup gluten-free all-purpose flour
– 1 teaspoon baking powder
– ¼ cup unsalted butter, softened
– 1 cup sugar
– 4 large eggs
– 1 cup whole milk
– ½ cup evaporated milk
– ½ cup sweetened condensed milk
– Whipped cream for topping
Instructions:
1. Preheat your oven to 350°F (175°C).
2. In a bowl, mix the flour and baking powder; set it aside.
3. Cream together the softened butter and sugar until light and fluffy.
4. Add the eggs one at a time, mixing well after each addition.
5. Gradually stir in the flour mixture until combined.
6. Pour the batter into a greased baking pan and bake for 25 minutes or until a toothpick comes out clean.
7. Let the cake cool completely, then poke holes all over the top with a fork.
8. In a separate bowl, mix the three types of milk together. Pour this mixture over the cooled cake, allowing it to soak in.
9. Refrigerate for at least 4 hours to let the flavors meld.
10. Before serving, top with whipped cream and fresh fruit for a burst of color and flavor.
Tips for the Best Tres Leches Cake:
– Make sure the cake is entirely cool before adding the milk mixture. This helps it soak better.
– Use seasonal fruit like strawberries or mango for a fresh, colorful garnish.
Frequently Asked Questions:
– Can I use a different type of milk? Yes! Almond or coconut milk can work well for a unique twist.
– How long can I keep leftovers? This cake lasts up to 3 days in the fridge, so enjoy it throughout the week!
With this recipe, you’ll create a stunning and flavorful dessert that everyone will love. Enjoy the smiles as you serve up this delightful Tres Leches Cake!
Tres Leches Cake
Editor’s Choice

King Arthur Measure for Measure Gluten-Free Flour: All-Purpose 1:1 Subst…
 Amazon$8.62
CAROTE 7-Piece Nonstick Stackable Baking Pans Set – Bakeware Sets Includ…
 Amazon$29.99
2. Churros with Chocolate Sauce
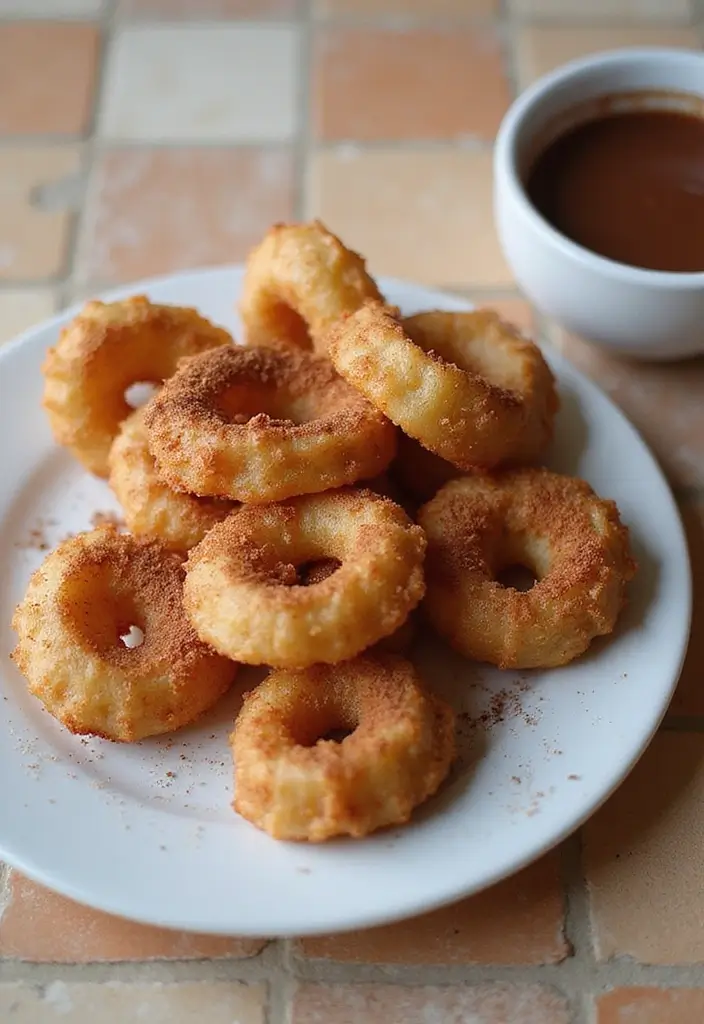
Imagine sinking your teeth into a warm, crispy churro, the sweet scent of cinnamon sugar wrapping around you like a warm hug. These tasty treats bring a taste of Mexico right to your kitchen. When you dip them into rich chocolate sauce, it’s pure bliss! Perfect for celebrations or just a cozy night in, churros are sure to delight everyone.
Recipe Overview:
– Servings: 6
– Prep Time: 15 minutes
– Cook Time: 10 minutes
– Total Time: 25 minutes
– Calories: 200 per churro
Ingredients:
– 1 cup water
– 2 tablespoons sugar
– 2 tablespoons vegetable oil
– 1 cup gluten-free all-purpose flour
– ½ teaspoon cinnamon
– 1 cup chocolate chips
– 1 tablespoon butter
Instructions:
1. In a saucepan, combine water, sugar, and oil. Bring this mixture to a boil over medium heat.
2. Remove the pan from heat. Stir in the flour until the dough is smooth and well combined.
3. Heat oil in a deep pan. Pipe the dough into hot oil, frying until golden brown, about 2-3 minutes per side.
4. In a separate small pot, melt chocolate chips and butter together over low heat, stirring until smooth.
5. Serve your churros warm with the chocolate sauce for dipping. Enjoy every bite!
To create the perfect churros, keep these tips in mind:
– Use a star-shaped piping tip for an attractive texture.
– Heat the oil properly before frying to ensure they’re crispy.
Frequently Asked Questions:
– Can I bake these instead of frying them? Yes, you can bake them at 400°F for a lighter option, but they won’t be as crispy as fried churros.
These churros are a fun, delicious treat that everyone will love. Whether it’s a festival or a cozy evening, they’re sure to bring smiles all around. Get ready to enjoy a taste of Mexico at home!
Churros with Chocolate Sauce
Editor’s Choice

King Arthur Measure for Measure Gluten-Free Flour: All-Purpose 1:1 Subst…
 Amazon$8.62
Ateco 850 – 10 Piece Closed Star Tube Set, Stainless Steel Pastry Tips, …
 Amazon$16.50
Candy Thermometer with Pot Clip – Deep Fry Oil Thermometer for Frying an…
 Amazon$9.96
3. Flan
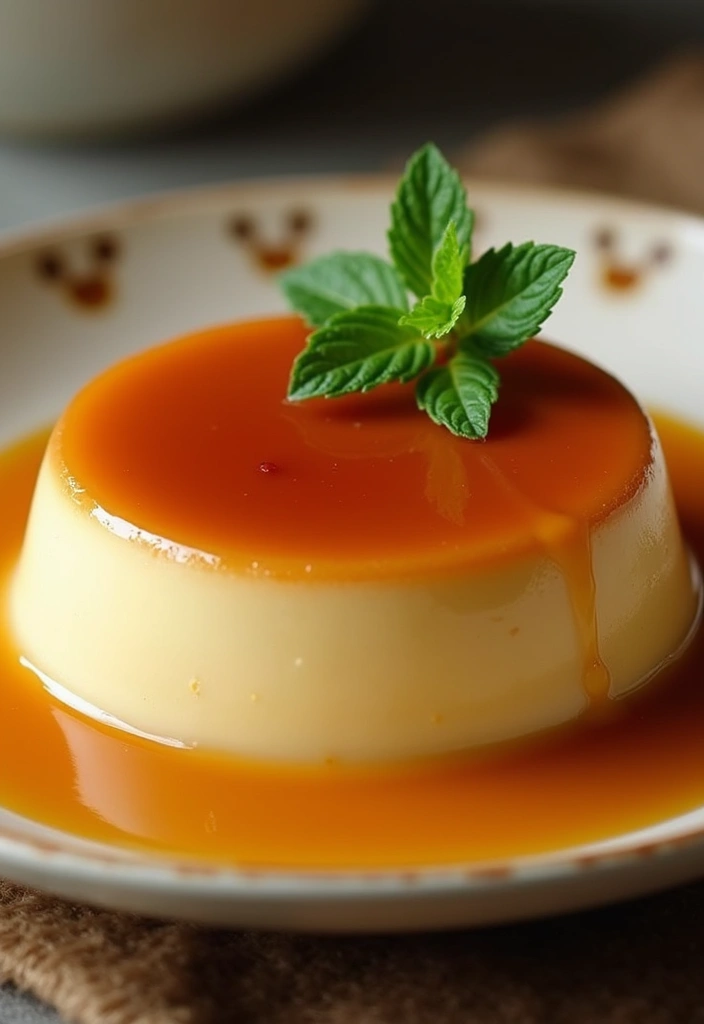
Flan is a beloved Mexican dessert that offers a creamy, dreamy experience with every bite. This gluten-free treat impresses with its rich flavor and smooth caramel topping. It’s the perfect way to end any meal on a sweet note, making it a favorite at gatherings and celebrations alike.
Imagine the soft texture of the flan melting in your mouth, paired with the sweet, slightly bitter taste of caramel. This dessert is not only delicious but also simple to prepare. So, let’s dive into making this classic treat that will surely delight your family and friends.
Recipe Overview:
– Servings: 6-8
– Prep Time: 15 minutes
– Cook Time: 50 minutes
– Total Time: 1 hour 5 minutes
– Calories: 280 per slice
Ingredients:
– 1 cup sugar (for caramel)
– 4 large eggs
– 1 can (14 oz) sweetened condensed milk
– 1 can (12 oz) evaporated milk
– 1 tablespoon vanilla extract
Instructions:
1. Preheat your oven to 350°F (175°C).
2. In a saucepan, melt the sugar over medium heat until it turns a golden brown. Be careful not to burn it!
3. Pour the hot caramel into a round baking dish, swirling it around to coat the bottom.
4. In a separate bowl, whisk together the eggs, sweetened condensed milk, evaporated milk, and vanilla until smooth.
5. Pour this mixture over the caramel in the baking dish.
6. Place the dish in a larger pan filled with water to create a water bath, then bake for 50 minutes.
7. After baking, let the flan cool completely. Refrigerate it for a few hours before serving to enhance the flavor.
For the Best Flan:
– Make sure your caramel is a light amber color to avoid bitterness.
– Prepare the flan a day ahead for the best taste and texture.
Frequently Asked Questions:
– Why does my flan have bubbles?
Bubbles can form if the mixture is over-beaten or cooked too quickly. Keep it gentle!
Flan is not just a dessert; it’s a celebration of flavors that brings everyone together. Enjoy this easy recipe and impress your guests with a dish that’s both comforting and delightful!
Did you know gluten-free flan shines with just 3 core ingredients—eggs, milk, sugar—and only 2 steps: bake and chill? In minutes you’ll master a silky, caramel-kissed dessert that wows at gatherings and stays gluten-free by design.
Flan
Editor’s Choice
Hollander Caramel Café Sauce | GMO Free, Corn Syrup Free, Soy/Gluten Fre…
 Amazon$11.95
NileHome Stainless Steel Whisk Set 8″ 10″ 12″ Kitchen Whisk Balloon Whis…
 Amazon$7.59
4. Mexican Hot Chocolate Cake
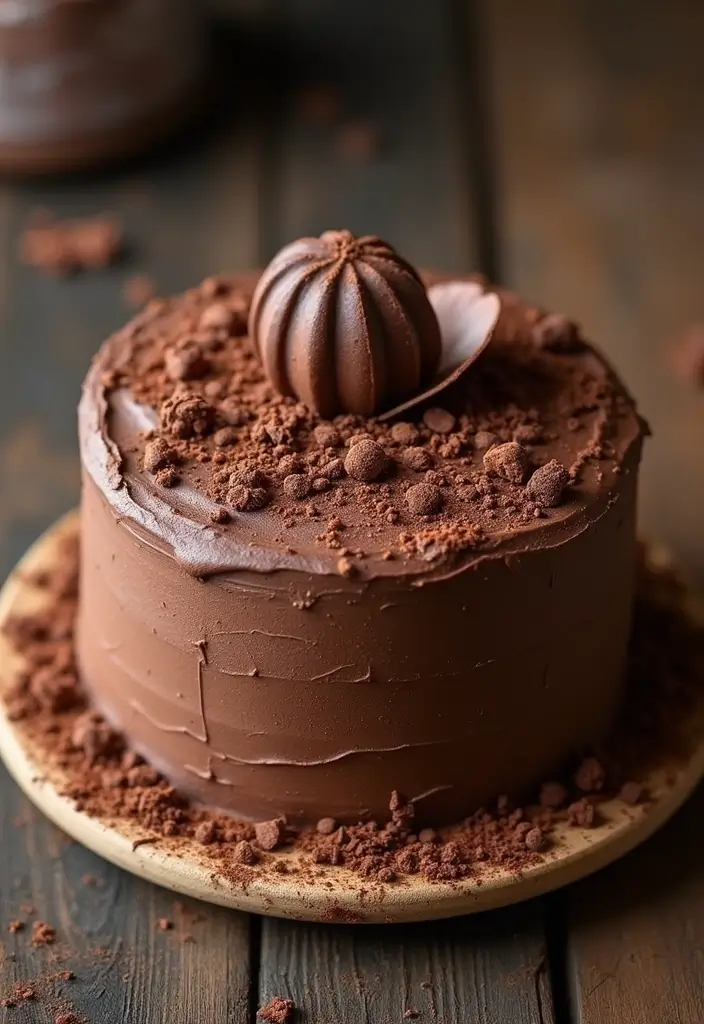
Indulge in the rich, warm delights of Mexican Hot Chocolate Cake. This dessert is not just a sweet treat; it’s a celebration of flavors. Imagine the deep, luscious chocolate mingling with hints of cinnamon and a touch of chili. Perfect for cozy nights or festive gatherings, this cake is sure to impress. Its moist texture makes it a standout centerpiece for any dessert table.
Let’s dive into the recipe so you can create this delicious cake!
Recipe Overview:
– Servings: 10
– Prep Time: 20 minutes
– Cook Time: 30 minutes
– Total Time: 50 minutes
– Calories: 350 per slice
Ingredients:
– 1 cup gluten-free all-purpose flour
– 1 cup cocoa powder
– 1 ½ teaspoons baking powder
– 1 teaspoon cinnamon
– ¼ teaspoon cayenne pepper
– 1 cup sugar
– ½ cup vegetable oil
– 3 eggs
– 1 cup milk
Instructions:
1. Preheat your oven to 350°F (175°C).
2. In a large bowl, mix together the gluten-free flour, cocoa powder, baking powder, cinnamon, and cayenne pepper. This blend adds a unique kick!
3. In another bowl, whisk together the sugar, vegetable oil, and eggs until smooth.
4. Gradually combine the dry ingredients into the wet mixture. Stir gently until everything is well blended.
5. Pour the batter into a greased cake pan. Bake for about 30 minutes, or until a toothpick comes out clean.
6. Allow the cake to cool completely before frosting it with chocolate ganache for that extra special touch.
For a truly memorable cake:
– Use high-quality cocoa for a richer taste.
– Frost with a spicy chocolate ganache to amp up the flavor.
Frequently Asked Questions:
– Can I make this cake ahead of time? Yes! It keeps well and often tastes even better the next day.
– What’s a good topping? Whipped cream or a sprinkle of cinnamon can elevate this cake beautifully!
Ready to bake? This Mexican Hot Chocolate Cake brings fun and flavor to your dessert lineup. Enjoy every bite!
Mexican Hot Chocolate Cake
Editor’s Choice

King Arthur Measure for Measure Gluten-Free Flour: All-Purpose 1:1 Subst…
 Amazon$8.62
Organic Cacao Powder, Unsweetened, 2 lb (907 g) – Rich Dark Chocolate Fl…
 Amazon$33.99
Cornaby’s Ready to Use Chocolate Ganache (2 pack) | Rich & Creamy Chocol…
 Amazon$25.99
5. Coconut Tres Leches
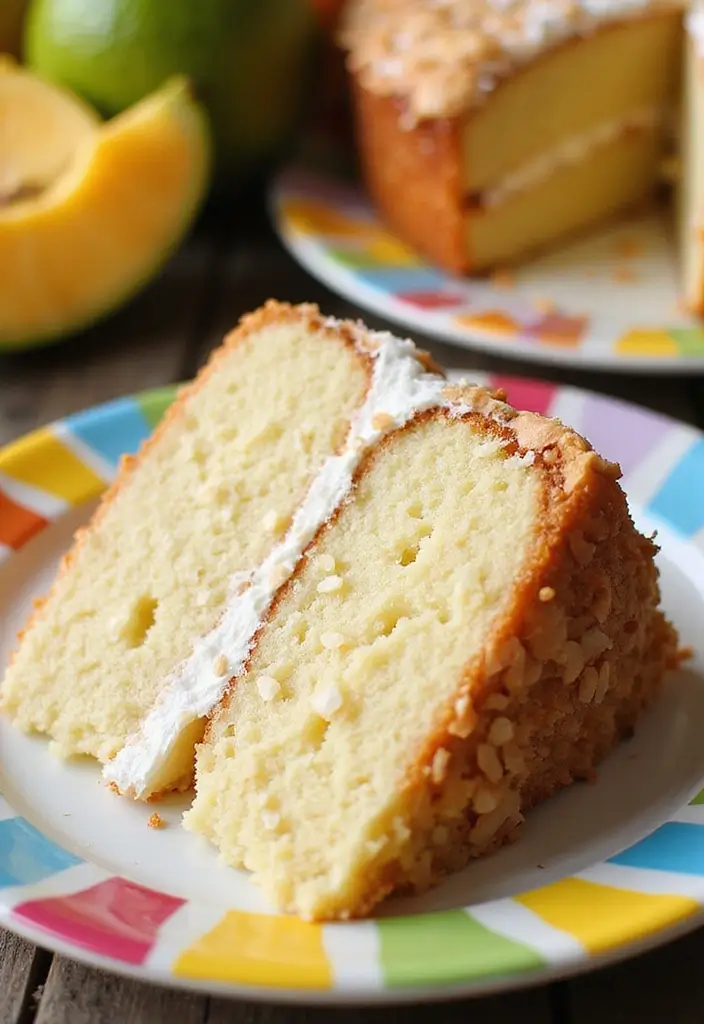
Dive into a delightful twist on a classic with Coconut Tres Leches cake! This gluten-free dessert adds a tropical flair that makes it a summer must-have. Imagine a moist cake soaked in creamy coconut milk, perfectly balancing sweetness and refreshment. Plus, it’s dairy-free, so it caters to various dietary needs without sacrificing flavor.
Let’s get cooking! Here’s a quick overview of the recipe:
– Servings: 8-10
– Prep Time: 25 minutes
– Cook Time: 30 minutes
– Total Time: 55 minutes
– Calories: 310 per slice
Ingredients:
– 1 cup gluten-free flour
– 1 teaspoon baking powder
– 4 large eggs
– 1 cup sugar
– 1 cup coconut milk
– ½ cup unsweetened coconut flakes
– 1 can sweetened condensed coconut milk
Instructions:
1. Preheat your oven to 350°F (175°C).
2. In a mixing bowl, combine the gluten-free flour and baking powder.
3. In another bowl, whisk the eggs and sugar until they are light and fluffy.
4. Gradually add the flour mixture, then mix in the coconut milk until smooth.
5. Pour the batter into a greased baking dish and bake for about 30 minutes or until golden brown.
6. Once baked, poke holes in the cake and drizzle the sweetened condensed coconut milk over it.
7. Finish off with a generous layer of whipped coconut cream and sprinkle with coconut flakes.
For a little extra flair, try these tips:
– Toast coconut flakes before adding them on top for a crunchy texture.
– Add lime zest for a refreshing citrus touch that brightens the flavors.
Frequently Asked Questions:
– Can I make this without eggs?
Yes! You can substitute with flax eggs for a vegan option.
Enjoy this Coconut Tres Leches cake at your next gathering. It’s not just a dessert; it’s a celebration of flavor that everyone will love!
Coconut Tres Leches
Editor’s Choice

King Arthur, Measure for Measure Flour, Certified Gluten-Free, Non-GMO P…
 AmazonCheck Price
365 by Whole Foods Market, Organic Coconut Milk, 13.5 Fl Oz
 Amazon$2.69
365 by Whole Foods Market, Organic Shredded Coconut, 8 Ounce (Pack of 2)
 AmazonCheck Price
6. Mexican Wedding Cookies
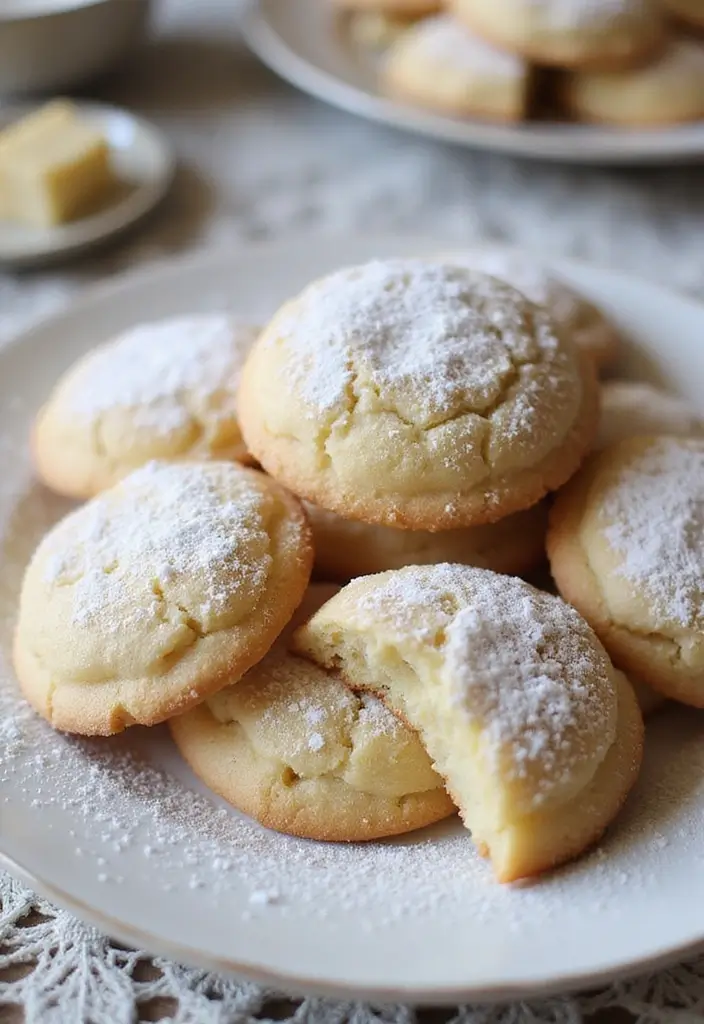
Indulge in the sweet, crumbly delight of Mexican Wedding Cookies, also called polvorones. These festive treats are perfect for celebrations, bringing joy to any table. With their rich nutty flavor and a dusting of powdered sugar, they melt in your mouth. Imagine sharing these cookies with family and friends during holiday gatherings or special occasions. Pinterest is filled with mouthwatering images of these cookies, making them a social media favorite.
Ready to make these delicious cookies? Here’s how you can whip them up in no time, even if you’re short on time. The recipe is budget-friendly and easy to follow. Plus, you can customize them with different nuts to keep things interesting. Your guests will love the homemade touch, and you’ll feel proud serving them.
Recipe Overview:
– Servings: 24 cookies
– Prep Time: 15 minutes
– Cook Time: 12 minutes
– Total Time: 27 minutes
– Calories: 100 per cookie
Ingredients:
– 1 cup gluten-free all-purpose flour
– ½ cup powdered sugar
– ½ cup ground almonds or pecans
– 1 cup unsalted butter, softened
– 1 teaspoon vanilla extract
Instructions:
1. Preheat your oven to 350°F (175°C).
2. In a mixing bowl, beat the softened butter and powdered sugar until creamy.
3. Gradually add the gluten-free flour and ground nuts. Mix until combined.
4. Roll the dough into small balls and place them on a baking sheet lined with parchment paper.
5. Bake for 12 minutes or until they are lightly golden around the edges.
6. Once cooled, roll the cookies in powdered sugar for a sweet finish.
Tips for Perfect Cookies:
– Keep the dough cold before baking to enhance texture.
– Experiment with different nuts like walnuts or pistachios for unique flavors.
Frequently Asked Questions:
– Can I freeze these cookies?
Yes, they freeze well! Just store them in an airtight container to keep the flavor intact.
Now you’re ready to impress everyone with your baking skills. These Mexican Wedding Cookies are not just treats; they’re a tradition filled with love and flavor. Enjoy every bite!
Mexican Wedding Cookies
Editor’s Choice

King Arthur Measure for Measure Gluten-Free Flour: All-Purpose 1:1 Subst…
 Amazon$8.62
Amazon Basics Silicone Rectangular Baking Mat, Non-Stick Reusable Oven B…
 Amazon$16.79
7. Dulce de Leche Crème Brûlée
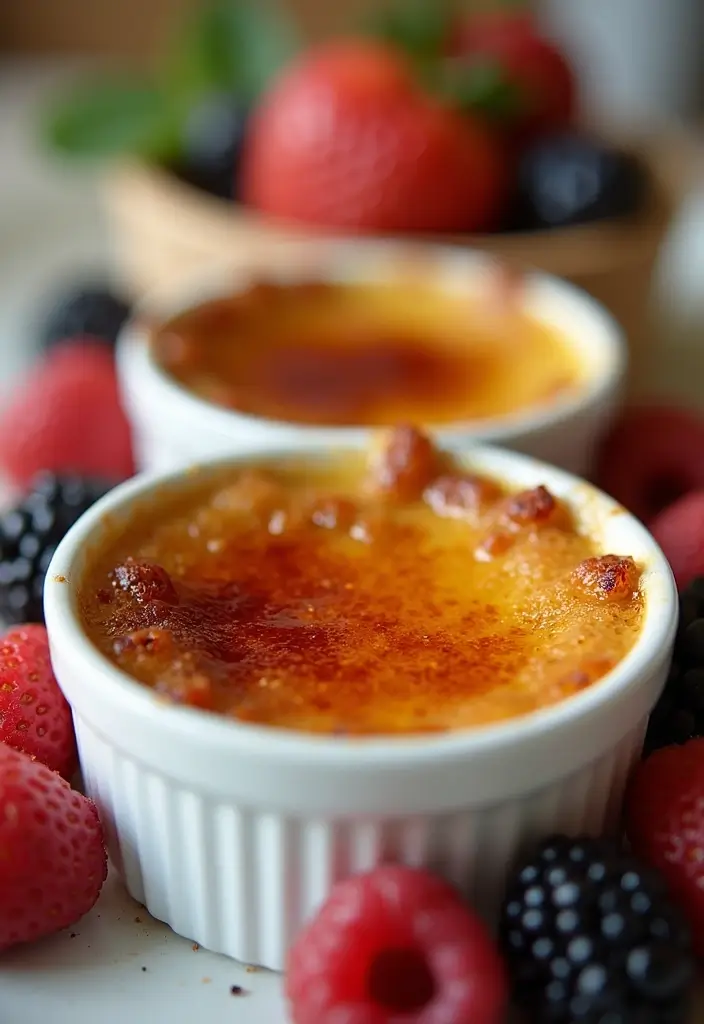
Indulge your sweet tooth with a delightful twist on a classic dessert: Dulce de Leche Crème Brûlée. This creamy treat merges the silky texture of traditional crème brûlée with the rich sweetness of dulce de leche. Picture the moment when you crack the caramelized sugar top, revealing the luscious custard beneath. Your guests will be in awe, and you’ll satisfy your cravings in style!
Let’s dive into making this irresistible dessert. The recipe serves four, making it perfect for a cozy dinner or a small gathering. Here’s what you need and how to bring this dessert to life:
Ingredients:
– 2 cups heavy cream
– ½ cup dulce de leche
– 4 large egg yolks
– ¼ cup sugar (for caramelizing the top)
Instructions:
1. Preheat your oven to 325°F (160°C).
2. In a saucepan, gently heat the cream and dulce de leche until warm but not boiling.
3. In a mixing bowl, whisk the egg yolks until smooth. Gradually add the warm cream mixture, stirring continuously to blend well.
4. Pour the mixture into ramekins, filling them about three-quarters full. Place the ramekins in a baking dish and fill the dish with hot water until it reaches halfway up the sides of the ramekins.
5. Bake for about 30 minutes, or until the edges are set but the center still jiggles slightly. Remove from the oven and let cool. Refrigerate for at least two hours or overnight for best results.
6. Just before serving, sprinkle a thin layer of sugar on top of each custard. Use a kitchen torch to caramelize the sugar until golden and crisp.
Tips for the Perfect Crème Brûlée:
– Make sure to cool the dessert completely before caramelizing the sugar to avoid melting the custard.
– A kitchen torch gives the best results for an even, crispy top.
Frequently Asked Questions:
– Can I prepare this dessert in advance?
Yes! You can make it a day early and store it in the fridge until you’re ready to serve.
This Dulce de Leche Crème Brûlée isn’t just a dessert; it’s an experience that will make any occasion feel special. So gather your ingredients and impress everyone with your culinary skills!
Dulce de Leche Crème Brûlée
Editor’s Choice

Sondiko Butane Torch Lighter with Fuel Gauge, Refillable Soldering Torch…
 Amazon$18.99
DOWAN Ramekins 4 oz Oven Safe for Creme Brulee Souffle, Porcelain Custar…
 Amazon$11.99
PHLUR Vanilla Skin & Heavy Cream Body Mist – Hair & Body Mist Fragrance …
 AmazonCheck Price
8. Chocolate Avocado Mousse
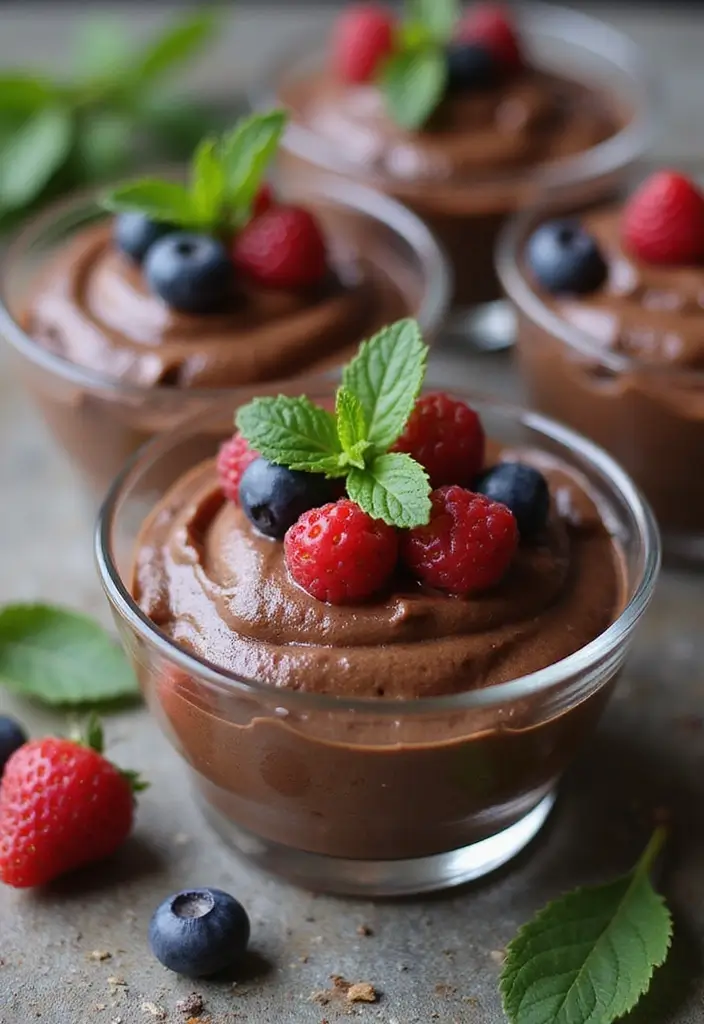
Indulge in a dessert that’s both rich and nutritious: Chocolate Avocado Mousse. This delightful treat combines the creaminess of ripe avocados with luscious cocoa powder, creating a dessert that’s both satisfying and guilt-free. With just a hint of maple syrup for sweetness, you’ll love how easy it is to whip up. This mousse is perfect for chocolate lovers who want to enjoy something delicious while sneaking in some healthy fats!
Ready to create this creamy delight? Here’s what you need:
Ingredients:
– 2 ripe avocados
– ½ cup cocoa powder
– ¼ cup maple syrup
– 1 teaspoon vanilla extract
– Pinch of salt
Instructions:
1. Scoop the avocado flesh into a food processor.
2. Add cocoa powder, maple syrup, vanilla extract, and a pinch of salt.
3. Blend until smooth and creamy. Taste and adjust sweetness if desired.
4. Spoon the mousse into serving bowls and refrigerate for at least 30 minutes to chill.
5. Serve cold, topped with fresh berries or a sprinkle of nuts for added texture.
To get the best results, make sure your avocados are perfectly ripe. If the mousse seems too thick, just mix in a splash of almond milk to achieve your desired consistency.
What about leftovers? Store any mousse in an airtight container in the fridge for up to three days. You’ll have a delicious treat ready to enjoy anytime!
This Chocolate Avocado Mousse isn’t just a dessert; it’s a fantastic way to satisfy your sweet tooth while nourishing your body. Perfect for gatherings or a cozy night in, it’s sure to be a hit!
Chocolate Avocado Mousse
Editor’s Choice

Hamilton Beach Food Processor & Vegetable Chopper for Slicing, Shredding…
 Amazon$46.98

Butternut Mountain Farm Pure Vermont Maple Syrup, Grade A, Dark Color, R…
 Amazon$17.97
9. Cinnamon Sugar Donuts
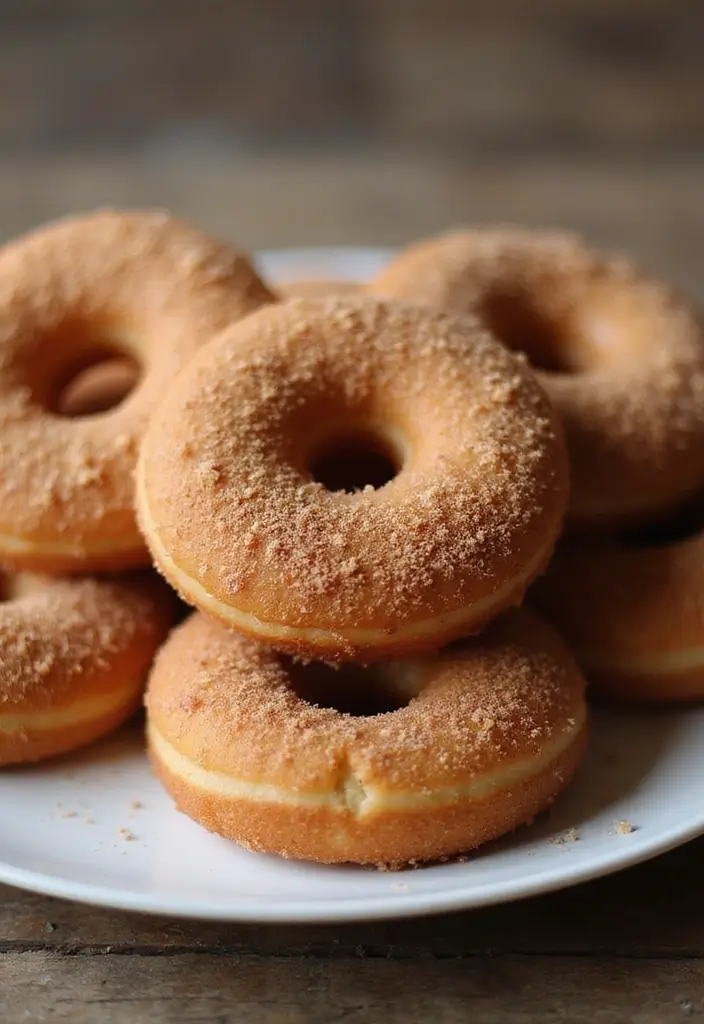
Indulge in the warm, comforting taste of Cinnamon Sugar Donuts. These gluten-free delights are perfect for any time of day. Imagine biting into a fluffy, sweet donut, rolled generously in cinnamon sugar. They’re a fantastic way to brighten your breakfast or add a sweet touch to your dessert table. Plus, they make a delightful surprise for your next brunch gathering!
Ready to whip up these tasty treats? Here’s a quick overview of what you need to know:
– Servings: 12 donuts
– Prep Time: 15 minutes
– Cook Time: 15 minutes
– Total Time: 30 minutes
– Calories: 180 per donut
Ingredients:
– 1 ½ cups gluten-free all-purpose flour
– ½ cup sugar
– 1 teaspoon baking powder
– ½ teaspoon salt
– ½ teaspoon cinnamon
– 2 eggs
– ½ cup milk
– ¼ cup melted butter
Instructions:
1. Preheat your oven to 350°F (175°C) and grease a donut pan.
2. In a bowl, mix the flour, sugar, baking powder, salt, and cinnamon.
3. In another bowl, whisk the eggs, milk, and melted butter until well combined.
4. Gently fold the wet ingredients into the dry ingredients until just combined—don’t overmix!
5. Fill each donut mold in the pan and bake for 15 minutes or until golden brown.
6. Once out of the oven, roll the warm donuts in cinnamon sugar.
To ensure perfect donuts every time, try these tips:
– Use a pastry bag for easy filling of the donut pan.
– Experiment with flavors by adding vanilla extract or a pinch of nutmeg for an extra twist.
FAQs:
– Can I fry these instead of baking?
Yes, but frying will change the texture, making them denser.
These cinnamon sugar donuts are not only simple to make but also a delightful treat that fills your kitchen with a warm, inviting aroma. They’re sure to impress your family and friends, making every occasion sweeter!
Cinnamon Sugar Donuts
Editor’s Choice

Bob’s Red Mill Gluten Free 1 to 1 Baking Flour, 44oz (Pack of 1) – Non G…
 AmazonCheck Price
Wilton Gold Premium Non-Stick Warp-Resistant Bakeware, Made without PFAs…
 Amazon$18.08
Ateco Plastic Coated Canvas Decorating Bag, 21-Inch, Reusable, Made in U…
 Amazon$9.80
10. Guava Paste and Cheese Dessert
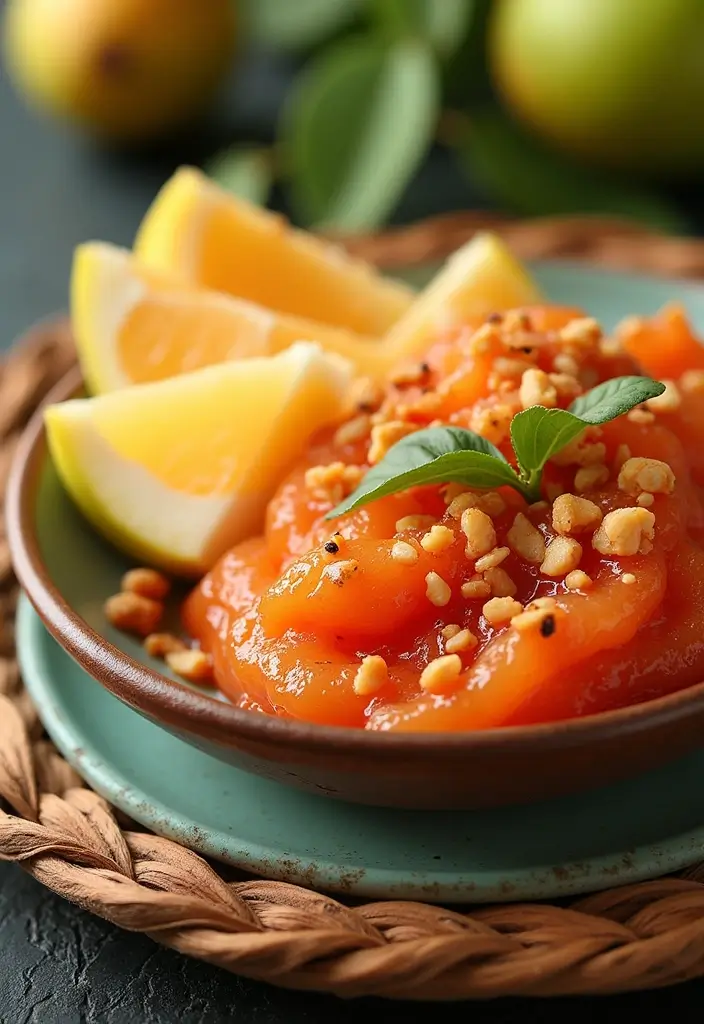
Indulge in the delightful flavors of the Guava Paste and Cheese Dessert, a traditional Mexican treat that will impress your friends and family. This dessert combines the tropical sweetness of guava with the creamy richness of cheese. It’s a surprising yet harmonious blend that’s perfect for gatherings or simply satisfying your sweet tooth!
Imagine slicing into a firm yet smooth piece of guava paste, its pink hue brightening your plate. Pair it with creamy cheese, like cream cheese or queso fresco, and you have a match made in dessert heaven. This dish is not only delicious but also incredibly easy to prepare.
Here’s how you can whip it up in just a few minutes:
Recipe Overview:
– Servings: 4
– Prep Time: 10 minutes
– Total Time: 10 minutes
– Calories: 150 per serving
Ingredients:
– 1 cup guava paste
– 4 oz cream cheese or queso fresco
– Optional: crushed nuts for garnish
Instructions:
1. Cut the guava paste into even slices.
2. Slice the cheese into pieces that match the guava.
3. Layer a slice of guava paste and cheese on a plate.
4. Sprinkle with crushed nuts if you want an extra crunch.
For Serving:
– Chill before serving for a refreshing treat.
– Enjoy it with a sweet glass of wine to elevate the experience.
Frequently Asked Questions:
– Can I use other fruits?
Absolutely! You can try mango or quince for a different twist on flavors.
This dessert is not just about taste; it also brings a touch of elegance to any table. It’s perfect for summer parties or a cozy night in. Treat yourself to this simple yet flavorful dessert that captures the essence of Mexican cuisine!
Guava Paste and Cheese Dessert
Editor’s Choice

Iberia Guava Paste, 14 oz, All Natural, Vegan, Gluten Free, Halal, Koshe…
 Amazon$1.99
Amazon Grocery, Cream Cheese, 8 Oz (Previously Amazon Fresh, Packaging M…
 Amazon$1.56
Chopped Peanuts Topping Roasted Peanuts, No Salt Unsalted, Chopped Nuts …
 Amazon$20.99
11. Pecan Pie Bars
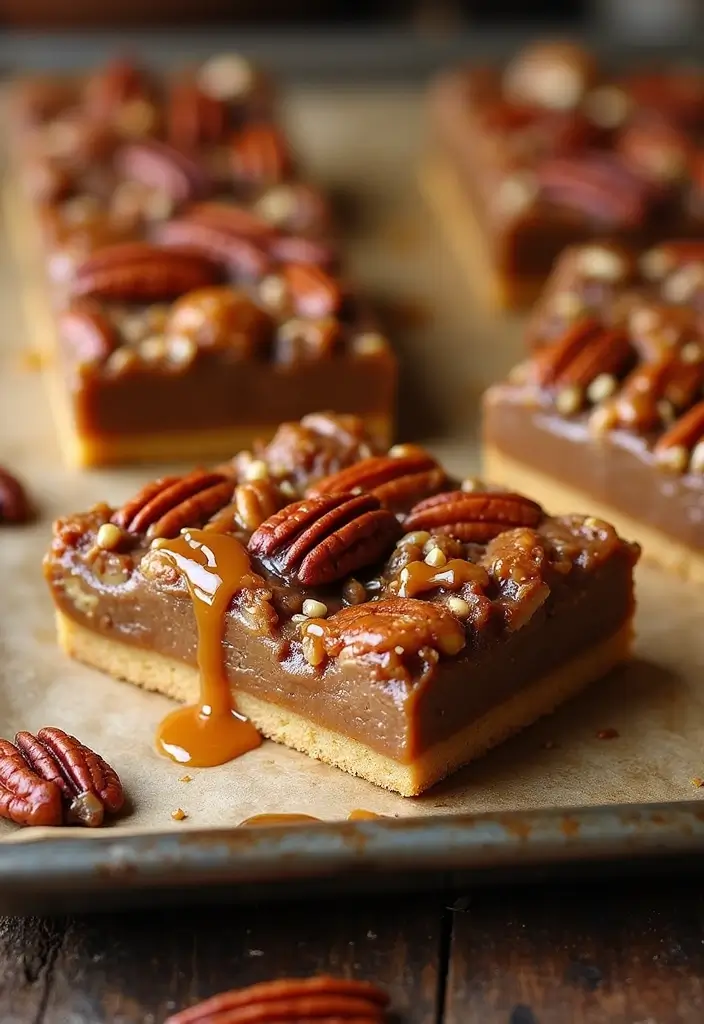
Get ready for a delightful twist on a classic favorite with these Pecan Pie Bars. These bars are not only simple to make, but they also pack the same rich, sweet flavor of traditional pecan pie. With a buttery gluten-free crust and a gooey pecan topping, they’re perfect for any gathering, from family dinners to holiday parties. You’ll love how easy they are to slice and serve!
Imagine biting into a soft, chewy bar with a slightly crunchy pecan topping. The blend of flavors creates a satisfying treat that everyone will enjoy. Plus, these bars are a fantastic way to satisfy your sweet tooth without worrying about gluten.
Here’s how to make them:
Recipe Overview:
– Servings: 16 bars
– Prep Time: 20 minutes
– Cook Time: 40 minutes
– Total Time: 1 hour
– Calories: 250 per bar
Ingredients:
– 1 cup gluten-free flour
– ½ cup butter, softened
– ¼ cup sugar
– 1 cup pecans, chopped
– 3 eggs
– ¾ cup corn syrup
– 1 teaspoon vanilla extract
Instructions:
1. Begin by preheating your oven to 350°F (175°C).
2. In a mixing bowl, combine the gluten-free flour, softened butter, and sugar until the mixture is crumbly. This will form your crust.
3. Press the crust mixture evenly into a greased baking dish and bake it for 15 minutes.
4. Meanwhile, in another bowl, mix the chopped pecans, eggs, corn syrup, and vanilla extract until well combined.
5. Pour this mixture over the baked crust, spreading it evenly.
6. Bake for an additional 25 minutes. You want the filling to be set and slightly bubbly.
7. Allow the bars to cool before slicing them into squares.
For the Best Bars:
– Ensure the pecan filling is fully set before removing from the oven.
– Consider adding chocolate chips on top before baking for a decadent twist!
Frequently Asked Questions:
– Can I use walnuts instead of pecans?
Absolutely! Walnuts make a great substitute.
These Pecan Pie Bars are sure to become a favorite in your dessert lineup. They offer a delicious, gluten-free option everyone can enjoy, making your gatherings even sweeter!
Pecan Pie Bars
Editor’s Choice

King Arthur Measure for Measure Gluten-Free Flour: All-Purpose 1:1 Subst…
 Amazon$8.62
Amazon Basics Silicone Rectangular Baking Mat, Non-Stick Reusable Oven B…
 Amazon$16.79
Amazon Brand – Happy Belly Pecan Halves, No Added Salt, 16 ounce (Pack o…
 Amazon$8.14
12. Mango Flan
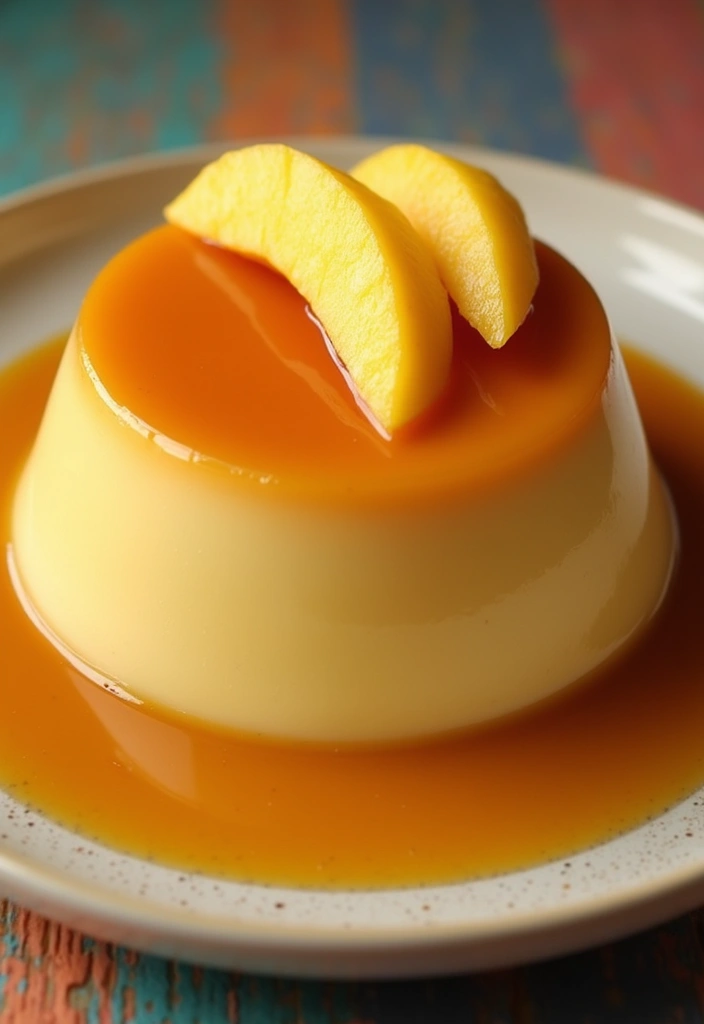
Treat yourself to a slice of sunshine with this delicious Mango Flan. This delightful dessert combines the classic creamy flan with the sweet, tropical burst of ripe mangoes. It’s perfect for those warm days when you need something refreshing. The vibrant mango flavor mingles beautifully with the smooth texture, making every bite a celebration of flavor!
Here’s how to make it:
Recipe Overview:
– Servings: 6-8
– Prep Time: 15 minutes
– Cook Time: 40 minutes
– Total Time: 55 minutes
– Calories: 280 per slice
Ingredients:
– 1 cup sugar (for caramel)
– 4 large eggs
– 1 cup sweet mango puree
– 1 can evaporated milk
– 1 can condensed milk
– 1 teaspoon vanilla extract
Instructions:
1. Preheat your oven to 350°F (175°C).
2. In a saucepan, melt the sugar over medium heat until it turns golden brown. This will be your caramel.
3. Quickly pour the caramel into a round baking pan, tilting it to coat the bottom.
4. Blend the eggs, mango puree, evaporated milk, condensed milk, and vanilla extract until smooth.
5. Carefully pour this creamy mixture over the caramel in the pan.
6. Place the pan in a larger baking dish filled with hot water (this is called a water bath) and bake for 40 minutes.
7. Once done, let it cool, then refrigerate for at least 2 hours before serving.
For the best Mango Flan, be sure to use ripe mangoes for a sweet flavor. You could also slice fresh mango to decorate the top for an extra touch. This dessert not only looks beautiful but also tastes divine!
Frequently Asked Questions:
– Can I use other fruits?
Yes! Fruits like passionfruit or pineapple make great substitutes. They add their own unique twist to the flan.
Enjoy this Mango Flan at your next gathering. It’s a treat that’s sure to impress your guests and leave them asking for the recipe!
Mango Flan
Editor’s Choice

HUAKENER 2 Pcs Silicone Muffin Top Pans for Baking, 4 Inch Non-Stick Rou…
 Amazon$9.99
Mazzoni Mango Puree, Juice, 100% Pure Mango Lassi, Just Fruit, Nectar, N…
 AmazonCheck Price
Ghirardelli Caramel Sauce Squeeze Bottle, 16 oz (Pack of 1)
 Amazon$4.44
13. Sweet Potato Pudding
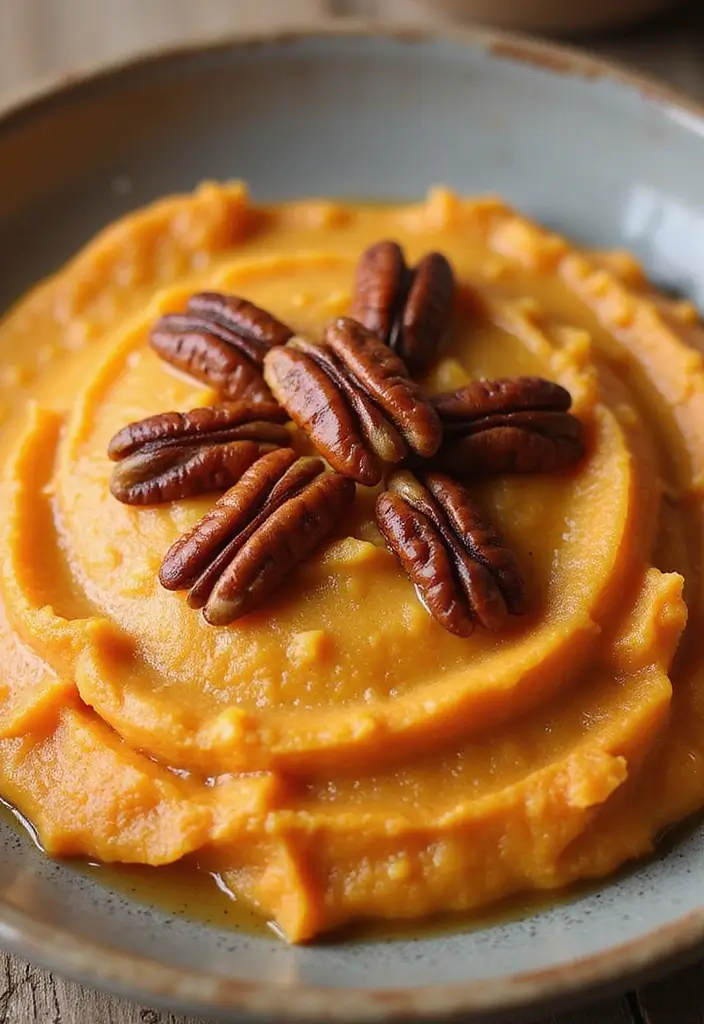
Indulge in a delightful bowl of Sweet Potato Pudding, a dessert that warms your heart and satisfies your sweet tooth. This dish showcases sweet potatoes, offering a unique twist on traditional puddings. Naturally gluten-free and bursting with nutrients, it uses rich maple syrup for sweetness and crunchy toasted pecans for a satisfying finish. It’s a comforting treat that feels like a hug from home.
Here’s how to make this delicious pudding:
Recipe Overview:
– Servings: 6
– Prep Time: 15 minutes
– Cook Time: 40 minutes
– Total Time: 55 minutes
– Calories: 230 per serving
Ingredients:
– 2 cups cooked sweet potatoes, mashed
– ½ cup maple syrup
– ½ teaspoon cinnamon
– ¼ teaspoon nutmeg
– ½ cup coconut milk
Instructions:
1. Preheat your oven to 350°F (175°C).
2. In a mixing bowl, combine the mashed sweet potatoes, maple syrup, cinnamon, nutmeg, and coconut milk. Stir well until smooth.
3. Pour the mixture into a greased baking dish and spread evenly.
4. Bake in the preheated oven for 40 minutes, or until set and slightly golden.
5. Allow it to cool before serving. If you like, sprinkle toasted pecans on top for added crunch and flavor.
Tips for the Best Pudding:
– Use fresh, cooked sweet potatoes for the richest taste.
– Add raisins for an extra hint of sweetness and texture.
Frequently Asked Questions:
– How long can I store this?
It stays fresh in the fridge for up to 5 days, making it great for meal prep!
Sweet Potato Pudding is not just a dessert; it’s a wholesome treat that embodies comfort and joy. Perfect for sharing with family or enjoying alone, this recipe fits right in with your gluten-free dessert collection. Enjoy every bite!
Sweet Potato Pudding
Editor’s Choice

Thai Kitchen Gluten Free Unsweetened Coconut Milk, 13.66 fl oz (Pack of 12)
 Amazon$18.96
Butternut Mountain Farm Pure Vermont Maple Syrup, Grade A, Dark Color, R…
 Amazon$17.97
PLANTERS Salted Pecans, Individual Nuts Snack Packs, 7.25 Ounce, Pack of 1
 Amazon$6.58
14. Pineapple Coconut Popsicles

Looking for a cool treat to beat the summer heat? Try these Pineapple Coconut Popsicles! They’re not just refreshing; they pack a punch of flavor. With the natural sweetness of ripe pineapple and the creamy goodness of coconut milk, these popsicles are a hit for both kids and adults. Whether you’re hosting a summer party or just need a healthy snack, these treats are simple to make and utterly delicious.
Let’s break down the recipe so you can whip them up in no time! It takes just 10 minutes of prep, and then you’ll need to let them freeze for about 4 hours. You’ll be enjoying these tasty pops in no time!
Recipe Overview:
– Servings: 8 popsicles
– Prep Time: 10 minutes
– Freeze Time: 4 hours
– Total Time: 4 hours 10 minutes
– Calories: 90 per pop
Ingredients:
– 2 cups fresh pineapple chunks
– 1 cup creamy coconut milk
– 2 tablespoons honey or agave syrup (for natural sweetness)
Instructions:
1. Start by blending the pineapple chunks, coconut milk, and honey until the mixture is smooth and creamy. This fruity blend smells divine!
2. Pour the mixture into popsicle molds, filling them about three-quarters full. Don’t forget to insert popsicle sticks!
3. Place the molds in the freezer and let them chill out for at least 4 hours. Patience pays off with these treats!
4. When you’re ready to enjoy, run warm water over the outside of the molds for a few seconds. This will help pop them out easily.
Tips for Perfect Popsicles:
– Use ripe pineapple for the sweetest flavor. A good pineapple should smell sweet at the bottom!
– Add shredded coconut for a fun texture and even more coconut flavor.
– Experiment by mixing in other fruits like mango or berries for a twist on the classic flavor.
– Store any leftover popsicles in an airtight container in the freezer to keep them fresh.
Frequently Asked Questions:
– Can I use frozen pineapple? Yes, but fresh pineapple gives a brighter taste that shines through!
– How long can I store these popsicles? They can last in the freezer for up to a month, but they’re so good, they probably won’t last that long!
Now you have a delicious and easy recipe for Pineapple Coconut Popsicles that will keep you refreshed and happy. Enjoy the burst of tropical flavors while staying cool this summer!
Pineapple Coconut Popsicles
Editor’s Choice

Silicone Popsicle Molds 10-cavity, DIY Ice Pop Mold for Kids Adult Teens…
 Amazon$11.99
Ninja BL660 Professional Compact Smoothie & Food Processing Blender, 110…
 Amazon$99.99
Simply Asia Unsweetened Coconut Milk, 13.66 fl oz – One 13.66 Ounce Can …
 AmazonCheck Price
15. Horchata Rice Pudding
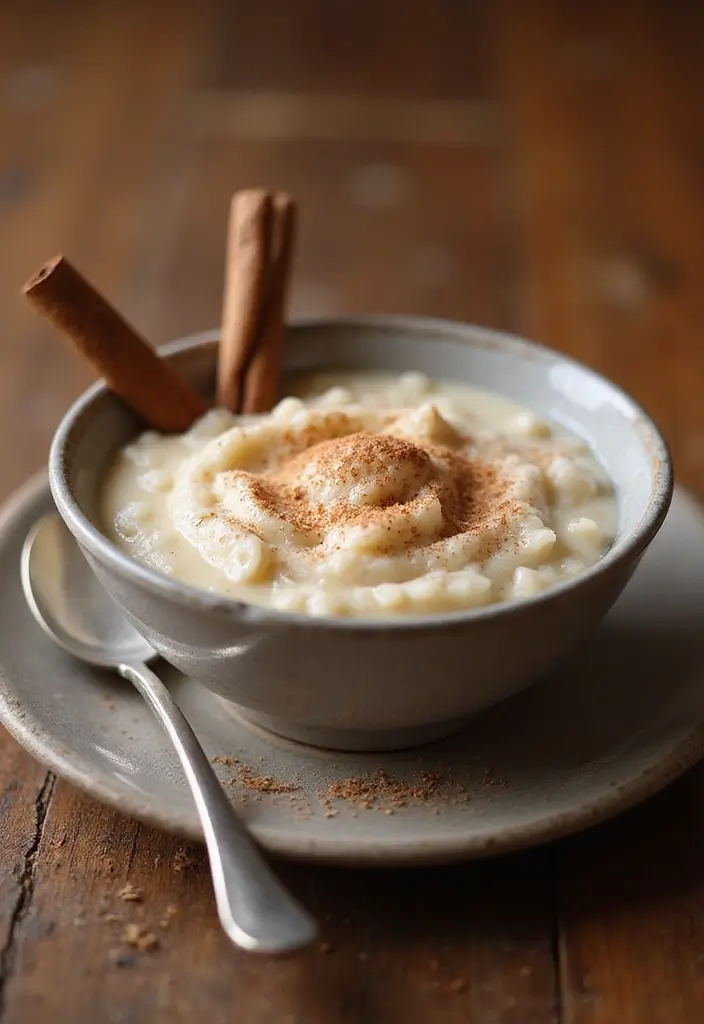
Craving something sweet yet comforting? Dive into the world of Horchata Rice Pudding. This delightful dessert combines the rich, creamy texture of rice pudding with the beloved flavors of horchata. The warming notes of cinnamon and sweet vanilla create a cozy treat that’s perfect for chilly nights or festive gatherings. It’s a dessert that feels like a comforting embrace!
Recipe Overview:
– Servings: 4
– Prep Time: 10 minutes
– Cook Time: 30 minutes
– Total Time: 40 minutes
– Calories: 220 per serving
Ingredients:
– 1 cup cooked rice
– 2 cups milk (you can use dairy or any non-dairy milk)
– ½ cup sugar
– 1 teaspoon cinnamon
– 1 teaspoon vanilla extract
Instructions:
1. Start by mixing the cooked rice, milk, sugar, cinnamon, and vanilla in a saucepan.
2. Heat the mixture over medium heat, stirring occasionally. Cook until it thickens, which should take about 30 minutes.
3. Once thickened to your liking, serve it warm or let it chill in the fridge. Top it with a sprinkle of cinnamon for a beautiful finish.
Pro Tips for Perfect Rice Pudding:
– Stir often to keep the pudding from sticking to the bottom.
– Consider adding raisins or chopped nuts on top to enhance the texture and flavor.
Frequently Asked Questions:
– Can I prepare this dessert ahead of time? Yes! It keeps well in the fridge for up to 3 days, making it a great option for meal prep or last-minute entertaining.
Enjoy this delicious horchata rice pudding and let it warm your heart and home!
Horchata Rice Pudding
Editor’s Choice

Silk Shelf-Stable Almond Milk, Unsweetened Vanilla, Dairy-Free, Vegan, N…
 Amazon$11.27
Amazon Grocery, Ground Cinnamon, 2.5 Oz (Previously Happy Belly, Packagi…
 Amazon$1.03
Watkins All Natural Original Gourmet Baking Vanilla, with Pure Vanilla E…
 Amazon$12.35
16. Almond Joy Energy Bites
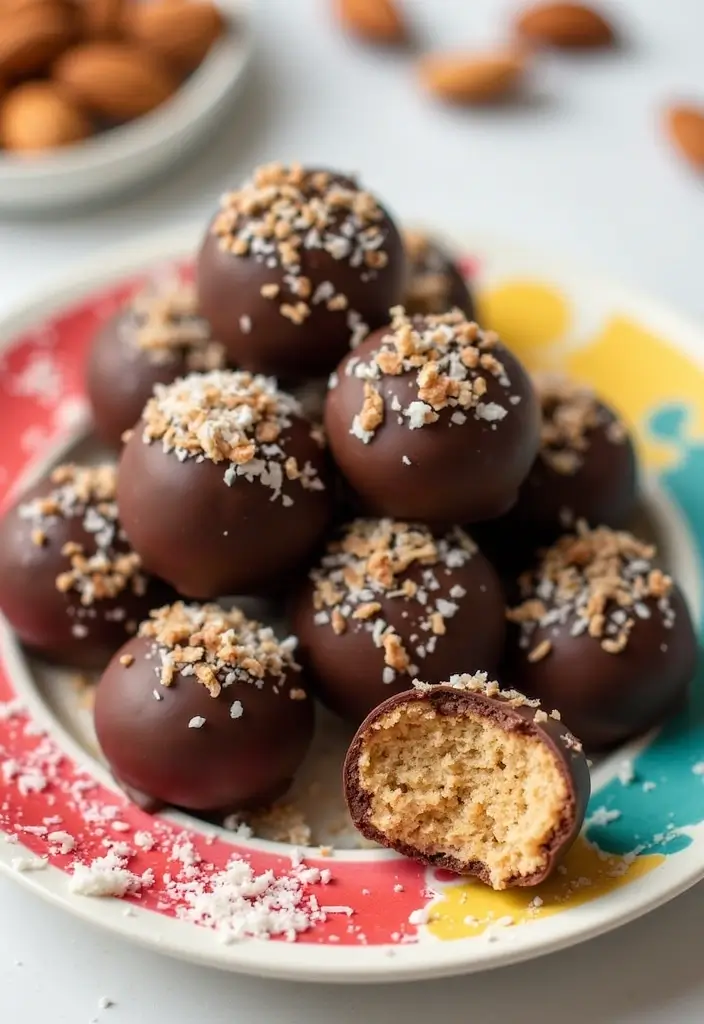
If you’re craving a sweet treat that’s both delicious and energizing, look no further than these Almond Joy Energy Bites. Imagine a delightful blend of almond, coconut, and rich chocolate, packed into bite-sized morsels. These no-bake snacks are perfect for any time of day—whether you need a quick pick-me-up or a guilt-free dessert. Wholesome ingredients make these bites a fantastic choice for both kids and adults alike!
Making these energy bites is simple and quick. In just 15 minutes, you can whip up a batch, and after a little chill time, you’ll have a tasty snack ready to enjoy. Plus, with only 150 calories per bite, they fit perfectly into your healthy eating plan. Let’s dive into the recipe so you can start enjoying these flavorful bites!
Recipe Overview:
– Servings: 12 bites
– Prep Time: 15 minutes
– Chill Time: 30 minutes
– Total Time: 45 minutes
– Calories: 150 per bite
Ingredients:
– 1 cup almond butter
– ½ cup shredded coconut
– ¼ cup honey
– ½ cup gluten-free oats
– ¼ cup dark chocolate chips
Instructions:
1. In a mixing bowl, combine the almond butter, shredded coconut, honey, gluten-free oats, and dark chocolate chips. Stir well to blend all the ingredients evenly.
2. Once mixed, use your hands to roll the mixture into small, bite-sized balls.
3. Place the balls on a plate and pop them in the refrigerator for about 30 minutes. This will help them firm up and make them easier to eat.
Tips for Perfect Energy Bites:
– Use smooth almond butter for a creamier texture.
– Add a pinch of salt to enhance the flavor and balance the sweetness.
Frequently Asked Questions:
– How long do these keep? They last up to a week in the refrigerator when stored in an airtight container. Perfect for meal prep!
Now that you have this delightful recipe, you can enjoy a healthy treat anytime you want. These Almond Joy Energy Bites are not just fun to make; they’re a fantastic way to satisfy your sweet tooth without the guilt. Enjoy every bite!
Almond Joy Energy Bites
Editor’s Choice

365 by Whole Foods Market, Organic Creamy Almond Butter, 16 Ounce
 Amazon$13.99
Bob’s Red Mill Gluten Free Old Fashioned Rolled Oats, 32oz (Pack of 4) -…
 Amazon$23.92
365 by Whole Foods Market, Dark Chocolate Baking Chunks, 12 Ounce
 Amazon$6.69
17. Mexican Chocolate Pudding
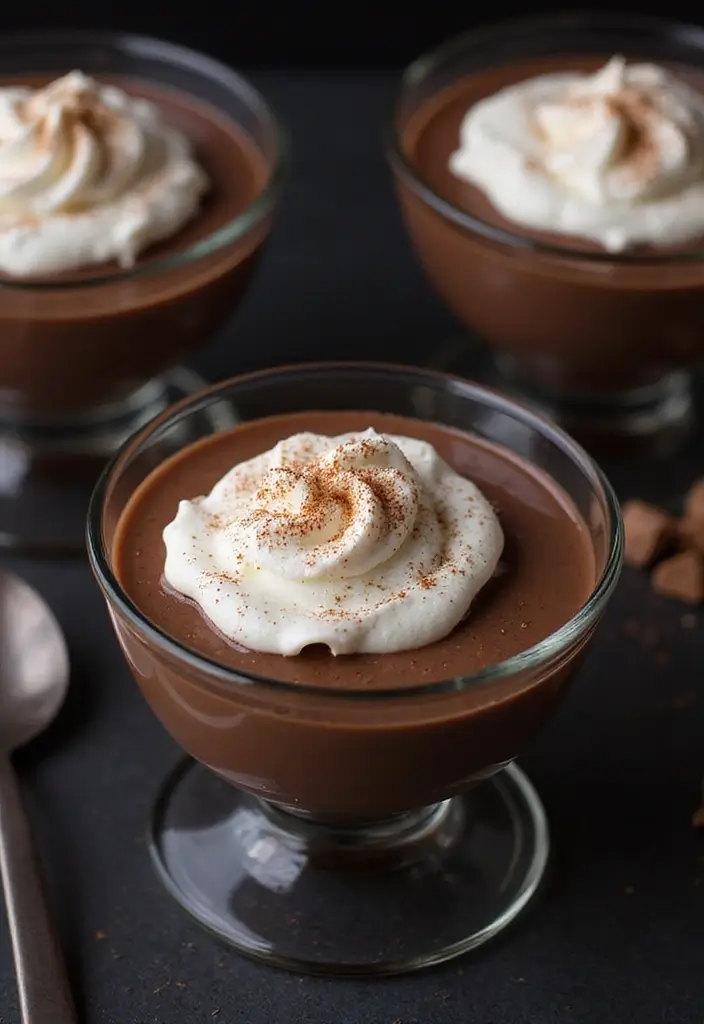
Indulge in the delightful experience of Mexican Chocolate Pudding, a dessert that brings rich flavors and a touch of excitement to your table. This creamy treat is not just about chocolate; it has a warm hint of cinnamon and a whisper of cayenne that dance on your palate. Imagine spooning into a velvety pudding, each bite reminding you of cozy nights and joyful gatherings. Serve this dessert in small cups for an elegant touch that impresses your guests!
Creating this mouthwatering dessert is quick and simple. You can whip it up in just 20 minutes, making it a perfect choice for last-minute cravings or gatherings. Plus, it’s gluten-free, so everyone can join in on the fun! You can even prepare it ahead of time and chill it for a refreshing finish to any meal.
Here’s how to make it:
Ingredients:
– 2 cups milk or dairy-free alternative
– ½ cup cocoa powder
– ½ cup sugar
– 2 tablespoons cornstarch
– 1 teaspoon cinnamon
– Pinch of cayenne pepper
Instructions:
1. In a saucepan, whisk together the cocoa powder, sugar, cornstarch, cinnamon, and cayenne until combined.
2. Gradually whisk in the milk until the mixture is smooth and lump-free.
3. Cook over medium heat, stirring continuously, until the pudding thickens to your desired consistency.
4. Pour into serving dishes and allow to chill in the refrigerator for at least one hour before serving.
For an extra special touch, consider these tips:
– Top with whipped cream to balance out the rich flavors.
– Sprinkle chili flakes on top for a surprising kick that will wow your taste buds.
Frequently Asked Questions:
– Can I use dark chocolate instead of cocoa? Yes! Melt dark chocolate and substitute it for cocoa powder for a deeper chocolate flavor.
Enjoy this delicious Mexican Chocolate Pudding that is sure to become a favorite in your dessert repertoire!
Mexican Chocolate Pudding
Editor’s Choice

Viva Naturals Organic Cacao Powder, 1lb – Unsweetened Cacao Powder With …
 Amazon$18.42
Clabber Girl Non-GMO Corn Starch, Gluten Free, 6.5 Ounce (Pack of 2)
 AmazonCheck Price
EurKitchen Professional Aluminum Whipped Cream Dispenser – Leak-Free Whi…
 Amazon$42.99
18. Strawberry Coconut Chia Pudding
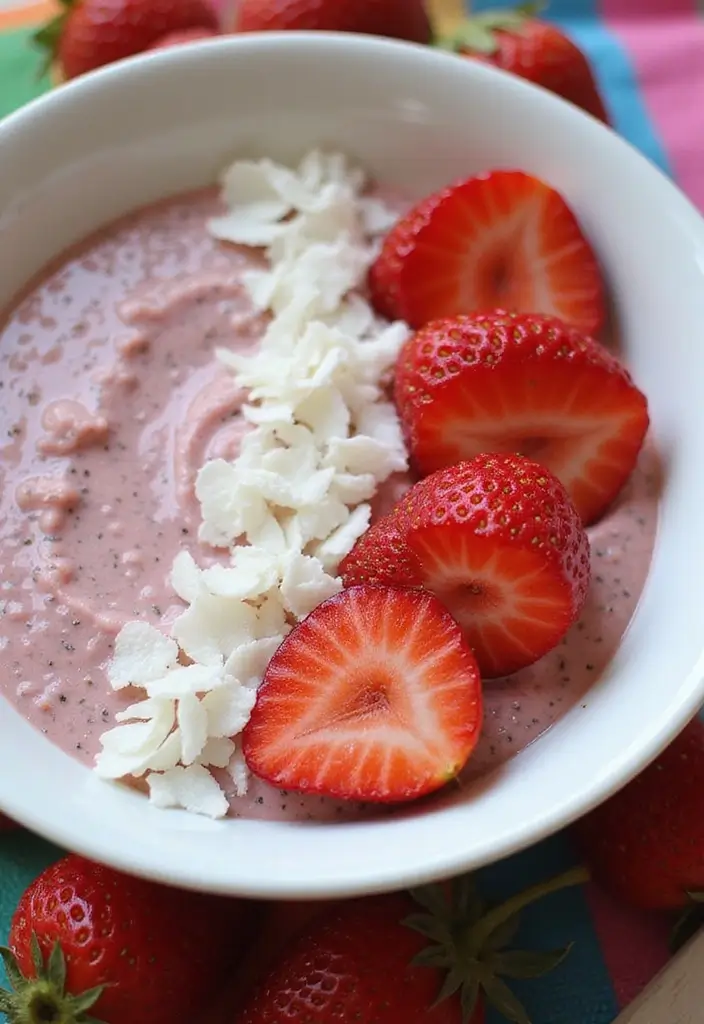
Treat yourself to a delightful bowl of Strawberry Coconut Chia Pudding. This dessert is not just gluten-free; it’s also packed with fiber and omega-3 fatty acids. Imagine a creamy coconut base layered with fresh, juicy strawberries. It’s a sweet escape that’s perfect for breakfast or as a light dessert after dinner.
Let’s break it down. You only need a few simple ingredients to whip up this treat. Plus, it takes less than ten minutes to prepare! The real magic happens when you let it chill, allowing the chia seeds to expand and create a pudding-like texture.
This recipe serves four and offers a healthy option at about 180 calories per serving. Here’s how you can make it:
Ingredients:
– ¼ cup chia seeds
– 1 cup coconut milk
– 2 tablespoons honey or maple syrup
– 1 cup fresh strawberries, sliced
Instructions:
1. In a bowl, mix the chia seeds, coconut milk, and your choice of sweetener.
2. Stir well, then let it sit for 5 minutes. Give it another stir to break up any clumps.
3. Cover and refrigerate for at least 2 hours, or overnight for best results.
4. Before serving, top with fresh strawberries for an extra burst of flavor.
To make your chia pudding perfect:
– Stir frequently while it thickens to avoid clumps.
– Add nuts or seeds on top for a satisfying crunch.
Curious about storage? This pudding can stay fresh in the fridge for up to 5 days in an airtight container. It’s an easy, healthy dessert that you can prepare in advance!
Now you can enjoy a delicious, refreshing treat that’s both nutritious and satisfying. Perfect for those warm days when you crave something sweet yet light!
Strawberry Coconut Chia Pudding
Editor’s Choice

BetterBody Foods Organic Chia Seeds 2 lbs, 32 Oz, with Omega-3, Non-GMO,…
 Amazon$11.97
Thai Kitchen Gluten Free Unsweetened Coconut Milk, 13.66 fl oz (Pack of 12)
 Amazon$18.96
Nate’s Organic 100% Pure, Raw & Unfiltered Honey – USDA Certified Organi…
 Amazon$8.54
19. Capirotada (Mexican Bread Pudding)
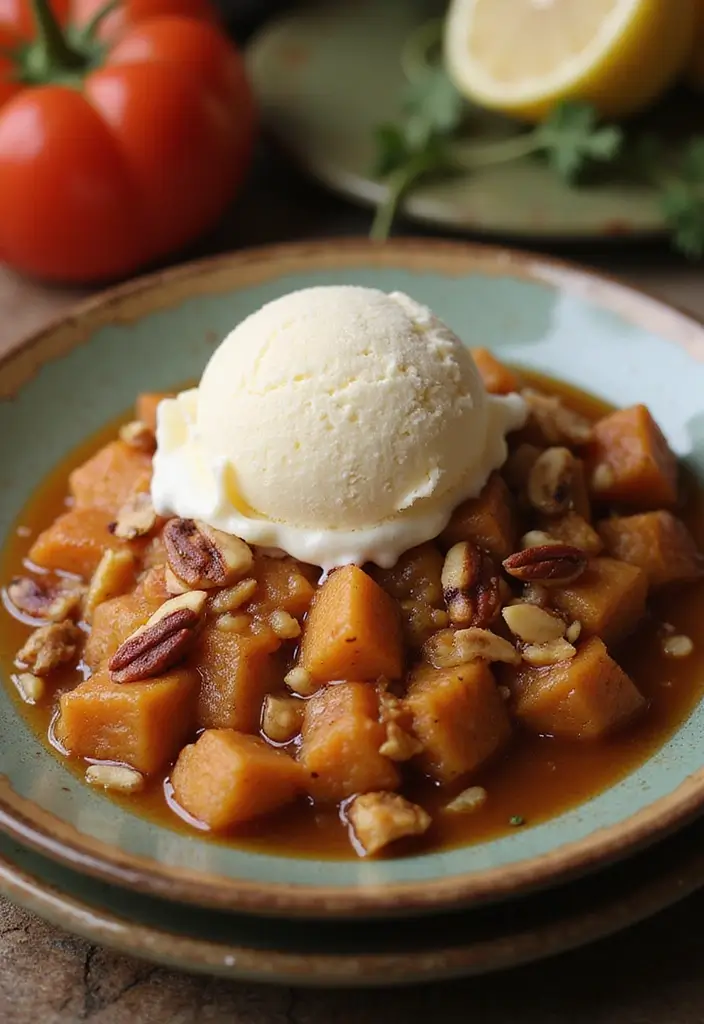
Capirotada, a beloved Mexican bread pudding, brings warmth to your table, especially during Lent. This delightful dessert combines gluten-free bread with rich spices, nuts, and dried fruits. It’s perfect for sharing with family and friends. Imagine serving it warm, topped with a scoop of creamy vanilla ice cream. Your guests will rave about this comforting treat!
Ready to make this delicious dessert? Here’s what you need:
Recipe Overview:
– Servings: 8
– Prep Time: 20 minutes
– Cook Time: 40 minutes
– Total Time: 1 hour
– Calories: 250 per serving
Ingredients:
– 6 slices gluten-free bread
– ½ cup brown sugar
– ½ cup raisins
– ½ cup chopped pecans
– 1 teaspoon cinnamon
– 2 cups milk (dairy or non-dairy)
Instructions:
1. Preheat your oven to 350°F (175°C).
2. Tear the gluten-free bread into bite-sized pieces and spread them in a baking dish.
3. In a saucepan, mix the brown sugar, raisins, pecans, cinnamon, and milk. Heat gently until the sugar dissolves.
4. Pour this sweet mixture over the bread. Let it soak for about 10 minutes so it absorbs all that flavor.
5. Bake for 40 minutes, or until the pudding is set and slightly golden.
For the Best Capirotada:
– Serve warm with a drizzle of cream or a scoop of vanilla ice cream.
– Customize it by adding your favorite nuts or dried fruits for extra flavor.
Frequently Asked Questions:
– Can I make this ahead of time? Yes! Prepare it a day early and simply reheat before serving.
This Capirotada recipe isn’t just a dessert; it’s a way to bring tradition into your home. Enjoy the sweet aroma and taste of Mexico with every bite!
Capirotada (Mexican Bread Pudding)
Editor’s Choice

King Arthur Gluten Free Bread Flour: 1:1 Replacement for Yeasted Recipes…
 Amazon$9.99
Amazon Grocery, Ground Cinnamon, 2.5 Oz (Previously Happy Belly, Packagi…
 Amazon$1.03
Alden’s, Organic Vanilla Bean Ice Cream, 48 oz (Frozen)
 AmazonCheck Price
20. Blueberry Lemon Rice Pudding
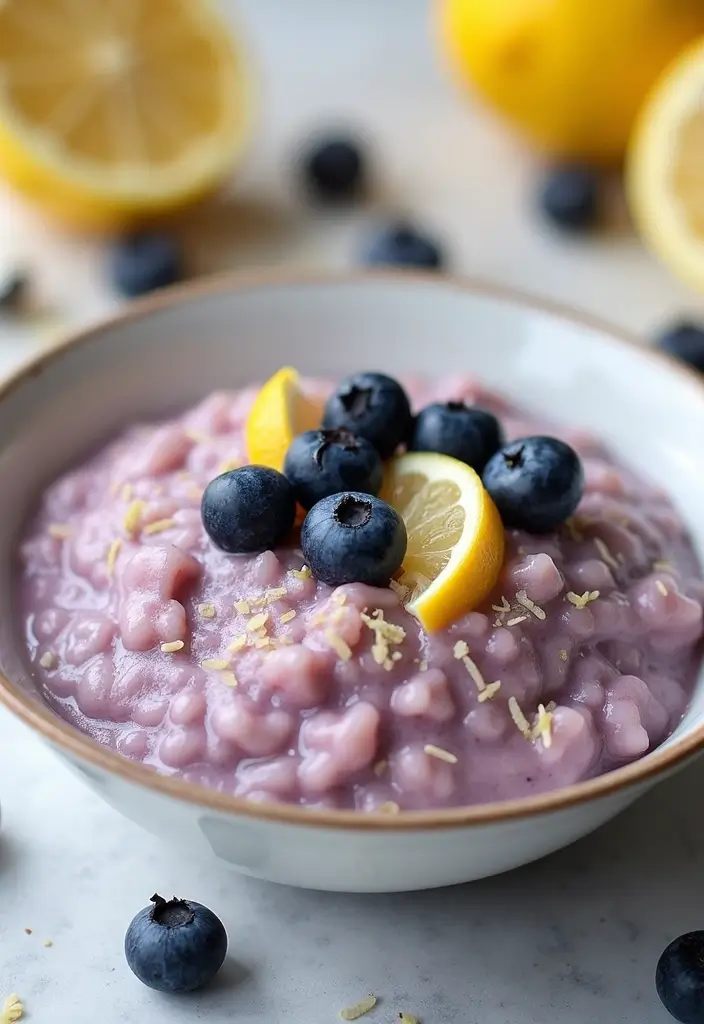
Indulge in the delightful taste of Blueberry Lemon Rice Pudding. This dish blends the creamy goodness of rice pudding with the zesty brightness of lemon and the sweetness of fresh blueberries. It’s the perfect dessert to bring a burst of flavor to your spring and summer gatherings, and it’s sure to impress your friends and family!
Imagine savoring a warm, comforting bowl of this pudding on a sunny day. The creamy texture pairs beautifully with the juicy blueberries, while the lemon zest brightens each bite. This dessert is not just a treat; it’s a celebration of fresh ingredients and vibrant flavors that will leave everyone asking for seconds.
Ready to make this easy recipe? Here’s what you’ll need:
Ingredients:
– 1 cup cooked rice
– 2 cups almond milk
– ¼ cup sugar
– 1 teaspoon lemon zest
– 1 cup fresh blueberries
Instructions:
1. In a saucepan, mix together the cooked rice, almond milk, sugar, and lemon zest.
2. Cook over medium heat, stirring frequently, until the mixture thickens, about 30 minutes.
3. Gently fold in the blueberries and serve warm or chilled.
Tips for the Best Pudding:
– Stir often to prevent clumping.
– Top with whipped cream for an extra touch of indulgence.
How to Store:
Keep leftovers in an airtight container in the fridge for up to 4 days. Enjoy this refreshing dessert anytime you crave something sweet and satisfying!
With this easy recipe, you can bring the charm of homemade desserts to your table. It’s not just delicious; it’s also a lovely way to enjoy seasonal fruits. Happy cooking!
Hosting a spring or summer gathering? This gluten free mexican dessert recipes pick—Blueberry Lemon Rice Pudding—wins friends fast. The creamy base, lemon brightness, and blueberries turn a simple dessert into a crowd-pleaser you can make ahead and enjoy guilt-free.
Blueberry Lemon Rice Pudding
Editor’s Choice

Califia Farms – Organic Unsweetened Almond Milk, 48 Oz, Dairy Free, Keto…
 AmazonCheck Price
Jello Sugar Free Chocolate Fudge Pudding Mix 1.4oz Box(Packaging May Var…
 AmazonCheck Price
EurKitchen Professional Aluminum Whipped Cream Dispenser – Leak-Free Whi…
 Amazon$42.99
21. Coconut Macaroons

Indulge in the sweet delight of Coconut Macaroons. These chewy treats burst with coconut flavor, making them the perfect snack for gatherings or a cozy night in. They’re not only easy to prepare but also a hit with friends and family. For an extra treat, consider dipping them in rich chocolate!
Here’s what you need to whip up a batch of these mouthwatering macaroons:
Recipe Overview:
– Servings: 24 macaroons
– Prep Time: 10 minutes
– Cook Time: 20 minutes
– Total Time: 30 minutes
– Calories: 100 per macaroon
Ingredients:
– 2 ¾ cups shredded coconut
– ½ cup sugar
– 2 egg whites
– 1 teaspoon vanilla extract
– Optional: melted chocolate for dipping
Instructions:
1. Preheat your oven to 325°F (165°C). This step ensures your macaroons bake evenly.
2. In a mixing bowl, combine shredded coconut, sugar, egg whites, and vanilla. Stir until the mixture is well combined.
3. Scoop the mixture onto a baking sheet lined with parchment paper. Make sure to pack them tightly so they hold their shape.
4. Bake for about 20 minutes, or until they turn a lovely golden brown.
5. Once cooled, dip them in melted chocolate if you want that extra touch of sweetness!
Tips for Perfect Macaroons:
– Make sure to pack the coconut mixture tightly when scooping to keep them from falling apart.
– Try adding almond extract for a different flavor twist!
Frequently Asked Questions:
– Can I use sweetened coconut?
Yes, sweetened coconut adds a nice boost of flavor!
With these simple steps, you’re on your way to creating delicious Coconut Macaroons. They’re easy to share and sure to impress anyone who tries them. Enjoy your baking adventure!
Coconut Macaroons
Editor’s Choice

365 by Whole Foods Market, Organic Shredded Coconut, 8 Ounce
 Amazon$3.99
Amazon Basics Silicone Rectangular Baking Mat, Non-Stick Reusable Oven B…
 Amazon$16.79
Wilton Candy Melts Melting Pot, Perfect for Dipping, Drizzling & Decorat…
 Amazon$28.14
22. Pumpkin Spice Muffins
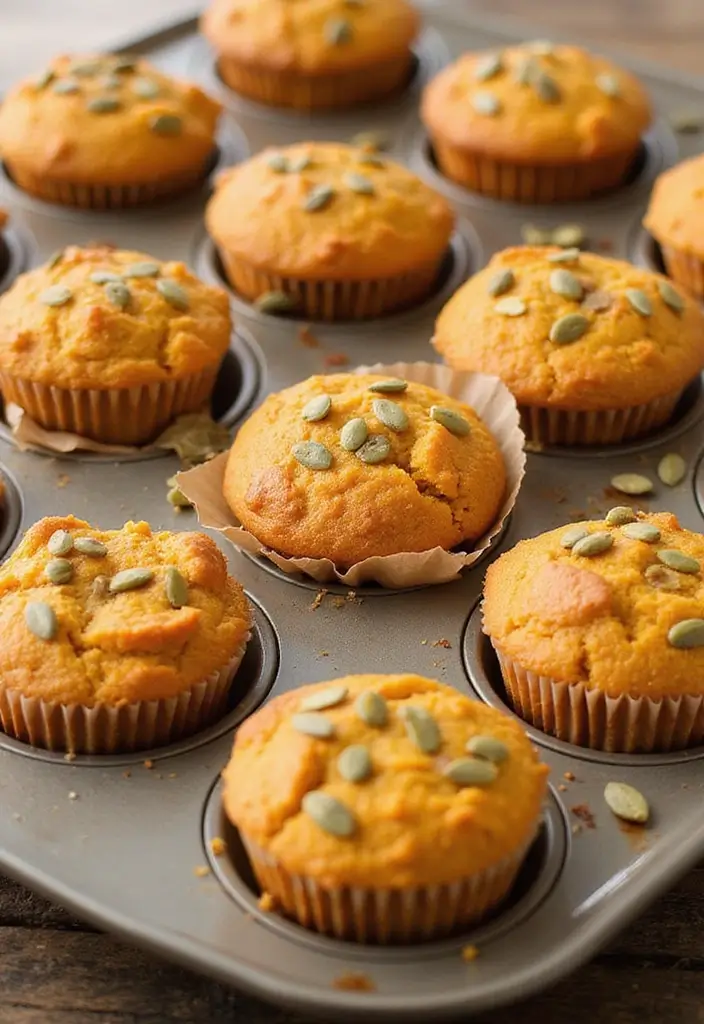
Indulge in the rich, comforting flavors of gluten-free Pumpkin Spice Muffins. These delightful treats are packed with the warm spices that make fall so special. Whether you enjoy them for breakfast or as an afternoon snack, their moist and tender crumb will have everyone reaching for more. Plus, they fill your kitchen with an inviting aroma that’s hard to resist!
Let’s break down the recipe so you can whip these up in no time. You’ll need just a few simple ingredients, making this a budget-friendly option for a cozy treat. With only 15 minutes of prep and 20 minutes of baking, you can enjoy fresh muffins that taste like they came from a bakery.
Recipe Overview:
– Servings: 12 muffins
– Prep Time: 15 minutes
– Cook Time: 20 minutes
– Total Time: 35 minutes
– Calories: 180 per muffin
Ingredients:
– 1 cup gluten-free flour
– 1 cup canned pumpkin puree
– ½ cup sugar
– 2 large eggs
– 1 teaspoon pumpkin spice
– ½ teaspoon baking soda
– ½ teaspoon baking powder
Instructions:
1. Preheat your oven to 350°F (175°C). Line a muffin tin with paper liners.
2. In a mixing bowl, combine all the ingredients. Stir until the mixture is smooth and well-blended.
3. Pour the batter evenly into the prepared muffin tins.
4. Bake for 20 minutes, or until a toothpick inserted into the center comes out clean.
5. Let the muffins cool for a few minutes before transferring them to a wire rack.
For an extra touch, you can add chocolate chips or nuts to the batter. This not only enhances flavor but also adds a delightful texture. Store any leftovers in an airtight container to keep them fresh and tasty for days.
Frequently Asked Questions:
– Can I use fresh pumpkin instead of canned?
Absolutely! Just make sure to puree it until smooth.
Now you’re ready to enjoy these pumpkin spice muffins. They’re perfect for sharing, or just keeping all to yourself. Enjoy every bite!
These pumpkin spice muffins are a cozy, gluten-free treat that turns any morning into fall. Bake a batch, freeze extras, and enjoy a quick breakfast or snack later—proving that gluten free Mexican dessert recipes can be both comforting and effortless.
Pumpkin Spice Muffins
Editor’s Choice

King Arthur, Measure for Measure Flour, Certified Gluten-Free, Non-GMO P…
 AmazonCheck Price

2Pack Silicone Muffin Pan for Baking with Metal Reinforced Frame, 12 Cup…
 Amazon$19.99
23. Chocolate Chip Cookies

Craving a sweet treat that won’t ruin your gluten-free lifestyle? Try these Chocolate Chip Cookies! They’re soft, chewy, and loaded with rich chocolate flavor, making them perfect for any occasion. Whether you’re hosting a party or simply treating yourself, these cookies will delight everyone who tries them.
Let’s get into the details. Here’s how to make 24 scrumptious cookies in just about half an hour:
Ingredients:
– 1 ½ cups gluten-free flour
– ½ cup softened butter
– ¾ cup brown sugar
– ½ cup granulated sugar
– 2 eggs
– 1 teaspoon vanilla extract
– 1 cup chocolate chips
Instructions:
1. Preheat your oven to 350°F (175°C). This ensures even baking.
2. In a mixing bowl, cream the softened butter with brown and granulated sugar until smooth and fluffy.
3. Beat in the eggs one at a time, then add the vanilla for a lovely aroma.
4. Gradually mix in the gluten-free flour until just combined. Then, fold in the chocolate chips.
5. Drop spoonfuls of dough onto a lined baking sheet, keeping them spaced apart.
6. Bake for 12 minutes. Let them cool a bit on the sheet before transferring them to a wire rack.
For the best results:
– Chill the dough for 30 minutes before baking to create thicker cookies.
– Mix it up by using milk, dark, or even white chocolate chips for a flavor twist.
Frequently Asked Questions:
– Can I freeze the dough? Yes! You can freeze the dough for up to 3 months. Just scoop it into balls, freeze, then store in a bag.
These cookies are not just gluten-free; they are a crowd-pleaser! You’ll love how easy they are to make and how delicious they taste. Perfect for sharing or enjoying all on your own!
Chocolate Chip Cookies
Editor’s Choice

King Arthur Measure for Measure Gluten-Free Flour: All-Purpose 1:1 Subst…
 Amazon$8.62
Amazon Basics Silicone Rectangular Baking Mat, Non-Stick Reusable Oven B…
 Amazon$16.79
Cookie Scoop Set, Include 1 Tbsp/2 Tbsp/3 Tbsp, Cookie Scoops for Baking…
 Amazon$16.99
24. Strawberry Shortcake
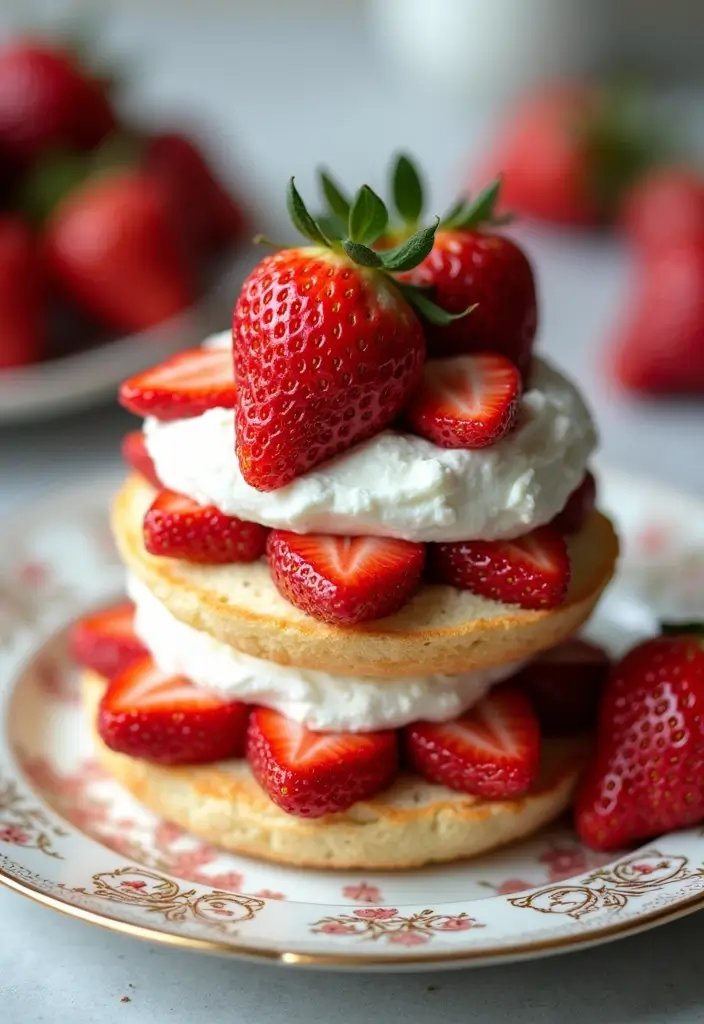
Indulge in the sweet taste of summer with this Strawberry Shortcake. This classic dessert is a delightful combination of juicy strawberries, fluffy whipped cream, and a tender gluten-free biscuit. Whether you’re hosting a backyard barbecue or enjoying a sunny afternoon, this treat brings joy to every occasion.
This recipe is quick and easy, making it perfect for anyone. In just 35 minutes, you can serve up a dessert that looks and tastes like a bakery masterpiece. Imagine biting into a soft biscuit topped with fresh strawberries and whipped cream—pure bliss!
Here’s how to make it:
Ingredients:
– 1 cup gluten-free flour
– ½ cup sugar
– 1 teaspoon baking powder
– ½ cup unsalted butter, softened
– 1 cup heavy cream
– 2 cups fresh strawberries, sliced
Instructions:
1. Preheat your oven to 350°F (175°C).
2. In a mixing bowl, whisk together the gluten-free flour, sugar, and baking powder.
3. Cut in the butter with a fork until the mixture resembles coarse crumbs.
4. Gradually add cold water, mixing until a dough forms. Press this dough into a greased baking dish.
5. Bake for 15 minutes, or until the biscuit is lightly golden and cooked through.
6. Allow it to cool slightly, then top with whipped cream and plenty of fresh strawberries.
For the best results, remember to keep your ingredients cold. This helps make your biscuit flaky and tender. A splash of vanilla extract in your whipped cream can add a lovely depth of flavor.
FAQ:
– How long does Strawberry Shortcake last? While it’s best enjoyed fresh, you can store it in the fridge for 1-2 days. Just note that the biscuit may soften over time.
Now go ahead and treat yourself! This Strawberry Shortcake is sure to be a hit at your next gathering or simply as a sweet reward for yourself. Enjoy every delicious bite!
Strawberry Shortcake
Editor’s Choice

King Arthur Measure for Measure Gluten-Free Flour: All-Purpose 1:1 Subst…
 Amazon$8.62
8-Piece Deep Glass Baking Dish Set with Plastic lids,Rectangular Glass B…
 Amazon$35.99
25. Chiles en Nogada Dessert
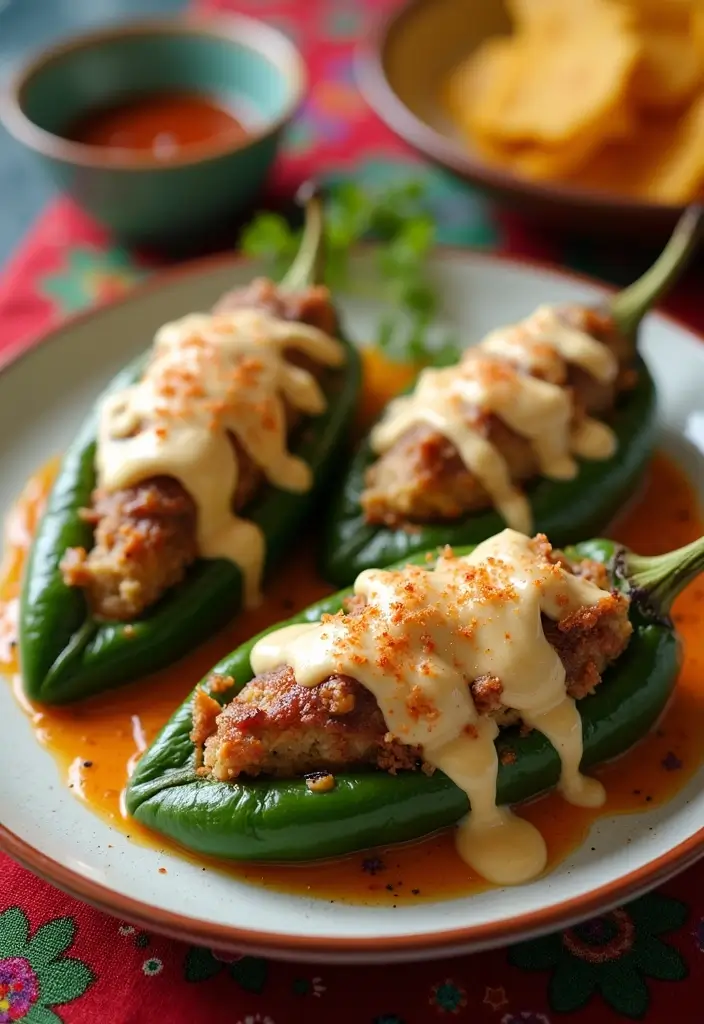
Indulge in the delightful twist of Chiles en Nogada Dessert. This sweet version of a classic savory dish offers a burst of flavors and colors, making it perfect for your next celebration. Imagine tender poblano peppers filled with a luscious sweet filling and drizzled with silky nogada sauce. It’s a treat that not only looks stunning on your table but also tantalizes your taste buds!
Let’s break down the recipe so you can make this show-stopping dessert at home. You’ll need a few simple ingredients, and the steps are easy to follow.
Recipe Overview:
– Servings: 6
– Prep Time: 30 minutes
– Cook Time: 30 minutes
– Total Time: 1 hour
– Calories: 300 per serving
Ingredients:
– 6 poblano peppers
– 1 cup sweetened cream cheese
– ½ cup chopped walnuts
– ½ teaspoon ground cinnamon
– ¼ cup powdered sugar
Instructions:
1. Begin by roasting the poblano peppers until the skin blisters. Once roasted, let them cool, then peel off the skin.
2. In a mixing bowl, combine sweetened cream cheese, chopped walnuts, and ground cinnamon. This creamy filling is the heart of your dessert!
3. Carefully stuff each roasted pepper with the sweet cream mixture. Make sure to fill them well for maximum flavor.
4. Just before serving, sprinkle with powdered sugar for a sweet finish that adds charm to your dish.
Want to elevate this dessert even more? Here are some fun tips:
– Use fresh walnuts for a delightful crunch.
– Experiment with fillings like fresh fruits or even chocolate for a unique twist.
Frequently Asked Questions:
– Can I prepare these ahead of time?
Yes, you can make them a day in advance. Just store them in the fridge and drizzle with powdered sugar before serving!
This Chiles en Nogada Dessert is not only a feast for the eyes but also a delectable treat that will impress your guests. Enjoy making this delightful dish and sharing it with your loved ones!
Chiles en Nogada Dessert
Editor’s Choice

Sow Right Seeds – Poblano Pepper Seeds for Planting – Non-GMO Heirloom P…
 Amazon$5.49
Diva Stuff Ultra Hydrating Lip Scrub for Soft Lips, Gentle Exfoliation, …
 AmazonCheck Price
Fisher Chef’s Naturals Chopped Walnuts 10 oz, 100% California Unsalted W…
 AmazonCheck Price
26. Raspberry Lime Sorbet
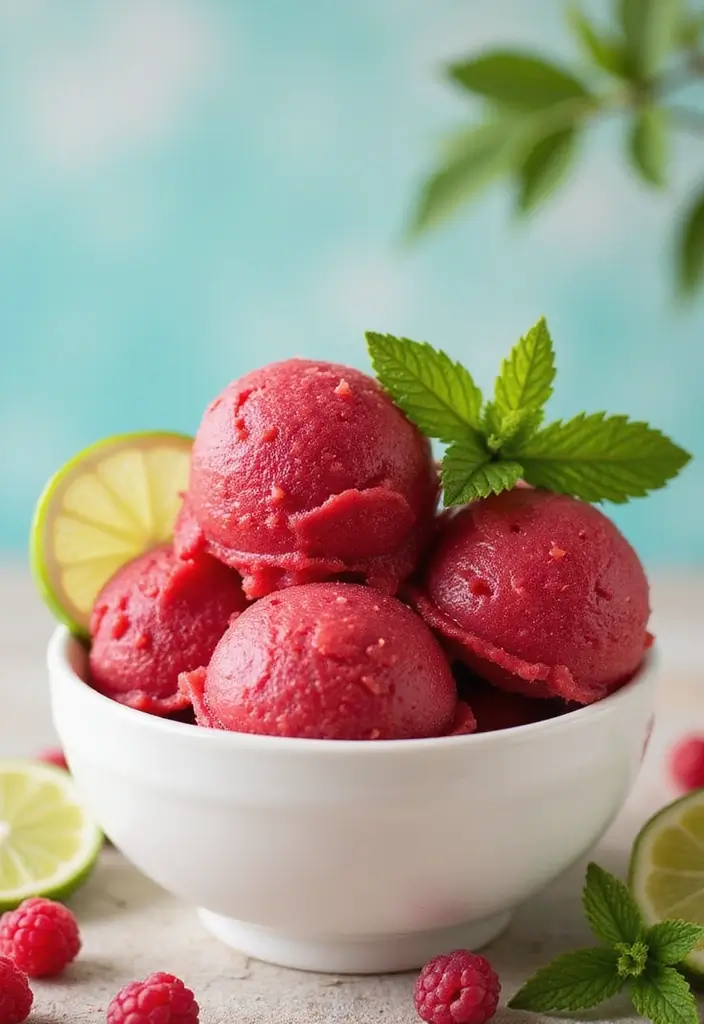
Cool down with a delightful Raspberry Lime Sorbet. This dessert is a perfect way to cleanse your palate after a hearty meal. It’s light, fruity, and incredibly refreshing, especially on warm days. Just imagine the sweet-tart flavor of ripe raspberries paired with zesty lime. Sounds tempting, right?
Making this sorbet is easy and requires just a few ingredients. You’ll need fresh raspberries, sugar, water, and a splash of lime juice. It only takes about 10 minutes of prep time, but you’ll need to freeze it for at least four hours. The wait will be worth it when you scoop into this vibrant sorbet!
Here’s how to whip it up:
Ingredients:
– 2 cups fresh raspberries
– 1 cup sugar
– 1 cup water
– 1 tablespoon lime juice
Instructions:
1. In a saucepan, combine sugar and water. Heat until the sugar dissolves.
2. Blend the fresh raspberries until smooth. Strain to remove the seeds if desired.
3. Mix the raspberry puree with the sugar syrup and lime juice until combined.
4. Pour the mixture into a container. Freeze for at least 4 hours until solid.
5. Serve the sorbet chilled. Garnish with lime slices for an extra touch.
Now, let’s make your sorbet even better! Here are some tips:
For the Perfect Sorbet:
– Use fresh raspberries for the best flavor.
– Add mint leaves to the blend for a refreshing twist.
Frequently Asked Questions:
– Can I use frozen raspberries? Yes, but fresh ones will give you a richer taste.
Enjoy this sorbet at your next gathering or simply as a treat for yourself! It’s a fun and flavorful way to enjoy dessert without gluten.
Raspberry Lime Sorbet
Editor’s Choice

Ninja BN701 Professional Plus Blender, 1400 Peak Watts, 3 Functions for …
 Amazon$109.99
Ice Cream Scoop, 2PCS Nonstick Anti-Freeze Food grade PPR + rubber Ice C…
 Amazon$6.45
Silicone Freezer Tray With Lid – Soup Freezer Container molds – Large Ic…
 Amazon$15.99
27. Chocolate Tamales
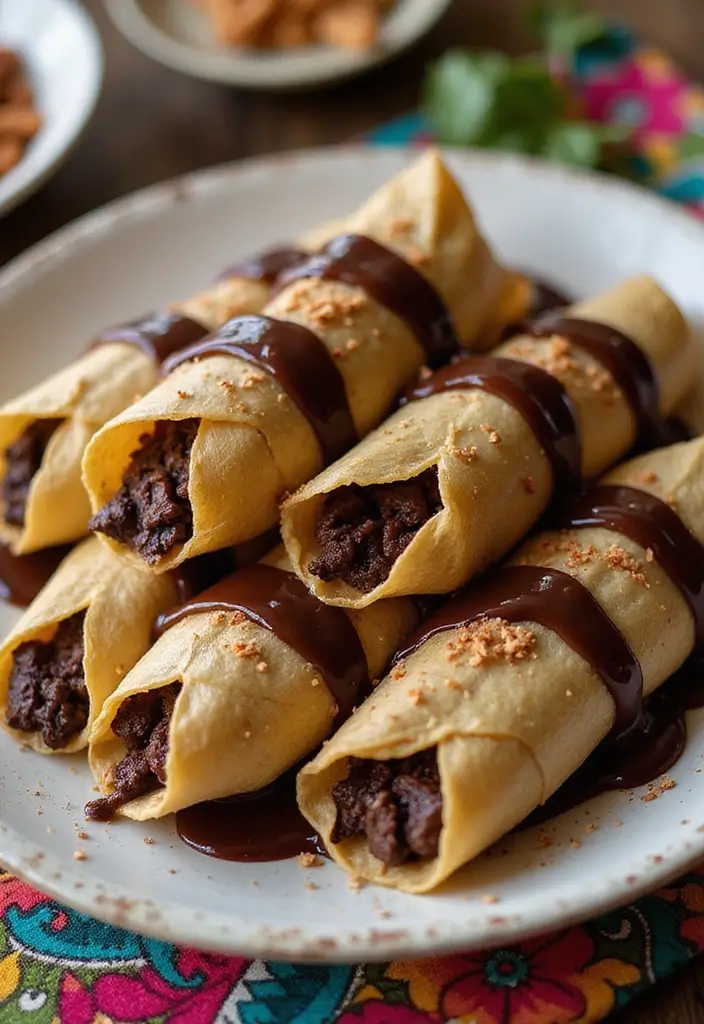
Chocolate Tamales bring a delightful twist to a classic Mexican favorite. Picture this: soft, sweet masa wrapped around a rich chocolate filling, all steamed to perfection in corn husks. These tamales are not just for special occasions; they are perfect for a cozy dessert night with friends or a festive gathering with family. Each bite is a warm hug of chocolatey goodness!
Ready to make your own? Here’s what you need:
Recipe Overview:
– Servings: 12 tamales
– Prep Time: 1 hour
– Cook Time: 1 hour
– Total Time: 2 hours
– Calories: 250 per tamale
Ingredients:
– 2 cups masa harina
– ½ cup cocoa powder
– 1 cup sugar
– 1 teaspoon baking powder
– 1 cup vegetable oil
– 1 cup milk
– 1 cup chocolate chips
– Corn husks for wrapping
Instructions:
1. Soak corn husks in warm water for about 30 minutes to make them pliable.
2. In a bowl, mix together masa harina, cocoa powder, sugar, and baking powder.
3. Stir in vegetable oil and milk until the mixture becomes a smooth dough.
4. Gently fold in the chocolate chips for extra richness.
5. Spread a portion of the masa onto each soaked corn husk. Fold it up and tie it with string or kitchen twine.
6. Place the tamales in a steamer and cook for 1 hour until they are firm and cooked through.
Here are some tips for your tasty tamales:
– Don’t overfill: This helps them cook evenly.
– Serve with chocolate sauce: A drizzle adds a delightful touch of sweetness.
Have leftovers? No problem! You can freeze them and reheat when you’re ready for another chocolate treat.
Frequently Asked Questions:
– Can I make these ahead of time? Absolutely! They freeze well and taste great reheated.
Enjoy your chocolate tamales, and watch your friends and family smile with every bite!
Chocolate Tamales
Editor’s Choice

P.A.N. White Corn Meal – Pre-cooked Gluten Free and Kosher Flour for Are…
 AmazonCheck Price
Corn Husks for Tamales 1 lb – Premium Dried Hojas de Maiz, Natural and A…
 Amazon$18.97
365 by Whole Foods Market, Semi-Sweet Chocolate Baking Chips, 12 Ounce
 Amazon$5.39
Conclusion
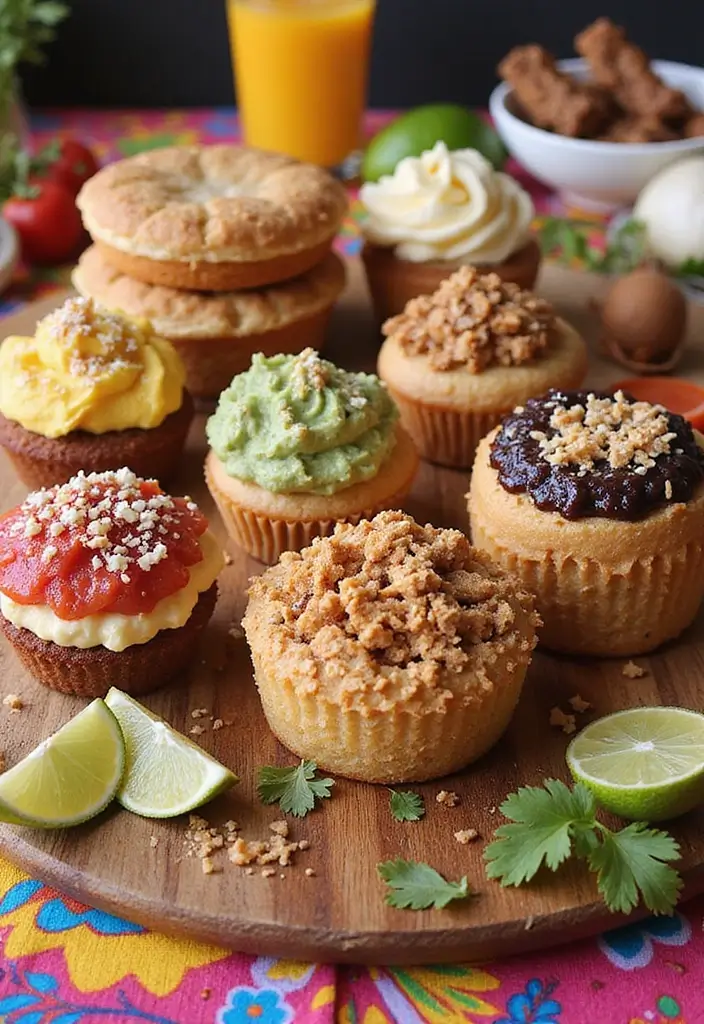
Exploring these 27 gluten-free Mexican dessert recipes opens the door to a world of flavor and fun. From the richness of chocolate to the freshness of fruit, these desserts cater to every palate and occasion. Each recipe is not just about satisfying your sweet tooth but also about celebrating the vibrant culture of Mexico. With all these delicious options, you’re sure to find the perfect treat for your next gathering!
Try one or try them all – your friends and family will thank you for the delightful experience!
Note: We aim to provide accurate product links, but some may occasionally expire or become unavailable. If this happens, please search directly on Amazon for the product or a suitable alternative.
This post contains Amazon affiliate links, meaning I may earn a small commission if you purchase through my links, at no extra cost to you.
Frequently Asked Questions
What Are Some Easy Gluten Free Mexican Dessert Recipes for Beginners?
If you’re new to cooking gluten free Mexican desserts, you’ll love the variety of easy dessert recipes available! Consider starting with classic treats like flan or chocoflan, which are simple to make and full of flavor. You can also try rice pudding or coconut macaroons for a delightful twist. These recipes require minimal ingredients and are perfect for special occasions!
Are Gluten Free Mexican Desserts Suitable for People With Celiac Disease?
Absolutely! Gluten free Mexican desserts are a fantastic option for those with celiac disease or gluten sensitivities. Many traditional Mexican treats can be easily adapted to be gluten free. Just ensure that you use certified gluten free ingredients and avoid cross-contamination in the kitchen. Enjoying these flavorful sweets can be both safe and delicious!
How Can I Make Traditional Mexican Desserts Gluten Free?
Transforming traditional Mexican desserts into gluten free versions is easier than you might think! Start by substituting regular flour with gluten free flour blends, almond flour, or rice flour. For recipes like pan de muerto or mole cake, simply replace the wheat flour and follow the original recipe. You’ll be amazed at how well these substitutions work while keeping the authentic flavors intact!
What Ingredients Are Commonly Used in Gluten Free Mexican Desserts?
Gluten free Mexican desserts often feature a variety of delicious ingredients. You’ll commonly find almond flour, coconut flour, cornmeal, and rice flour as gluten free alternatives. Sweeteners like agave syrup and coconut sugar are popular, along with traditional flavors like cinnamon, vanilla, and chocolate. These ingredients combine to create delightful and flavorful sweets!
Can I Use Alternative Sweeteners in Gluten Free Mexican Dessert Recipes?
Absolutely! Alternative sweeteners can be a great addition to gluten free Mexican dessert recipes. Options like stevia, honey, or maple syrup can replace traditional sugars. Just be mindful of their sweetness levels and how they interact with other ingredients. Experimenting with these alternatives can lead to deliciously unique and healthier versions of your favorite Mexican treats!
Related Topics
gluten free
Mexican desserts
easy dessert recipes
traditional Mexican treats
flavorful sweets
special occasion desserts
family-friendly
quick desserts
holiday baking
dessert for parties
healthy treats
cooking with kids

