Are you craving something sweet but need to stick to gluten-free options? You’re not alone. With more people looking for delicious treats that meet gluten-free diets, I felt inspired to whip up a collection of dessert recipes that everyone can enjoy. Whether you’re gluten-sensitive, have celiac disease, or simply want to explore new flavors, these recipes are here to satisfy your sweet tooth.
If you’re someone who loves desserts but struggles with gluten, this post is for you. You might be tired of missing out on your favorite treats at parties or family gatherings. Maybe you’ve tried a few gluten-free options and found them lacking in flavor or texture. I get it—finding desserts that taste good and fit your lifestyle can be a challenge.
That’s why I pulled together 27 easy gluten-free dessert recipes that are not only simple to make but also incredibly tasty. From gooey brownies to light and fruity cakes, there’s something for every occasion. These recipes are perfect for birthdays, holidays, or just a cozy night in when you want a sweet treat.
You’ll discover how easily you can create mouthwatering desserts without gluten, using ingredients you probably have at home. Each recipe is designed to be approachable, so you won’t need to be a baking pro to impress your friends or family. Plus, they’ll love them just as much as you do, whether or not they follow a gluten-free diet.
So, let’s dive into these delicious gluten-free desserts. Get ready to enjoy sweet moments that everyone can share, no matter their dietary preferences!
1. Chocolate Avocado Mousse
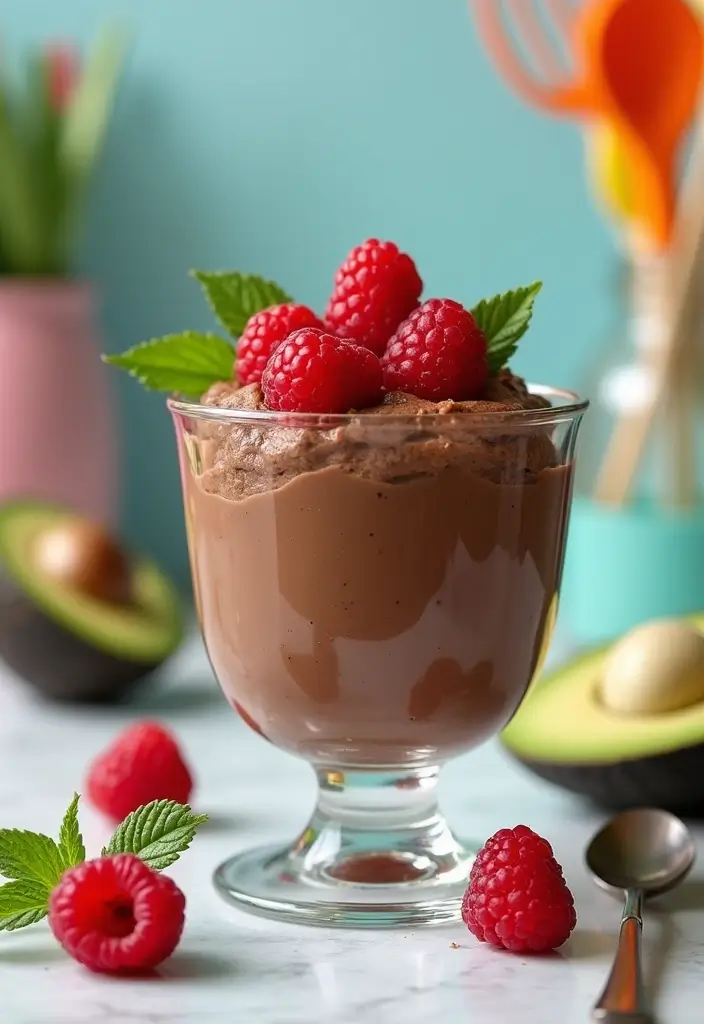
Indulge in the creamy delight of Chocolate Avocado Mousse, a dessert that is as nutritious as it is delicious. This treat is perfect for anyone, especially kids who will be amazed that they’re enjoying something made from avocados! With rich cocoa powder, a touch of pure maple syrup, and a hint of vanilla, you can create a dessert that feels like a guilty pleasure but is actually a healthy choice.
This mousse isn’t just gluten-free; it’s also packed with healthy fats and nutrients from avocados. It’s a smart dessert option that allows you to satisfy your sweet tooth while still being kind to your body. Plus, it’s quick to make, taking only about 10 minutes from start to finish.
Here’s how to whip it up:
Ingredients:
– 2 ripe avocados
– 1/2 cup unsweetened cocoa powder
– 1/3 cup pure maple syrup
– 1 teaspoon vanilla extract
– A pinch of sea salt
Instructions:
1. Cut the avocados in half and remove the pit. Scoop the flesh into a blender or food processor.
2. Add the cocoa powder, maple syrup, vanilla extract, and sea salt to the blender.
3. Blend until the mixture is smooth and creamy. Stop to scrape down the sides as needed.
4. Taste the mousse and add more maple syrup if you like it sweeter.
5. Spoon the mousse into serving glasses and chill in the refrigerator for at least 30 minutes before serving.
For an extra special touch, top with fresh berries or a dollop of whipped coconut cream. Make sure your avocados are perfectly ripe for the best texture!
Frequently Asked Questions:
– Can I use honey instead of maple syrup? Yes, honey works nicely too.
– How long does it last in the fridge? It’s best enjoyed within 2-3 days for freshness.
This mousse is not just a dessert; it’s also a fun activity you can share with the kids. Enjoy creating this delightful treat together!
Chocolate Avocado Mousse
Editor’s Choice


Butternut Mountain Farm Pure Vermont Maple Syrup, Grade A, Dark Color, R…
 Amazon$17.97
Ninja BL660 Professional Compact Smoothie & Food Processing Blender, 110…
 Amazon$99.99
2. Peanut Butter Chocolate Chip Cookies
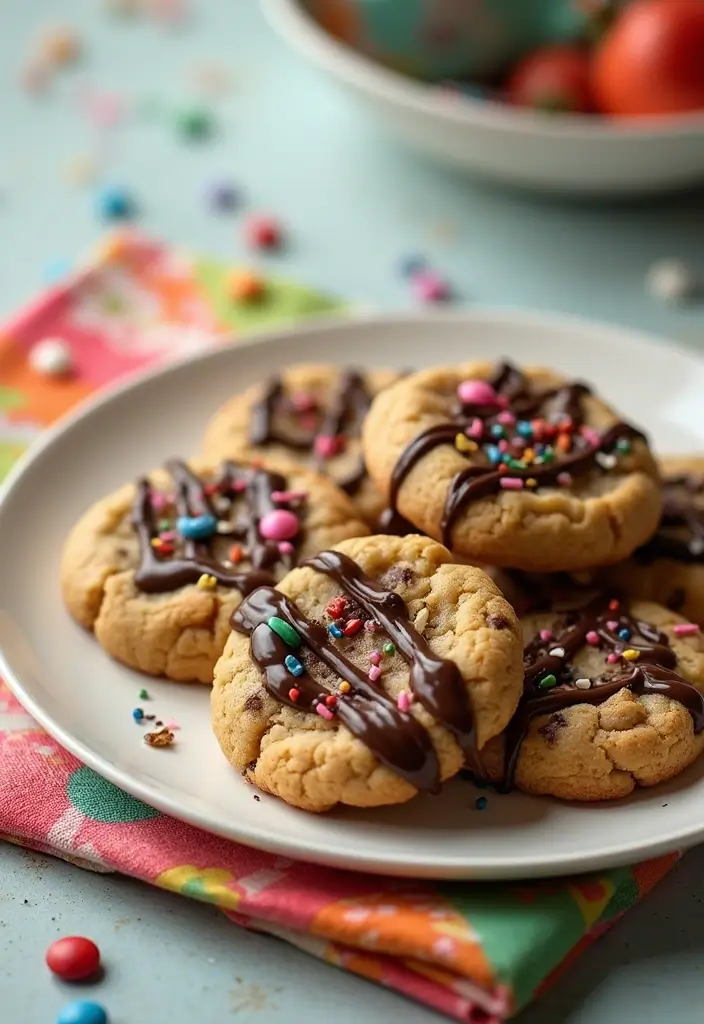
Craving something sweet and satisfying? These Peanut Butter Chocolate Chip Cookies are the perfect treat for you! Not only are they gluten-free, but they come together in just 20 minutes. Imagine the delightful smell of fresh cookies wafting through your kitchen, with the rich aroma of peanut butter mingling with melted chocolate chips. Kids and adults alike will be reaching for these delicious bites!
This easy recipe requires just four ingredients. You won’t need fancy tools or hours in the kitchen. Plus, the peanut butter adds a protein boost, making these cookies a more filling option. They’re great for parties, snack time, or whenever you need a sweet pick-me-up.
Here’s how to make them:
Recipe Overview:
– Servings: 12
– Prep Time: 10 minutes
– Cook Time: 10 minutes
– Total Time: 20 minutes
– Calories: Approximately 100 per cookie
Nutrition Information:
– Fat: 5g
– Carbohydrates: 8g
– Protein: 3g
Ingredients:
– 1 cup creamy peanut butter
– 1/2 cup sugar
– 1 egg
– 1/2 cup gluten-free chocolate chips
Instructions:
1. Preheat your oven to 350°F (175°C).
2. In a bowl, mix the peanut butter and sugar until smooth.
3. Add in the egg and stir until everything is well combined.
4. Gently fold in the chocolate chips.
5. Drop spoonfuls of dough onto a baking sheet lined with parchment paper.
6. Bake for about 10 minutes, or until the edges turn golden brown.
7. Let the cookies cool on a wire rack before enjoying.
Want to customize your cookies? Add some chopped nuts or coconut flakes for a fun twist! Adjust the sweetness based on your taste, especially if you love darker chocolate.
Frequently Asked Questions:
– Can I use almond butter instead of peanut butter?
Yes, almond butter works just as well!
– How do I store leftover cookies?
Keep them in an airtight container at room temperature for up to a week.
Whip up these cookies for your next gathering, and watch them disappear in no time!
Peanut Butter Chocolate Chip Cookies
Editor’s Choice

King Arthur Measure for Measure Gluten-Free Flour: All-Purpose 1:1 Subst…
 Amazon$8.62
3. Berry Coconut Popsicles
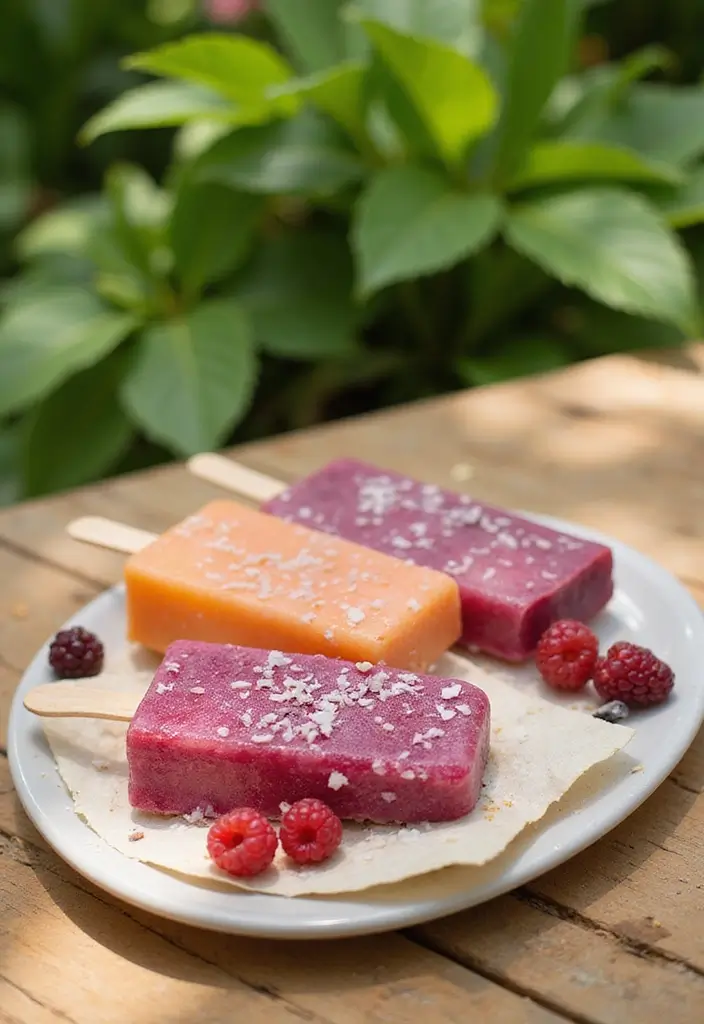
Beat the summer heat with Berry Coconut Popsicles! These delightful treats are a perfect gluten-free dessert for sunny days and fun gatherings. With a blend of sweet mixed berries and creamy coconut milk, they offer a refreshing escape with every bite. Plus, they’re easy to make, ensuring your kids can indulge without any guilt. The bright colors make them eye-catching, and the best part? You can prepare them ahead of time, leaving you free to enjoy the party!
Recipe Overview:
– Servings: 6
– Prep Time: 15 minutes
– Total Time: 4 hours (freezing time)
– Calories: About 80 per popsicle
Nutrition Information:
– Fat: 5g
– Carbohydrates: 8g
– Protein: 1g
Ingredients:
– 1 cup mixed berries (strawberries, blueberries, raspberries)
– 1 can (13.5 oz) full-fat coconut milk
– 2 tablespoons honey or maple syrup (to taste)
Instructions:
1. In a blender, combine mixed berries and coconut milk. Blend until smooth.
2. Taste the mixture, and add honey or maple syrup if you want it sweeter.
3. Pour the blend into popsicle molds, leaving a little space at the top.
4. Insert sticks and freeze for at least 4 hours, or until solid.
5. To remove, run warm water over the molds for a few seconds.
Tips for Extra Fun:
– Add texture: Mix in whole berries before pouring for a fun surprise.
– Experiment with flavors: Try using pineapple or mango for a tropical twist!
Common Questions:
– Can I use canned coconut milk? Absolutely! Just opt for full-fat for that rich creaminess.
– How long can I store these popsicles? They last about a month in the freezer, perfect for spontaneous treats!
These popsicles are not just delicious; they’re a colorful way to cool down and enjoy quality time with family. Get ready for smiles all around!
Berry Coconut Popsicles
Editor’s Choice

Ninja BL660 Professional Compact Smoothie & Food Processing Blender, 110…
 Amazon$99.99
Oneroot 100% Organic Canadian Wildflower Honey – 17.6 Oz/1.1 Lbs, Unheat…
 AmazonCheck Price
4. Vanilla Coconut Macaroons
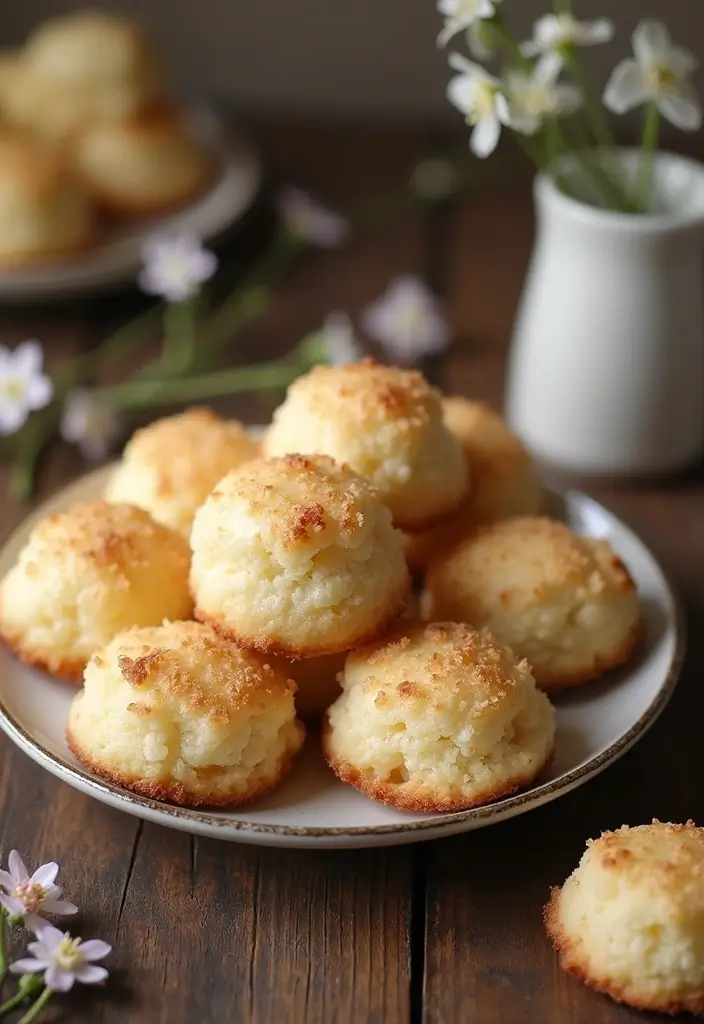
Treat yourself to the deliciousness of Vanilla Coconut Macaroons! These chewy, sweet delights are perfect for any occasion, whether it’s a kids’ party or a cozy family gathering. With just a handful of simple ingredients, you can whip up a batch that everyone will love. The tropical taste of coconut, combined with a hint of vanilla, makes these cookies a treat for your taste buds.
What’s even better? You can prepare these macaroons in a flash! They bake quickly, so you won’t have to wait long to enjoy them. Plus, feel free to get creative! You can dip them in melted chocolate for an extra indulgent touch.
Here’s how to make them:
Recipe Overview:
– Servings: 15
– Prep Time: 10 minutes
– Cook Time: 15 minutes
– Total Time: 25 minutes
– Calories: Approximately 120 per macaroon
Nutrition Information:
– Fat: 4g
– Carbohydrates: 22g
– Protein: 2g
Ingredients:
– 3 cups shredded unsweetened coconut
– 1/2 cup sugar
– 1/4 cup almond flour
– 3 egg whites
– 1 teaspoon vanilla extract
Instructions:
1. Preheat your oven to 325°F (160°C).
2. In a mixing bowl, combine the shredded coconut, sugar, almond flour, egg whites, and vanilla extract. Stir until everything is well mixed.
3. Use a spoon or cookie scoop to drop heaping tablespoons of the mixture onto a parchment-lined baking sheet.
4. Bake for about 15 minutes, or until the edges turn golden brown.
5. Let the macaroons cool completely before enjoying them.
Want to add a twist? Try dipping cooled macaroons in melted dark chocolate! Adjust the sugar to suit your taste.
Frequently Asked Questions:
– Can I use sweetened coconut? Yes, but it may make them sweeter than intended.
– How should I store these? Keep them in an airtight container at room temperature for up to a week.
These Vanilla Coconut Macaroons are not just a recipe; they’re a fun way to spend time with your kids in the kitchen. Enjoy creating sweet memories together!
Fun fact: Vanilla Coconut Macaroons come together in under 15 minutes with just 4 simple ingredients. They bake quickly, so you won’t wait long to share these gluten free dessert recipes easy with family and friends.
Vanilla Coconut Macaroons
Editor’s Choice

365 by Whole Foods Market, Organic Shredded Coconut, 8 Ounce (Pack of 2)
 AmazonCheck Price
Blue Diamond Almonds Almond Flour, Gluten Free, Blanched, Finely Sifted,…
 Amazon$9.91
Amazon Basics Silicone Rectangular Baking Mat, Non-Stick Reusable Oven B…
 Amazon$16.79
5. Lemon Blueberry Muffins
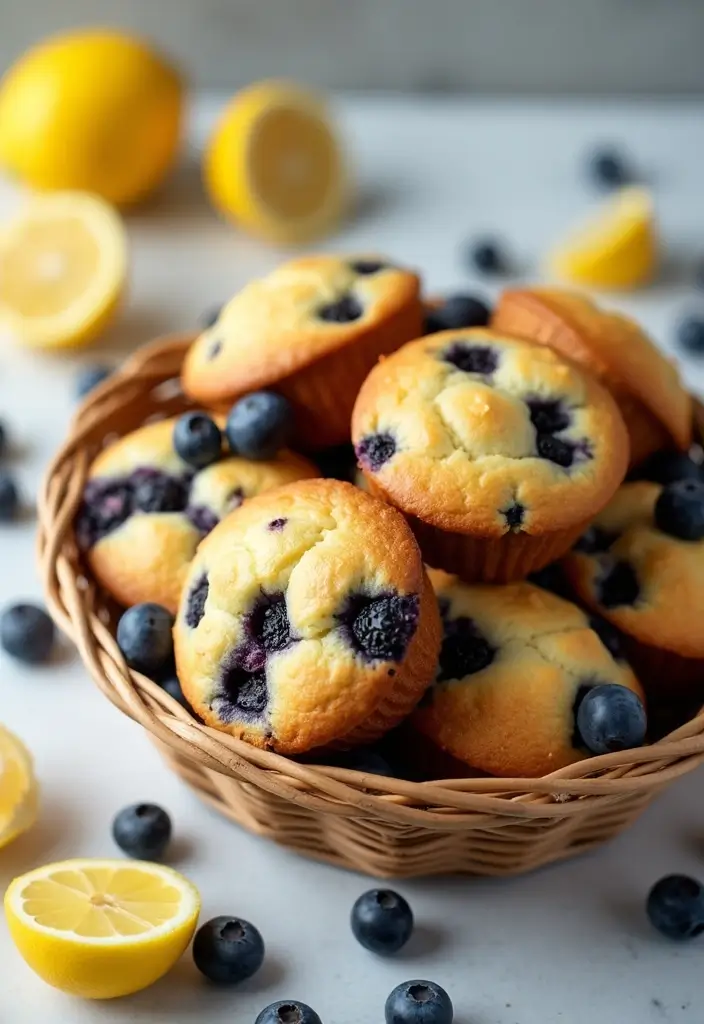
Looking for a sweet treat that’s both delicious and gluten-free? Try these Lemon Blueberry Muffins! They are light, fluffy, and bursting with the bright flavors of lemon and juicy blueberries. Perfect for dessert or a cheerful breakfast, these muffins will delight kids and adults alike.
Imagine biting into a warm muffin with a zesty lemon kick and a burst of sweet blueberries. They’re easy to whip up, making them a fantastic choice for any occasion. Plus, they add a splash of color to your dessert table, which is always a win!
Let’s dive into the recipe so you can enjoy these tasty treats:
Recipe Overview:
– Servings: 12 muffins
– Prep Time: 15 minutes
– Cook Time: 20 minutes
– Total Time: 35 minutes
– Calories: About 150 per muffin
Nutritional Information:
– Fat: 5g
– Carbohydrates: 24g
– Protein: 3g
Ingredients:
– 2 cups almond flour
– 1/2 cup sugar
– 2 large eggs
– 1/2 cup coconut oil, melted
– 2 tablespoons lemon juice
– Zest of 1 lemon
– 1 cup fresh blueberries
– 1 teaspoon baking powder
– 1/2 teaspoon baking soda
Instructions:
1. Preheat your oven to 350°F (175°C) and line a muffin tin with paper liners.
2. In a large bowl, mix almond flour, sugar, baking powder, and baking soda.
3. In another bowl, whisk together the eggs, melted coconut oil, lemon juice, and lemon zest.
4. Combine the wet ingredients with the dry ingredients and stir until just mixed. Gently fold in the blueberries.
5. Distribute the batter evenly into the muffin cups.
6. Bake for 20 minutes or until a toothpick inserted comes out clean.
7. Allow them to cool slightly before enjoying!
Tips:
– Avoid overmixing the batter; this keeps your muffins airy and light.
– Feel free to swap in other fruits like raspberries for a fun twist!
Frequently Asked Questions:
– Can I use frozen blueberries? Yes! Just fold them in gently to prevent discoloring the batter.
– How should I store these muffins? Keep them in an airtight container at room temperature for up to 3 days.
These Lemon Blueberry Muffins will bring joy to any gathering. They are simple, vibrant, and oh-so-delicious! Enjoy baking and sharing them with your loved ones!
Lemon Blueberry Muffins
Editor’s Choice

Blue Diamond Almonds Almond Flour, Gluten Free, Blanched, Finely Sifted,…
 Amazon$9.91
Amazon Basics Nonstick Round Muffin Baking Pan, 12 Cups, Set of 2, Gray,…
 AmazonGBP 11.23
6. No-Bake Cheesecake Bites
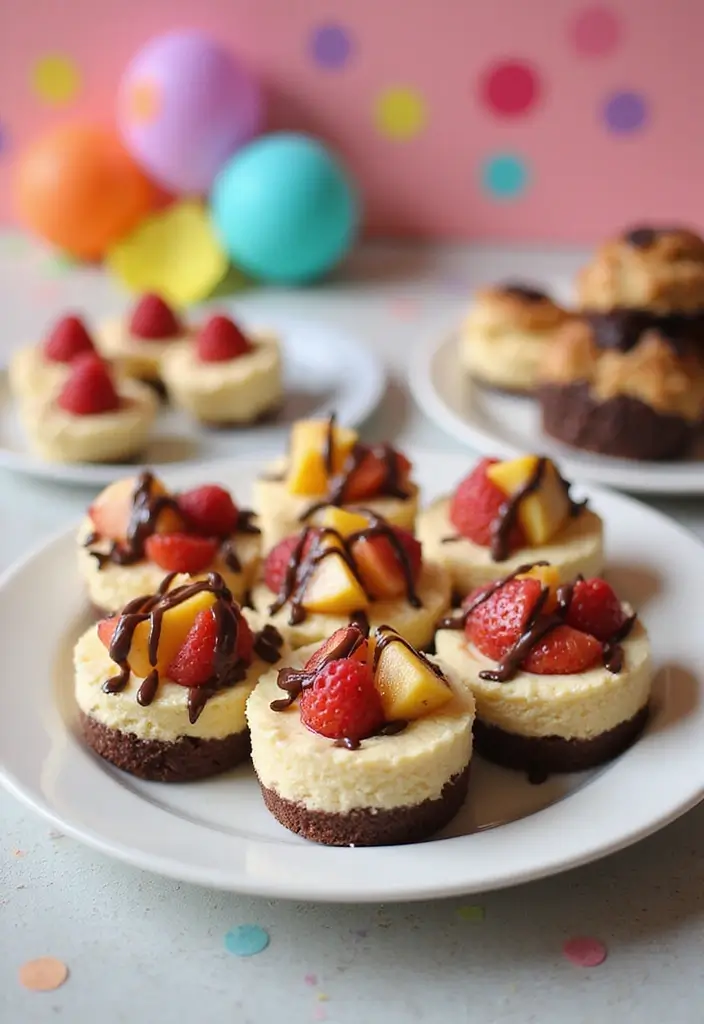
Are you looking for a simple yet delicious dessert that will impress your guests? Look no further than these No-Bake Cheesecake Bites. They are creamy, crunchy, and perfect for any occasion. Plus, they don’t require an oven, making them a great choice for busy days when you want something sweet without the hassle.
You can easily customize these bites with your favorite toppings. Think fresh fruits, chocolate drizzles, or crunchy nuts. This versatility means you can adapt them for birthdays, holidays, or just a fun family treat.
Here’s how to make them:
Recipe Overview:
– Servings: 16
– Prep Time: 15 minutes
– Cook Time: 0 minutes
– Total Time: 15 minutes
– Calories: Approximately 100 per bite
Nutritional Information:
– Fat: 7g
– Carbohydrates: 10g
– Protein: 2g
Ingredients:
– 1 1/2 cups gluten-free graham cracker crumbs
– 1/4 cup sugar
– 1/2 cup melted coconut oil
– 2 cups cream cheese, softened
– 1/2 cup powdered sugar
– 1 teaspoon vanilla extract
Instructions:
1. In a mixing bowl, combine the graham cracker crumbs, sugar, and melted coconut oil until blended.
2. Press this mixture into the bottom of a lined muffin tin to form a crust.
3. In another bowl, beat together the cream cheese, powdered sugar, and vanilla until smooth and creamy.
4. Spoon the cheesecake mixture over the crusts in the muffin tin, filling them generously.
5. Place the muffin tin in the refrigerator for at least 2 hours to set.
6. Once set, pop out the bites and serve them with your favorite toppings, like fresh strawberries or a drizzle of chocolate.
Tips:
– Freeze them for a refreshing treat on hot days.
– Experiment with different toppings to keep things exciting.
FAQs:
– How long do these last in the fridge? They stay fresh for up to a week in an airtight container.
– Can I swap cream cheese for Greek yogurt? Yes, this will make them lighter in texture!
These No-Bake Cheesecake Bites are sure to be a hit, leaving everyone craving more. Enjoy making and sharing them!
No-Bake Cheesecake Bites
Editor’s Choice

Amazon Brand – Happy Belly Honey Graham Crackers, 1.8 pound (Pack of 2)
 AmazonCheck Price
Silicone Muffin Pans for Baking with Metal Frame, Egg Bite Molds, Cupcak…
 Amazon$24.97
Hamilton Beach 6-Speed Electric Hand Mixer with Whisk, Traditional Beate…
 Amazon$27.95
7. Chocolate-Dipped Strawberries

Chocolate-Dipped Strawberries are a dessert that brings joy to any occasion. These sweet treats combine the freshness of strawberries with rich, creamy chocolate. Whether you’re hosting a party or looking for a fun activity with your kids, making chocolate-dipped strawberries is a delightful choice that’s sure to impress.
Imagine biting into a juicy strawberry, its tartness balanced by luscious chocolate. This dessert isn’t just a feast for your taste buds; it also makes a stunning centerpiece on any dessert table. As seen in many food blogs, this classic treat is a favorite for birthdays, anniversaries, or even a cozy movie night at home.
Here’s how you can make these delicious snacks yourself:
Ingredients:
– 12 large strawberries, washed and dried
– 1 cup gluten-free dark chocolate chips
– Optional toppings: crushed nuts, colorful sprinkles, or shredded coconut
Instructions:
1. In a microwave-safe bowl, melt the chocolate chips in 30-second intervals. Stir well until the mixture is smooth and creamy.
2. Hold each strawberry by the stem and dip it into the melted chocolate, allowing any excess to drip off.
3. Place the chocolate-covered strawberries on a sheet of parchment paper. Before the chocolate hardens, sprinkle your choice of toppings for added flair.
4. Refrigerate the strawberries until the chocolate sets, which should take about 15-30 minutes.
Here are some handy tips for the best results:
– Always ensure your strawberries are completely dry so the chocolate sticks well.
– Feel free to experiment with different types of chocolate, like creamy white or milk chocolate, for a unique twist!
Frequently Asked Questions:
– How long can I keep them? They taste best within 2-3 days.
– Can I use chocolate bars instead of chips? Absolutely! Just chop them into small pieces for melting.
These chocolate-dipped strawberries are not just a delicious snack; they also offer a fun way to bond with family or friends. Give this simple recipe a try, and enjoy the smiles it brings!
Chocolate-Dipped Strawberries
Editor’s Choice

Enjoy Life Baking Dark Chocolate Morsels, Dairy Free , Soy Free, Nut Fre…
 Amazon$5.84
Parchment Paper Sheets, 9×13 In Non-Stick Precut Baking Parchment for Ba…
 Amazon$7.99
Wilton Candy Melts Melting Pot, Perfect for Dipping, Drizzling & Decorat…
 Amazon$28.14
8. Gluten Free Brownies
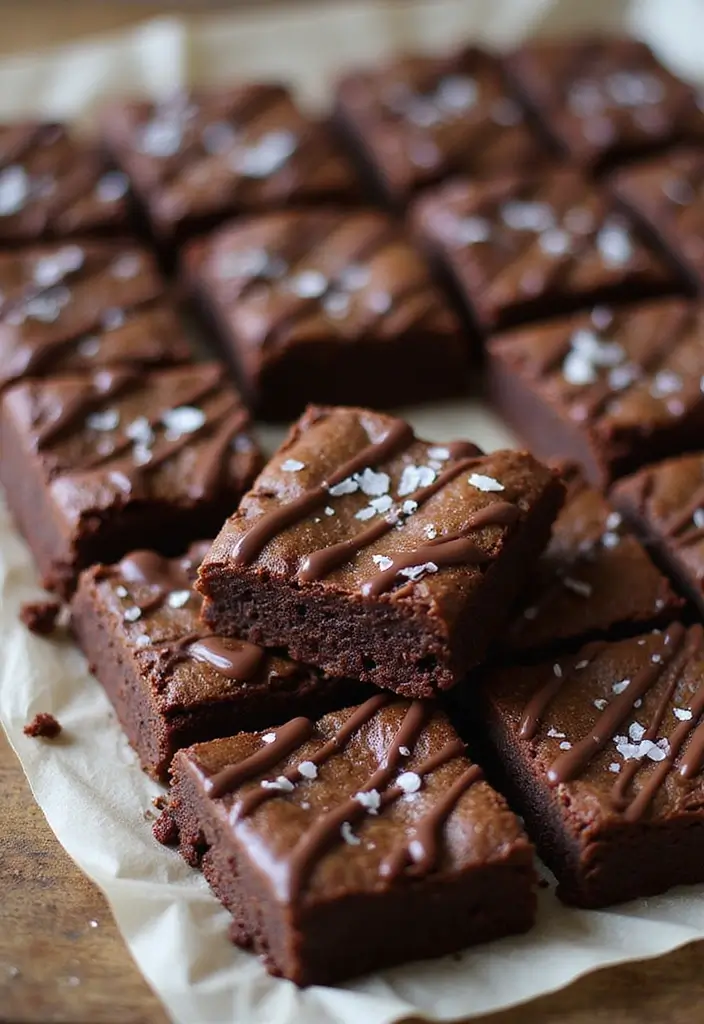
Craving something sweet? These Gluten Free Brownies are a chocolate lover’s perfect solution! Rich, fudgy, and irresistibly gooey, they’ll satisfy any dessert desire. Plus, you can whip them up in just one bowl. This means less mess and more time enjoying your delicious treats!
Imagine biting into a warm brownie, the chocolate melting in your mouth. Add a scoop of cold ice cream on top, and you’ve got a dessert that’ll impress any crowd. Whether it’s a birthday party or a cozy family night, these brownies are sure to shine.
Ready to make your own? Here’s how:
Recipe Overview:
– Servings: 12
– Prep Time: 15 minutes
– Cook Time: 30 minutes
– Total Time: 45 minutes
– Calories: About 200 per brownie
Nutrition Information:
– Fat: 10g
– Carbohydrates: 25g
– Protein: 3g
Ingredients:
– 1/2 cup coconut oil, melted
– 1 cup sugar
– 2 large eggs
– 1 teaspoon vanilla extract
– 1/2 cup cocoa powder
– 1/2 cup gluten-free all-purpose flour
– 1/2 teaspoon salt
– 1/2 cup chocolate chips
Instructions:
1. Preheat your oven to 350°F (175°C). Grease and line a baking dish with parchment paper.
2. In a mixing bowl, stir together the melted coconut oil, sugar, eggs, and vanilla until smooth.
3. Add the cocoa powder, gluten-free flour, and salt. Mix until just combined.
4. Fold in the chocolate chips for that extra chocolatey goodness.
5. Pour the batter into the prepared dish and spread it evenly.
6. Bake for about 30 minutes. Check with a toothpick; it should come out mostly clean.
7. Let the brownies cool before cutting them into squares.
Want to make them even more special? Here are some tips:
– Add a swirl of peanut butter on top before baking for a nutty twist.
– Serve with whipped cream for extra indulgence.
FAQs:
– How do I store leftovers? Keep them in an airtight container at room temperature for up to a week.
– Can I freeze these brownies? Yes! Just wrap them tightly, and they’ll be good for a couple of months.
These brownies are bound to become a family favorite. Enjoy baking and indulging in this delightful treat!
Gluten Free Brownies
Editor’s Choice

BetterBody Foods Organic Oat Flour Blend, Whole Grain, Gluten-Free, All …
 AmazonCheck Price
Amazon Fresh, Unsweetened Cocoa Powder, 8 Oz (Pack of 3)
 AmazonCheck Price
Amazon Basics Silicone Rectangular Baking Mat, Non-Stick Reusable Oven B…
 Amazon$16.79
9. Cinnamon Apple Nachos
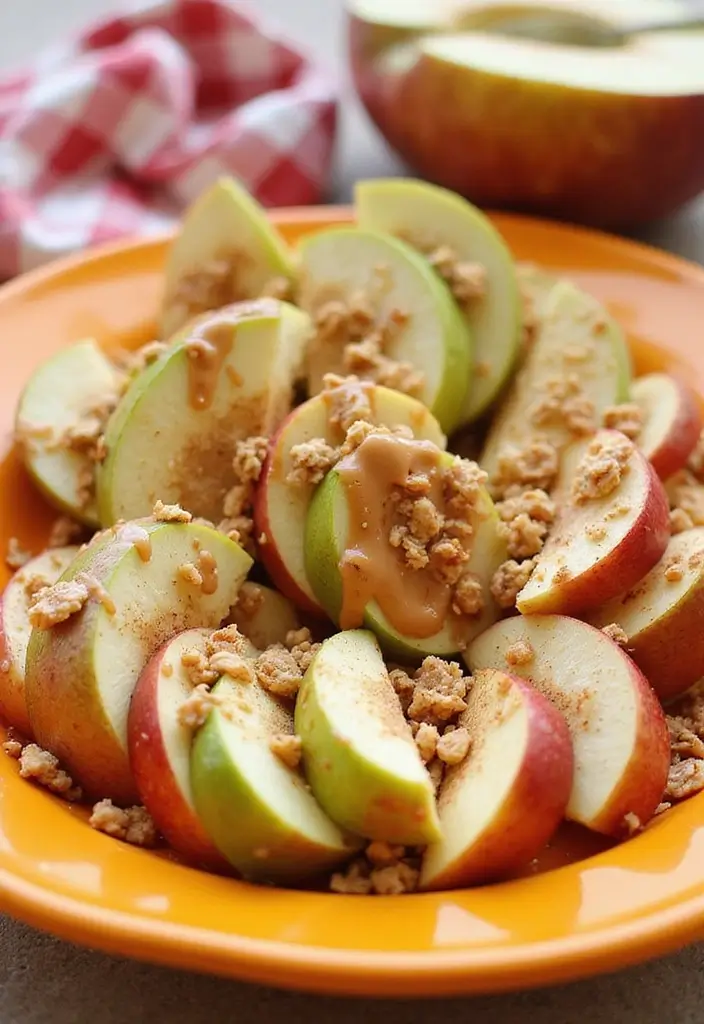
Cinnamon Apple Nachos bring a delightful twist to dessert time, making them a hit with both kids and adults! Imagine crisp apple slices drizzled with creamy nut butter and dusted with warm cinnamon. Then, you add crunchy gluten-free granola to top it all off. It’s a sweet treat that feels indulgent while being packed with nutrition. Plus, kids love to customize their own plates, mixing and matching flavors for a fun dessert experience.
This easy recipe takes just 10 minutes to prepare and serves four people. Perfect for a quick snack or a light dessert, these nachos are a great way to satisfy your sweet tooth without the guilt.
Recipe Overview:
– Servings: 4
– Prep Time: 10 minutes
– Cook Time: 0 minutes
– Total Time: 10 minutes
– Calories: About 150 per serving
Nutrition Information:
– Fat: 7g
– Carbohydrates: 20g
– Protein: 3g
Ingredients:
– 2 large apples, sliced
– 1/2 cup almond or peanut butter
– 1 teaspoon ground cinnamon
– 1/2 cup gluten-free granola
– Optional toppings: chocolate chips, raisins, or coconut flakes
Instructions:
1. Start by slicing the apples and arranging them on a platter.
2. Drizzle the nut butter evenly over the apple slices.
3. Sprinkle the cinnamon and gluten-free granola on top.
4. Add any optional toppings you like.
5. Serve immediately for the freshest taste.
To keep your apples from browning, soak them in lemon water before serving. You can use different apple varieties to create a colorful and flavorful mix.
Tips for Enjoying Your Nachos:
– Choose crunchy apples like Granny Smith or Honeycrisp for an exciting bite.
– Add chocolate chips for a sweet twist that kids will adore.
– Pick coconut flakes for a tropical flair.
– Serve these nachos at parties for a fun and interactive dessert.
These Cinnamon Apple Nachos not only taste great but also make dessert time an enjoyable activity for everyone!
Cinnamon Apple Nachos
Editor’s Choice

Purely Elizabeth, Organic Original, Ancient Grain Granola, Gluten-Free, …
 Amazon$5.99
365 by Whole Foods Market, Organic Creamy Almond Butter, 16 Ounce
 Amazon$13.99
365 by Whole Foods Market, Organic Ground Cinnamon, 1.9 Ounce (Pack of 2)
 AmazonCheck Price
10. Oatmeal Raisin Cookies
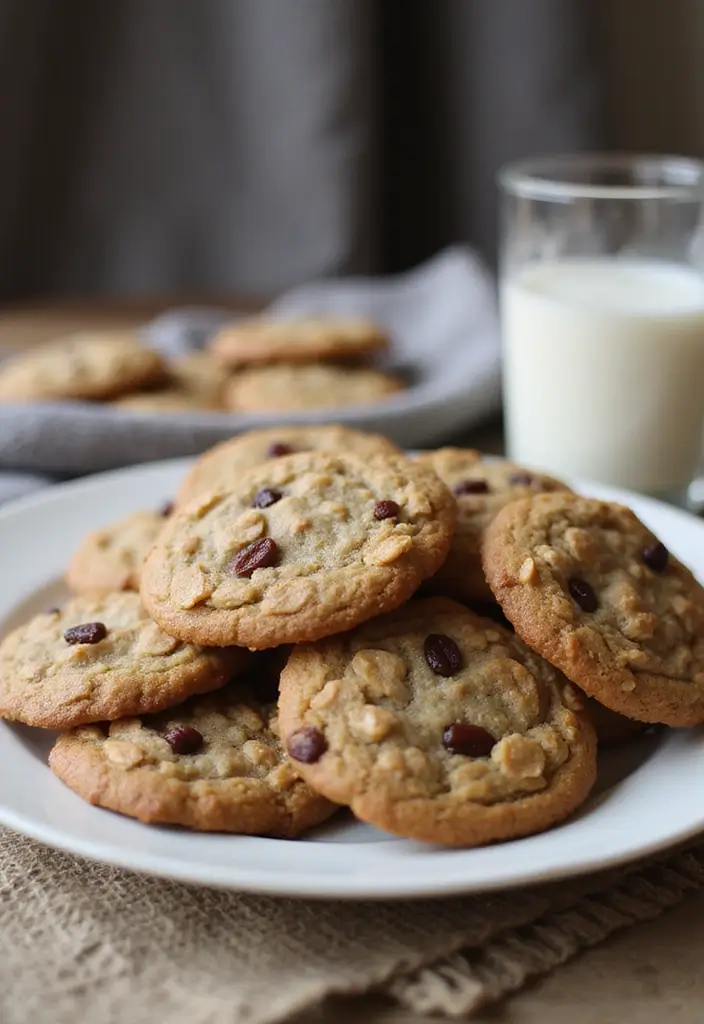
Oatmeal Raisin Cookies are a timeless treat that brings smiles to faces of all ages. Soft and chewy, these gluten-free cookies are loaded with hearty oats and plump raisins. They’re not just tasty; they’re also a delightful way to sneak some wholesome ingredients into your dessert! Picture the warm aroma filling your kitchen as they bake, making everyone in the house eagerly await the first bite.
Making these cookies is a breeze! You can whip them up in just one bowl, cutting down on cleanup time. Plus, they’re perfect for lunchboxes or as an after-school snack. Here’s how you can create your own batch:
Recipe Overview:
– Servings: 24
– Prep Time: 10 minutes
– Cook Time: 12 minutes
– Total Time: 22 minutes
– Calories: About 100 per cookie
Nutrition Information:
– Fat: 4g
– Carbohydrates: 15g
– Protein: 2g
Ingredients:
– 2 cups gluten-free rolled oats
– 1/2 cup coconut sugar or brown sugar
– 1/2 cup coconut oil or butter, softened
– 1/4 cup honey or maple syrup
– 1/2 cup raisins
– 1/2 teaspoon ground cinnamon
– 1/2 teaspoon baking soda
– 1/2 teaspoon salt
Instructions:
1. Preheat your oven to 350°F (175°C) and line a baking sheet with parchment paper.
2. In a large bowl, combine the oats, sugar, coconut oil, honey, cinnamon, baking soda, and salt. Mix until well combined.
3. Gently fold in the raisins until they are evenly distributed throughout the dough.
4. Scoop rounded tablespoons of dough onto the prepared baking sheet, spacing them about two inches apart.
5. Bake for 10-12 minutes, or until the edges turn golden brown. The centers may look a bit soft, but they will firm up as they cool.
6. Let the cookies cool on the baking sheet for a few minutes before transferring them to a wire rack to cool completely.
For some added flair, feel free to mix in chopped nuts or chocolate chips! Store any leftovers in an airtight container to keep them fresh for days.
Frequently Asked Questions:
– Can I use quick oats instead of rolled oats? Yes, but keep in mind the texture will be different.
– How long do these cookies last? You can store them at room temperature for up to a week in an airtight container.
These Oatmeal Raisin Cookies are not only easy to make but also a classic treat that everyone will enjoy!
Oatmeal Raisin Cookies
Editor’s Choice

Bob’s Red Mill Gluten Free Old Fashioned Rolled Oats, 32oz (Pack of 4) -…
 Amazon$23.92
MADHAVA Organic Coconut Sugar 3 Lb. Bag (Pack of 1), Natural Sweetener, …
 Amazon$12.22
Amazon Basics Silicone Rectangular Baking Mat, Non-Stick Reusable Oven B…
 Amazon$16.79
11. Strawberry Shortcake Cups
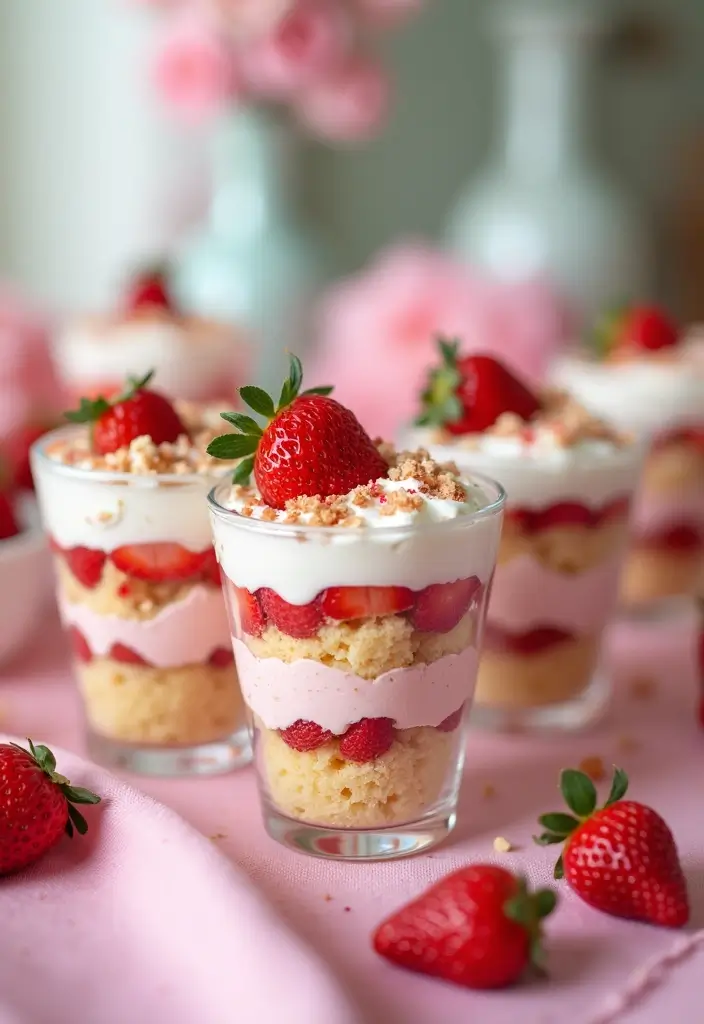
Strawberry Shortcake Cups are a fun and fresh take on a beloved classic dessert! You’ll love how simple they are to put together. These delightful cups feature layers of light gluten-free sponge cake, juicy strawberries, and creamy whipped topping, making them a perfect choice for any gathering. Their charming presentation makes them a hit at kids’ parties, and every bite is a sweet treat bursting with flavor!
Imagine the joy on kids’ faces as they dig into these colorful cups. You can easily whip them up in just 15 minutes. Plus, they’re gluten-free, so everyone can enjoy them. Let’s dive into the recipe so you can impress your family and friends!
Recipe Overview:
– Servings: 6
– Prep Time: 15 minutes
– Cook Time: 0 minutes
– Total Time: 15 minutes
– Calories: Approximately 180 per cup
Nutrition Information:
– Fat: 8g
– Carbohydrates: 25g
– Protein: 2g
Ingredients:
– 2 cups gluten-free sponge cake, cubed
– 2 cups fresh strawberries, sliced
– 1 cup whipped cream (or coconut whipped cream)
– 2 tablespoons sugar (optional)
Instructions:
1. In a bowl, combine sliced strawberries with sugar (if desired) and let them sit for a few minutes to release their juices.
2. In serving cups, start layering with cubed sponge cake, followed by the strawberries, and finish with a layer of whipped cream.
3. Repeat the layers until the cups are filled to the top.
4. Top with extra strawberries and a dollop of whipped cream for a beautiful finish.
Add a splash of vanilla or a squeeze of lemon juice to the strawberries for an extra burst of flavor! You can also mix it up by using other berries like blueberries or raspberries for a delightful twist.
Frequently Asked Questions:
– Can I use store-bought whipped cream? Yes! It’s a quick and easy option.
– How long do they last? These cups are best enjoyed fresh, but you can prepare them a few hours ahead of time.
With Strawberry Shortcake Cups, you’re sure to create a dessert that steals the show at your next gathering!
Strawberry Shortcake Cups
Editor’s Choice
Mom’s Place Gluten-Free Angel Food Cake Mix, Easy to Make, Nut Free, Dai…
 Amazon$9.99
EurKitchen Professional Aluminum Whipped Cream Dispenser – Leak-Free Whi…
 Amazon$42.99
12. Chocolate Chip Banana Bread
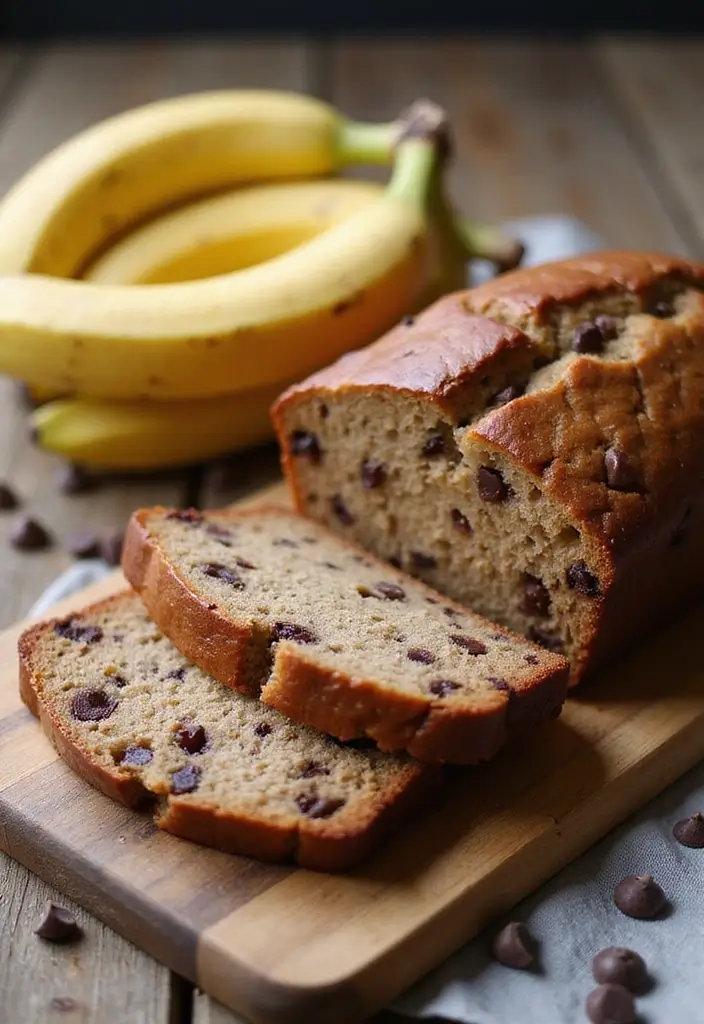
This indulgent Chocolate Chip Banana Bread is a must-try for anyone craving a gluten-free dessert. It’s easy to whip up, making it a fantastic way to use those overripe bananas sitting on your counter. Bursting with sweet banana flavor and studded with chocolate chips, this treat is sure to please both kids and adults alike.
You can enjoy it warm out of the oven or at room temperature as a delightful snack or a breakfast option. This recipe is a classic that fits perfectly into any occasion, from cozy family gatherings to casual brunches with friends.
Here’s how you can make it:
Recipe Overview:
– Servings: 10
– Prep Time: 10 minutes
– Cook Time: 60 minutes
– Total Time: 70 minutes
– Calories: Approximately 180 per slice
Nutrition Information:
– Fat: 7g
– Carbohydrates: 26g
– Protein: 3g
Ingredients:
– 3 ripe bananas, mashed
– 1/3 cup melted coconut oil
– 1/2 cup sugar or honey
– 2 eggs
– 1 teaspoon vanilla extract
– 1 teaspoon baking soda
– 1 1/2 cups gluten-free all-purpose flour
– 1/2 cup gluten-free chocolate chips
Instructions:
1. Preheat your oven to 350°F (175°C) and grease a 9×5 inch loaf pan.
2. In a mixing bowl, mash the bananas. Then combine them with melted coconut oil, sugar, eggs, and vanilla.
3. Stir in the baking soda and gluten-free flour until just mixed. Gently fold in the chocolate chips.
4. Pour the batter into the prepared loaf pan.
5. Bake for 60 minutes or until a toothpick inserted comes out clean.
6. Let it cool for a bit before slicing and serving.
Want to add a little crunch? Try adding chopped walnuts or pecans! Store any leftovers wrapped tightly to keep them fresh.
Frequently Asked Questions:
– Can I freeze banana bread? Yes! Just wrap it tightly to prevent freezer burn.
– How ripe should the bananas be? The riper, the better for maximum sweetness!
This Chocolate Chip Banana Bread is more than just a dessert; it’s a delicious way to sneak in some fruit while satisfying your sweet tooth!
Chocolate Chip Banana Bread
Editor’s Choice

King Arthur Measure for Measure Gluten-Free Flour: All-Purpose 1:1 Subst…
 Amazon$8.62
Enjoy Life Baking Dark Chocolate Morsels, Dairy Free, Soy Free, Nut Free…
 AmazonCheck Price
3PCS Silicone Bread Loaf Pan, Non-Stick Bread Pans for Baking, Easy Rele…
 Amazon$8.99
13. Fruit Salad with Honey Lime Dressing
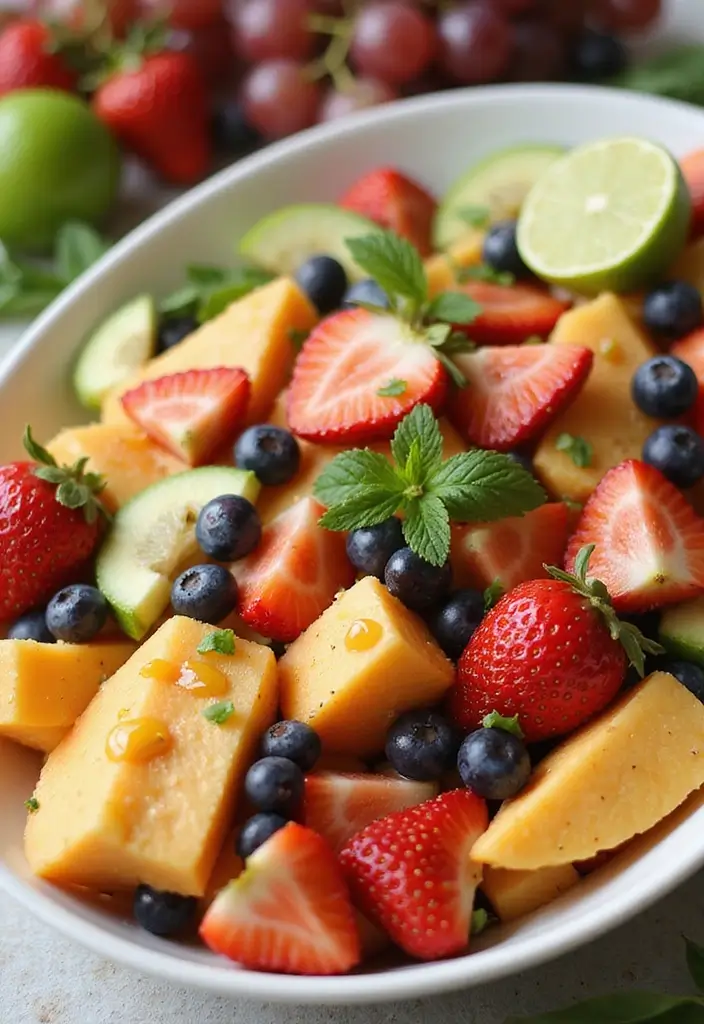
Bright, colorful, and oh-so-refreshing, this Fruit Salad with Honey Lime Dressing is a must-have for any dessert table. It’s not just a treat; it’s a healthy option that kids and adults alike will adore. The combination of sweet honey and zesty lime elevates the natural flavors of each fruit, creating a dish that sings with taste and vibrancy.
You can whip this up in just 10 minutes, making it a perfect last-minute addition to parties or family gatherings. Plus, you can prepare it ahead of time, which means less stress for you. This salad is not only delicious but also a feast for the eyes, bringing a burst of color to your dessert spread.
Here’s how to make it:
Recipe Overview:
– Servings: 6
– Prep Time: 10 minutes
– Cook Time: 0 minutes
– Total Time: 10 minutes
– Calories: Approximately 100 per serving
Nutrition Information:
– Fat: 0g
– Carbohydrates: 25g
– Protein: 1g
Ingredients:
– 2 cups strawberries, hulled and sliced
– 2 cups grapes, halved
– 2 cups melon, cubed
– 1 cup blueberries
– 2 tablespoons honey
– Juice of 1 lime
Instructions:
1. In a large bowl, combine all the prepared fruits.
2. In a separate small bowl, whisk together honey and lime juice until smooth.
3. Drizzle the honey lime dressing over the fruit and toss gently to coat everything.
4. Serve immediately or chill for about an hour to let the flavors meld.
Feel free to get creative with this recipe! You can add other fruits that are in season or your personal favorites. To keep your fruit looking fresh and bright, include some citrus fruits to prevent browning.
Frequently Asked Questions:
– How long will the salad last? It’s best enjoyed fresh, but you can store it in the fridge for up to a day.
– Can I add more fruits? Absolutely! Mix in whatever fruits you love.
This Fruit Salad with Honey Lime Dressing is not just a dish; it’s a celebration of flavors and colors that will leave everyone wanting more. Enjoy the fresh taste and the compliments that follow!
Fruit Salad with Honey Lime Dressing
Editor’s Choice

Large Glass Salad Bowl with Lid Set, 5.7 L Decorative Glass Mixing Bowl,…
 Amazon$59.95
No‑Drip Honey Dispenser Bottle FIFO – 18 oz BPA-Free Squeeze Jar with Si…
 Amazon$10.99
Zulay Kitchen Metal 2-in-1 Lemon Squeezer – Sturdy Max Extraction Hand J…
 Amazon$14.99
14. Mini Pavlovas with Fresh Fruit
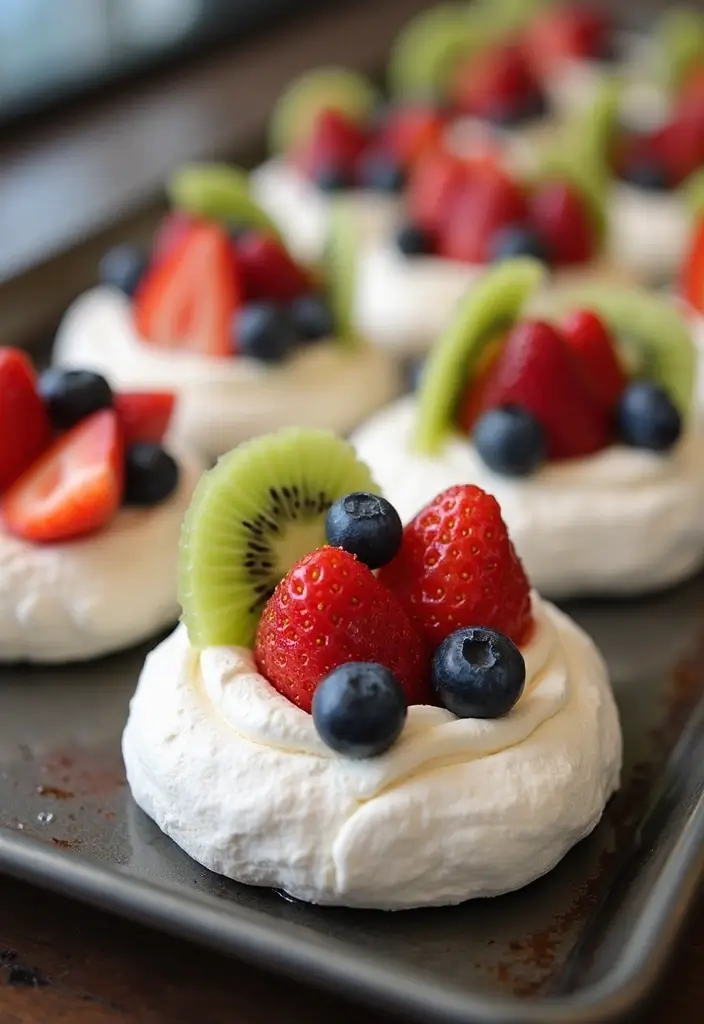
Imagine a dessert that’s both stunning and delicious. Mini Pavlovas with Fresh Fruit are exactly that! These light and airy treats are perfect for kids and adults alike. Each one has a crisp outer shell and a soft, marshmallow-like center, creating a delightful contrast. When topped with fluffy whipped cream and colorful seasonal fruits, they transform into a beautiful centerpiece for any gathering.
Making these mini pavlovas is easy and fun. You can whip them up in just over an hour, and they’re best assembled right before serving, ensuring they’re fresh and delightful. This dessert is a hit at parties, picnics, and family dinners. Plus, they’re gluten-free, so everyone can enjoy them!
Here’s how to make these tasty treats:
Recipe Overview:
– Servings: 8
– Prep Time: 15 minutes
– Cook Time: 1 hour
– Total Time: 1 hour 15 minutes
– Calories: Approximately 120 per pavlova
Nutrition Information:
– Fat: 5g
– Carbohydrates: 16g
– Protein: 2g
Ingredients:
– 4 egg whites
– 1 cup sugar
– 1 teaspoon vanilla extract
– 1 teaspoon vinegar
– 1 cup whipped cream
– Fresh fruit (strawberries, kiwi, blueberries)
Instructions:
1. Preheat your oven to 225°F (110°C) and line a baking sheet with parchment paper.
2. In a clean bowl, whip the egg whites until soft peaks form.
3. Gradually add the sugar, vanilla, and vinegar while continuing to whip until you have glossy, stiff peaks.
4. Spoon the meringue mixture into small circles on the prepared baking sheet.
5. Bake for 1 hour, then turn off the oven, allowing them to cool inside.
6. Once cool, top each pavlova with whipped cream and fresh fruit right before serving.
Tips:
– Use a grease-free bowl to ensure the egg whites whip properly.
– Feel free to mix and match fruits based on what’s in season!
Frequently Asked Questions:
– Can I make these ahead of time? Yes! The meringues can be made a day in advance and stored in an airtight container.
– What if they crack? No worries! Cracks won’t affect the flavor, and they’ll still look beautiful with toppings.
With their delightful taste and beautiful presentation, these mini pavlovas are sure to impress your guests. Enjoy this simple yet elegant dessert at your next celebration!
Mini Pavlovas with Fresh Fruit
Editor’s Choice

Amazon Basics Silicone Rectangular Baking Mat, Non-Stick Reusable Oven B…
 Amazon$16.79
Hamilton Beach 6-Speed Electric Hand Mixer with Whisk, Traditional Beate…
 Amazon$27.95
Riccle Piping Bags and Tips Set, 11.8 Inch 100 Anti Burst Piping Bags, 1…
 Amazon$7.99
15. Peanut Butter Chocolate Chip Energy Bites
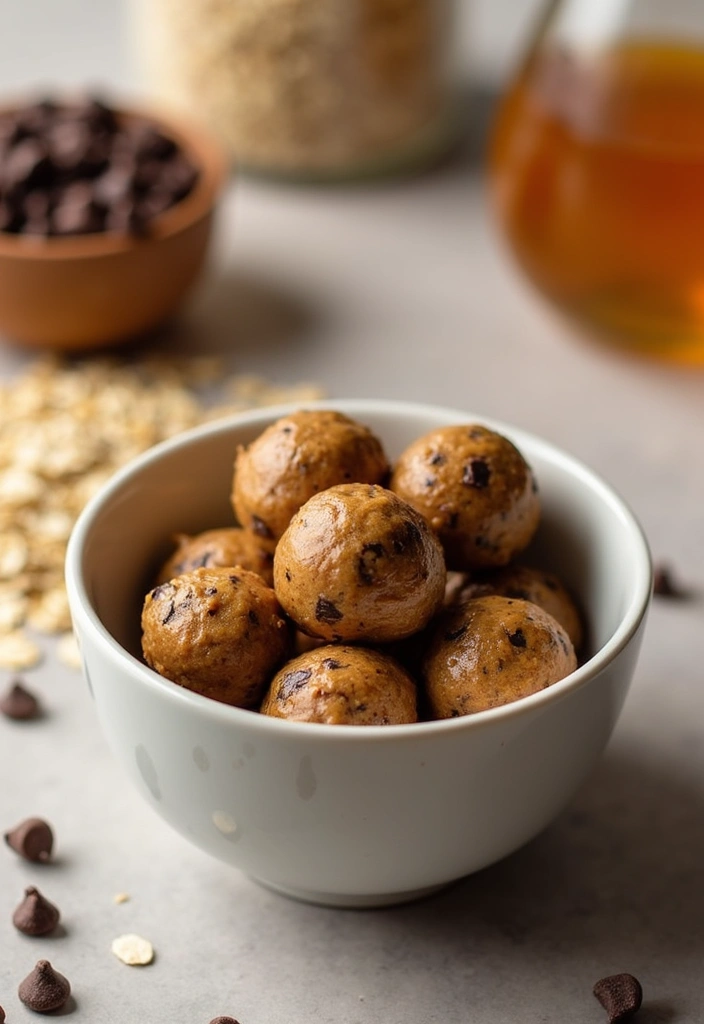
Do you need a quick and healthy snack that satisfies your sweet tooth? Try these Peanut Butter Chocolate Chip Energy Bites! They’re simple to make and require no baking at all. Packed with wholesome ingredients, these tasty treats are perfect for busy days or when you want a nutritious pick-me-up.
Imagine enjoying a delightful blend of creamy peanut butter, rich chocolate chips, and chewy oats. These bites are kid-approved and a great addition to lunchboxes or after-school snacks. With just a few ingredients, you can whip up a batch in no time!
Here’s how to make them:
Recipe Overview:
– Servings: 12
– Prep Time: 10 minutes
– Cook Time: 0 minutes
– Total Time: 10 minutes
– Calories: Approximately 80 per bite
Nutrition Information:
– Fat: 4g
– Carbohydrates: 10g
– Protein: 3g
Ingredients:
– 1 cup gluten-free rolled oats
– 1/2 cup peanut butter
– 1/4 cup honey or maple syrup
– 1/2 cup chocolate chips
Instructions:
1. In a large bowl, combine all of the ingredients until smooth.
2. Roll the mixture into small balls, about the size of a tablespoon.
3. Place the balls on a baking sheet lined with parchment paper.
4. Refrigerate for at least 30 minutes to firm up.
5. Store in an airtight container in the fridge for up to a week.
Feel free to add in some chia seeds or flaxseeds for an extra boost of nutrition! If you want to keep them longer, pop them in the freezer.
Frequently Asked Questions:
– Can I use almond butter instead of peanut butter? Yes, almond butter is a great alternative!
– How long do they last in the fridge? They stay fresh for up to a week in an airtight container.
These energy bites are not just fun to eat; they’re also a fantastic way to keep your energy levels up without any guilt. Enjoy snacking on these delightful treats anytime you need a boost!
Peanut Butter Chocolate Chip Energy Bites
Editor’s Choice

Bob’s Red Mill Gluten Free Organic Extra Thick Rolled Oats, 32oz (Pack o…
 AmazonCheck Price
SKIPPY Natural Creamy Peanut Butter Spread Twin Pack 2-Pack, 5 LB
 Amazon$9.42
Enjoy Life Baking Dark Chocolate Morsels, Dairy Free , Soy Free, Nut Fre…
 Amazon$5.84
16. No-Bake Chocolate Oat Bars
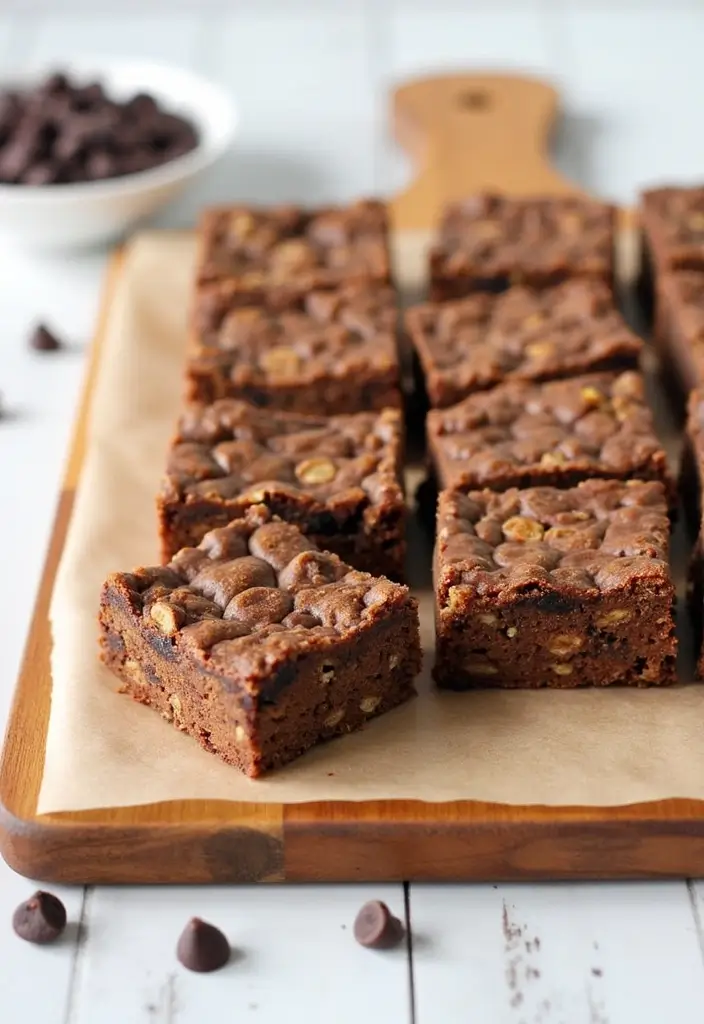
If you’re craving a quick and delicious gluten-free treat, look no further than these No-Bake Chocolate Oat Bars. They combine wholesome oats with rich chocolate flavor, and best of all, they come together in just 15 minutes without needing an oven! Whether you need a snack for the kids or something sweet for yourself, these bars are perfect for any occasion.
Imagine biting into a soft, chewy chocolate bar filled with the goodness of oats. You can customize them with your favorite mix-ins, like nuts or dried fruit, making each batch uniquely yours. These bars are not just tasty; they’re also a nutritious option that you can feel good about serving.
Ready to make your own? Here’s how:
Recipe Overview:
– Servings: 12
– Prep Time: 15 minutes
– Cook Time: 0 minutes
– Total Time: 15 minutes
– Calories: About 150 per bar
Nutrition Information:
– Fat: 7g
– Carbohydrates: 20g
– Protein: 3g
Ingredients:
– 2 cups gluten-free oats
– 1/2 cup almond butter (or peanut butter for a twist)
– 1/4 cup honey or maple syrup
– 1/2 cup chocolate chips
– 1/4 cup unsweetened cocoa powder
Instructions:
1. In a large bowl, combine the oats, almond butter, honey, cocoa powder, and chocolate chips. Stir until everything is mixed well.
2. Press the mixture into a lined baking dish, spreading it evenly.
3. Refrigerate for at least 30 minutes to help the bars set before cutting them.
4. Store your bars in an airtight container in the fridge for up to a week.
For an extra treat, drizzle some melted chocolate on top before refrigerating! Want a little crunch? Just add some chopped nuts or seeds to the mixture.
Frequently Asked Questions:
– Can I use peanut butter instead of almond butter? Yes, it works wonderfully!
– How long do these bars last? They stay fresh in the fridge for a week.
These No-Bake Chocolate Oat Bars are not only a breeze to make but also a delightful way to satisfy your sweet tooth while keeping it gluten-free!
No-Bake Chocolate Oat Bars
Editor’s Choice

Bob’s Red Mill Gluten Free Organic Extra Thick Rolled Oats, 32oz (Pack o…
 AmazonCheck Price
365 by Whole Foods Market, Organic Creamy Almond Butter, 16 Ounce
 Amazon$13.99
Enjoy Life Baking Dark Chocolate Morsels, Dairy Free , Soy Free, Nut Fre…
 Amazon$5.84
17. Coconut Flour Pancakes
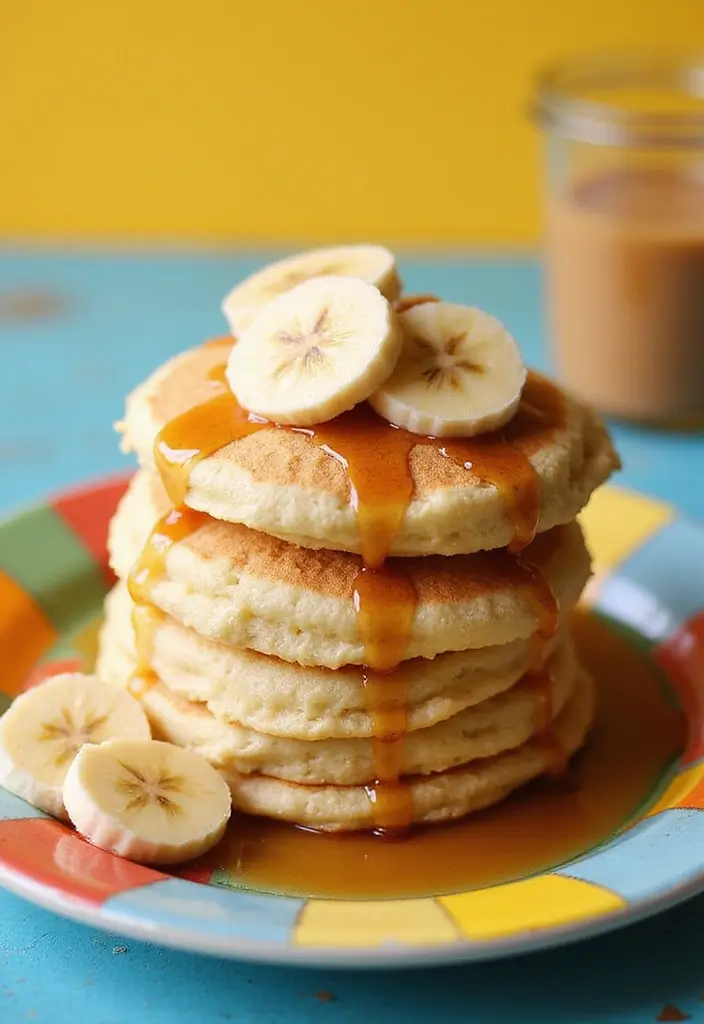
Wake up to a breakfast that delights your taste buds and fuels your day! These fluffy Coconut Flour Pancakes are not just gluten-free; they’re a delicious way to start your morning. Light and airy, they make a perfect breakfast or a sweet snack any time of the day. Plus, their natural sweetness means you can enjoy them with minimal added sugar.
Imagine sinking your fork into a stack of these pancakes topped with fresh berries, a drizzle of maple syrup, or even some chocolate chips. Kids will love them, and they’ll get a great energy boost from the wholesome ingredients. Let’s dive into how you can whip up this delightful dish!
Recipe Overview:
– Servings: 4
– Prep Time: 10 minutes
– Cook Time: 10 minutes
– Total Time: 20 minutes
– Calories: Approximately 120 per pancake
Nutrition Information:
– Fat: 6g
– Carbohydrates: 12g
– Protein: 4g
Ingredients:
– 1/2 cup coconut flour
– 4 large eggs
– 1/2 cup milk or any dairy-free alternative
– 1 tablespoon honey or maple syrup
– 1/2 teaspoon baking powder
Instructions:
1. In a mixing bowl, whisk together the coconut flour, eggs, milk, honey, and baking powder until smooth.
2. Heat a non-stick skillet over medium heat. Pour in batter to form pancakes of your desired size.
3. Cook until bubbles form on the surface, then flip and cook for another 1-2 minutes until golden.
4. Serve warm with your favorite toppings!
Pro Tips:
– Let the batter sit for a few minutes for extra fluffiness.
– Feel free to mix in some cocoa powder or vanilla extract for added flavor!
Frequently Asked Questions:
– Can I use a different flour? Coconut flour absorbs a lot of moisture, so substituting requires extra care!
– How do I store leftovers? Keep them in an airtight container in the fridge for up to three days.
These pancakes will brighten up your mornings with their delightful taste and texture. Enjoy every bite!
Coconut Flour Pancakes
Editor’s Choice


CAROTE Nonstick Frying Pan Skillet,Non Stick Granite Fry Pan Egg Pan Ome…
 Amazon$14.99
TILUCK Stainless Steel Measuring Cups & Spoons Set, Cups and Spoons,Kitc…
 Amazon$15.99
18. Chocolate Mango Popsicles
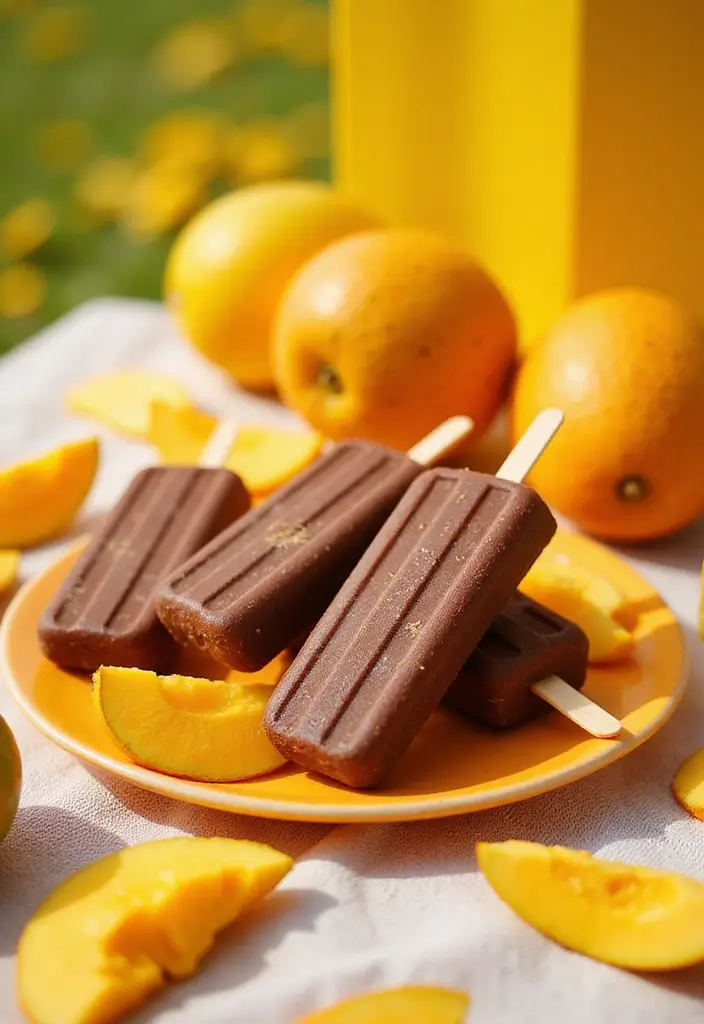
Beat the heat with Chocolate Mango Popsicles, a delightful summer treat that combines the sweetness of ripe mangoes with the richness of chocolate. These popsicles are not only gluten-free but also an easy recipe you can whip up with your kids. They make for a refreshing dessert that’s perfect for those sunny days!
Imagine taking a bite of these creamy popsicles, where the tropical mango flavor dances with the smooth chocolate. You can prepare them ahead of time and pull them out whenever you need a quick dessert. They are sure to become a favorite for everyone in the family!
Recipe Overview:
– Servings: 6
– Prep Time: 15 minutes
– Freeze Time: 4 hours
– Calories: About 100 per popsicle
Nutrition Information:
– Fat: 4g
– Carbohydrates: 14g
– Protein: 1g
Ingredients:
– 2 ripe mangoes, peeled and chopped
– 1 cup coconut milk
– 1/4 cup cocoa powder
– 1/4 cup honey or maple syrup
Instructions:
1. Blend the mango, coconut milk, cocoa powder, and honey until smooth.
2. Pour the mixture into popsicle molds, placing sticks inside.
3. Freeze for at least 4 hours or until completely solid.
4. To remove the popsicles, run warm water over the outside of the molds.
Want to add a twist? Try these tips:
– Add chocolate chips for a fun texture!
– Mix in other fruits like bananas or strawberries for different flavors!
Frequently Asked Questions:
– Can I use frozen mango? Yes, just let it thaw a bit before blending.
– How long do they last in the freezer? About a month if stored properly!
These popsicles are not just a fun treat; they’re a great way to get kids involved in the kitchen while enjoying the natural sweetness of fruit. So, gather your ingredients and enjoy making this refreshing dessert!
Chocolate Mango Popsicles
Editor’s Choice

Miaowoof Homemade Popsicle Molds, 10-Cav Non-BPA Silicone Ice Pop Maker,…
 Amazon$19.99
365 by Whole Foods Market, Organic Coconut Milk, 13.5 Fl Oz
 Amazon$2.29
19. Pumpkin Spice Energy Balls
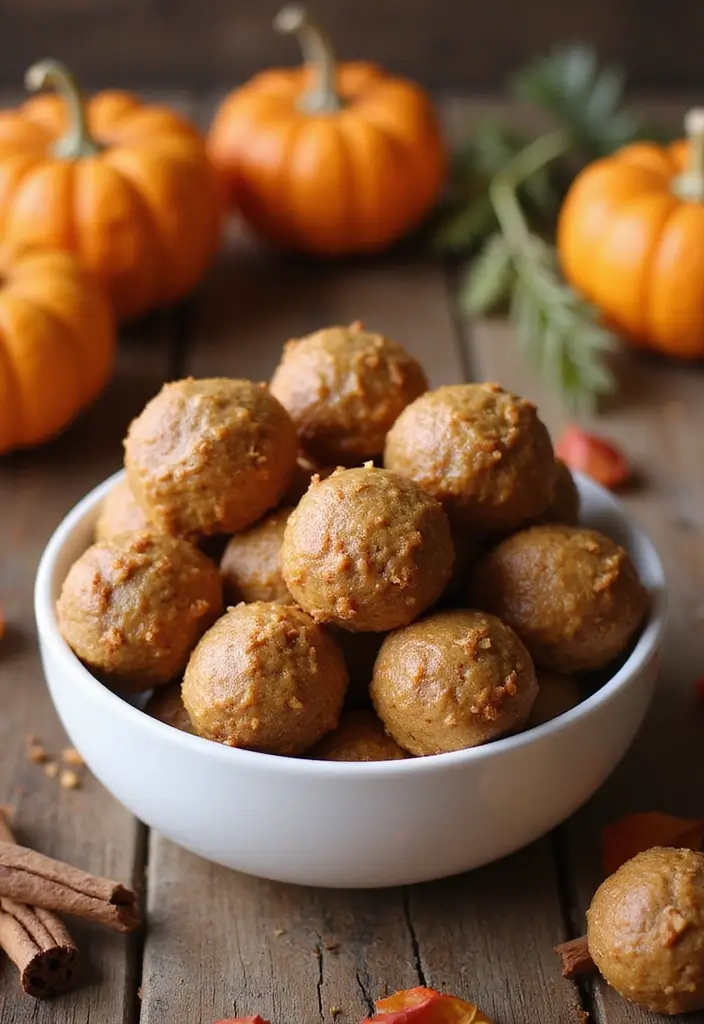
Get ready to embrace the cozy vibes of fall with these delightful Pumpkin Spice Energy Balls! They’re perfect for a quick, healthy snack when you need a little boost. With the comforting flavors of pumpkin and a blend of spices, these bites are not just tasty; they pack a nutritious punch. Whether you’re looking for something to satisfy your sweet tooth or a pick-me-up after a long day, these energy balls are a fantastic choice.
Imagine serving these at your next gathering or enjoying them as an after-school snack for the kids. They’re easy to make and even easier to love! With only a few ingredients, you can whip up a batch in no time. Plus, they’re gluten-free, making them a great option for everyone.
Here’s how to make them:
Recipe Overview:
– Servings: 12
– Prep Time: 10 minutes
– Cook Time: 0 minutes
– Total Time: 10 minutes
– Calories: About 90 per ball
Nutrition Information:
– Fat: 3g
– Carbohydrates: 12g
– Protein: 2g
Ingredients:
– 1 cup gluten-free oats
– 1/2 cup pumpkin puree
– 1/4 cup almond butter
– 1/4 cup maple syrup
– 1 teaspoon pumpkin spice
Instructions:
1. In a large bowl, combine all the ingredients until well mixed.
2. Use your hands to roll the mixture into small balls, about 1 inch in diameter.
3. Place the balls on a baking sheet lined with parchment paper.
4. Refrigerate for at least 30 minutes to firm them up.
5. Store any leftovers in an airtight container in the fridge for up to a week.
Feel free to add a twist! You can coat the energy balls in shredded coconut or crushed nuts for some extra texture. Want to switch it up? Try adding different spices like cinnamon or nutmeg to change the flavor profile.
Frequently Asked Questions:
– Can I use peanut butter instead? Yes, peanut butter works just as well!
– How long do they last? Keep them in the fridge, and they’ll be good for up to a week.
These Pumpkin Spice Energy Balls are not just a seasonal treat; they’re a delicious way to enjoy the flavors of fall whenever you want! Enjoy your snack time!
Pumpkin Spice Energy Balls
Editor’s Choice

Bob’s Red Mill Gluten Free Old Fashioned Rolled Oats, 32oz (Pack of 4) -…
 Amazon$23.92

Airtight Food Storage Containers with Lids, Vtopmart 24 pcs Plastic Kitc…
 Amazon$35.99
20. Chocolate Zucchini Muffins
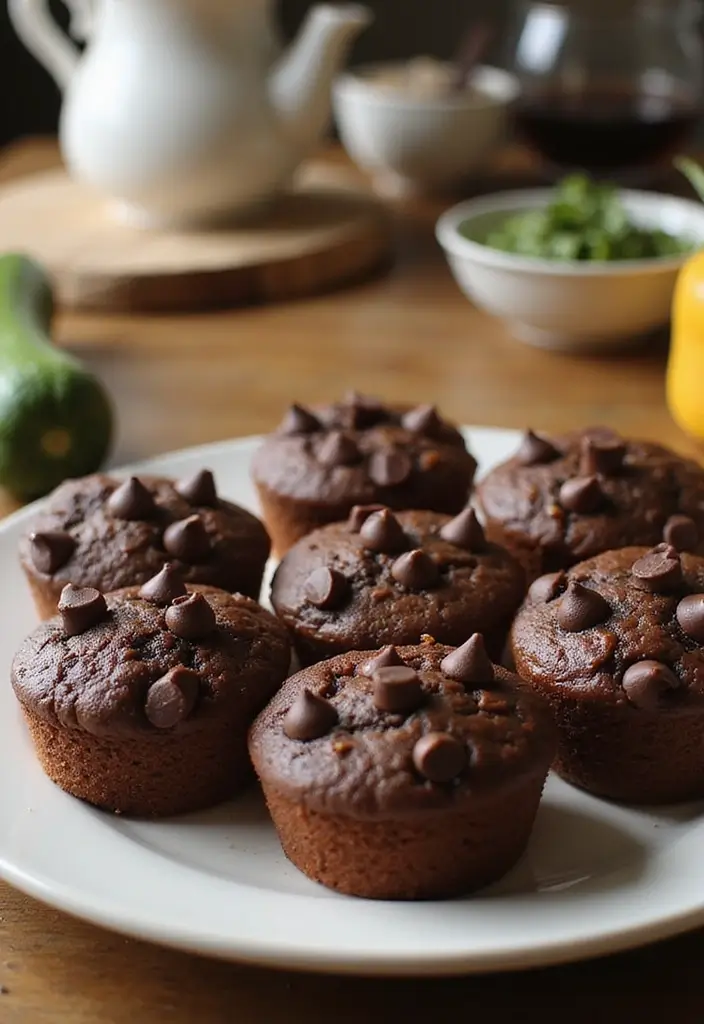
If you want a sweet treat that sneaks in some veggies, these Chocolate Zucchini Muffins are just what you need! They’re rich, moist, and a hit with kids and adults alike. Plus, they’re super simple to make, making them a great option for a fun baking session with your little ones.
The secret ingredient here is zucchini. It adds moisture without changing the taste, which means your muffins stay deliciously chocolatey. Imagine biting into a soft, warm muffin that feels like a dessert but has a veggie hidden inside. It’s the perfect way to make dessert a bit healthier!
Here’s how to whip up a batch of these delightful muffins:
Recipe Overview:
– Servings: 12
– Prep Time: 15 minutes
– Cook Time: 20 minutes
– Total Time: 35 minutes
– Calories: Approximately 140 per muffin
Nutrition Information:
– Fat: 6g
– Carbohydrates: 22g
– Protein: 3g
Ingredients:
– 1 1/2 cups gluten-free all-purpose flour
– 1 cup grated zucchini (about 1 medium zucchini)
– 1/2 cup cocoa powder
– 1/2 cup sugar
– 1/4 cup coconut oil, melted
– 2 large eggs
– 1 teaspoon vanilla extract
– 1 teaspoon baking soda
Instructions:
1. Preheat your oven to 350°F (175°C) and line a muffin tin with liners.
2. In a bowl, mix together flour, cocoa powder, sugar, and baking soda.
3. In another bowl, whisk together the eggs, melted coconut oil, vanilla, and grated zucchini.
4. Combine the wet and dry ingredients until just mixed; be careful not to overmix.
5. Spoon the batter into the muffin tin and bake for about 20 minutes, or until a toothpick comes out clean.
6. Allow the muffins to cool before serving.
Tips:
– Make sure to drain excess water from the zucchini to avoid soggy muffins.
– Consider adding chocolate chips for an extra touch of sweetness!
Frequently Asked Questions:
– Can I use yellow squash instead of zucchini? Yes, yellow squash works well too!
– How do I store leftover muffins? Keep them in an airtight container for up to 3 days.
These Chocolate Zucchini Muffins are perfect for dessert, snacks, or even breakfast. Enjoy the chocolatey goodness while knowing you’ve added a healthy twist!
Chocolate Zucchini Muffins
Editor’s Choice

King Arthur Measure for Measure Gluten-Free Flour: All-Purpose 1:1 Subst…
 Amazon$8.62

2Pack Silicone Muffin Pan for Baking with Metal Reinforced Frame, 12 Cup…
 Amazon$19.99
21. Maple Pecan Pie Bars
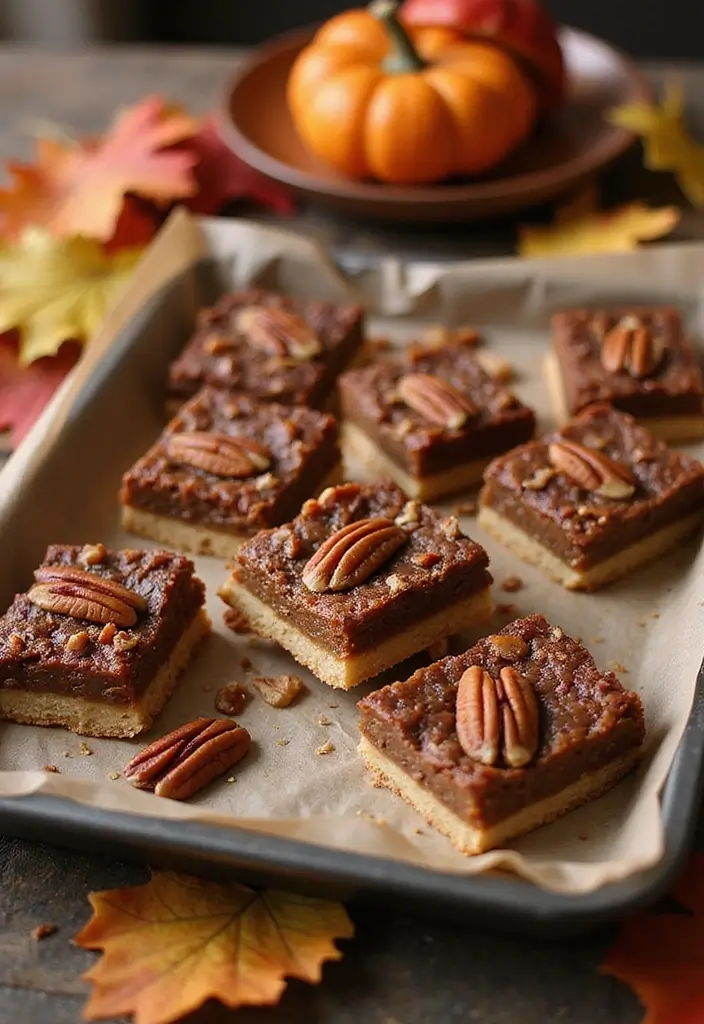
Satisfy your sweet tooth with these Maple Pecan Pie Bars! They’re the perfect gluten-free dessert that brings the comforting flavors of fall right to your table. Imagine a buttery crust paired with a sweet maple filling and crunchy pecans. These bars are not only easy to make but also a delightful treat for any occasion, from family gatherings to cozy nights at home.
These bars can be prepared in advance, making them a fantastic option for busy schedules. Your guests will be wowed by the unique flavor combination—especially when they learn how simple they are to whip up!
Recipe Overview:
– Servings: 12
– Prep Time: 15 minutes
– Cook Time: 30 minutes
– Total Time: 45 minutes
– Calories: Approximately 220 per bar
Nutrition Information:
– Fat: 12g
– Carbohydrates: 28g
– Protein: 3g
Ingredients:
– 1 cup gluten-free oats
– 1/2 cup almond flour
– 1/2 cup melted coconut oil
– 1/2 cup maple syrup
– 1 cup chopped pecans
– 1 teaspoon vanilla extract
Instructions:
1. Preheat your oven to 350°F (175°C). Grease a baking dish.
2. In a mixing bowl, combine oats, almond flour, melted coconut oil, and half the maple syrup. Stir until well mixed.
3. Press this mixture firmly into the bottom of your prepared baking dish to form a crust.
4. In a separate bowl, mix the remaining maple syrup, chopped pecans, and vanilla extract. Pour this mixture over the crust.
5. Bake for about 30 minutes, or until the top is golden brown.
6. Allow the bars to cool completely before cutting them into squares.
For an extra touch, sprinkle in a dash of cinnamon with the pecans for added warmth. Store these delicious bars in an airtight container in the fridge for up to a week. They’re a perfect treat for any time of day, offering a taste of pecan pie in a fun and easy-to-eat form!
Maple Pecan Pie Bars
Editor’s Choice

Bob’s Red Mill Gluten Free Organic Extra Thick Rolled Oats, 32oz (Pack o…
 AmazonCheck Price
Blue Diamond Almonds Almond Flour, Gluten Free, Blanched, Finely Sifted,…
 AmazonCheck Price
Butternut Mountain Farm Pure Vermont Maple Syrup, Grade A, Dark Color, R…
 Amazon$17.97
22. Chocolate Chip Cookie Dough Dip
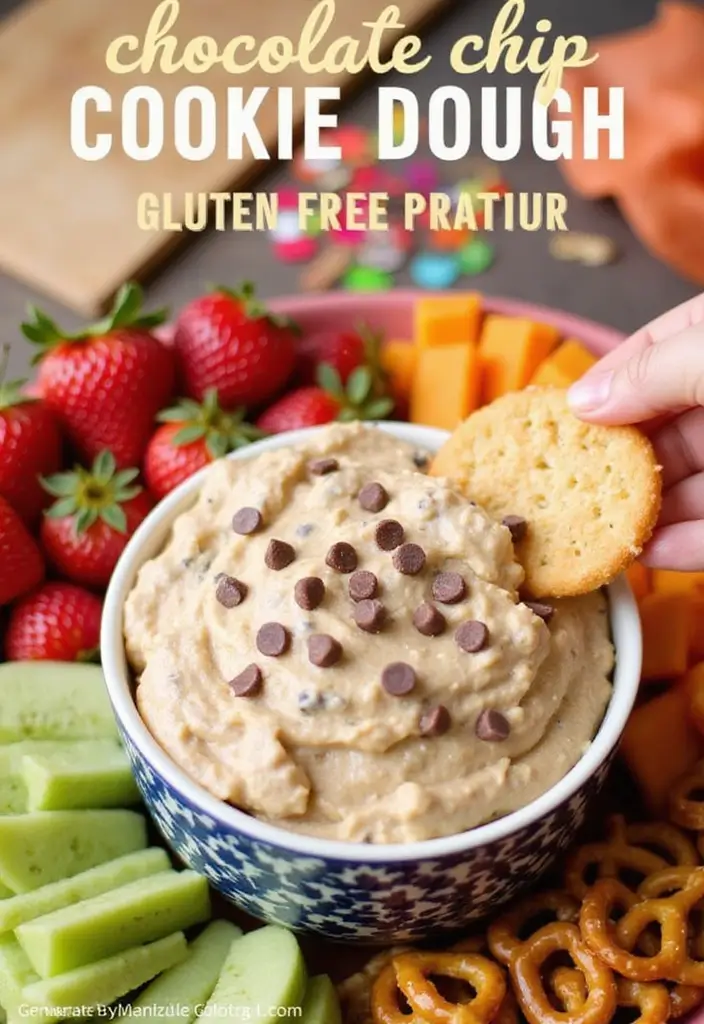
Indulge your sweet tooth with this delicious Chocolate Chip Cookie Dough Dip! Perfect for gatherings or a cozy night in, this dip is a hit with cookie lovers of all ages. The best part? It’s flourless and gluten-free, so you can enjoy every creamy bite without worry. Pair it with fresh fruits, crunchy pretzels, or your favorite gluten-free crackers for a delightful treat that everyone will love.
Imagine the smooth, rich texture of almond butter blended with sweet maple syrup and studded with chocolate chips. It’s a simple yet satisfying dessert that takes just minutes to prepare. Plus, it’s a fantastic way to get kids involved in the kitchen. They’ll have a blast mixing up this easy recipe!
Here’s how to make it:
Recipe Overview:
– Servings: 8
– Prep Time: 10 minutes
– Cook Time: 0 minutes
– Total Time: 10 minutes
– Calories: Approximately 150 per serving
Nutrition Information:
– Fat: 7g
– Carbohydrates: 17g
– Protein: 3g
Ingredients:
– 1 cup almond flour
– 1/2 cup almond butter
– 1/4 cup maple syrup
– 1/2 teaspoon vanilla extract
– 1/4 cup gluten-free chocolate chips
Instructions:
1. In a mixing bowl, combine almond flour, almond butter, maple syrup, and vanilla. Stir until smooth and creamy.
2. Gently fold in the chocolate chips, making sure not to break them.
3. Serve your cookie dough dip with fresh fruit, pretzels, or gluten-free crackers for dipping.
Feel free to get creative! For a chocolatey twist, mix in a tablespoon of cocoa powder. Experimenting with different nut butters can also bring new flavors to this simple dish.
Frequently Asked Questions:
– How long can you keep it in the fridge? It lasts up to a week in an airtight container.
– Can you freeze it? Yes, just thaw it out before serving.
This Chocolate Chip Cookie Dough Dip is not just a dessert; it’s a fun experience. Whether it’s for a party or a treat at home, it’s bound to impress!
Did you know this flourless chocolate chip cookie dough dip can be made with just 4 simple ingredients in under 15 minutes? It proves gluten free dessert recipes easy can be crowd-pleasers at kids’ parties.
Chocolate Chip Cookie Dough Dip
Editor’s Choice

Blue Diamond Almonds Almond Flour, Gluten Free, Blanched, Finely Sifted,…
 Amazon$9.91
Enjoy Life Baking Dark Chocolate Morsels, Dairy Free , Soy Free, Nut Fre…
 Amazon$5.84
Butternut Mountain Farm Pure Vermont Maple Syrup, Grade A, Dark Color, R…
 Amazon$17.97
23. Rainbow Fruit Skewers
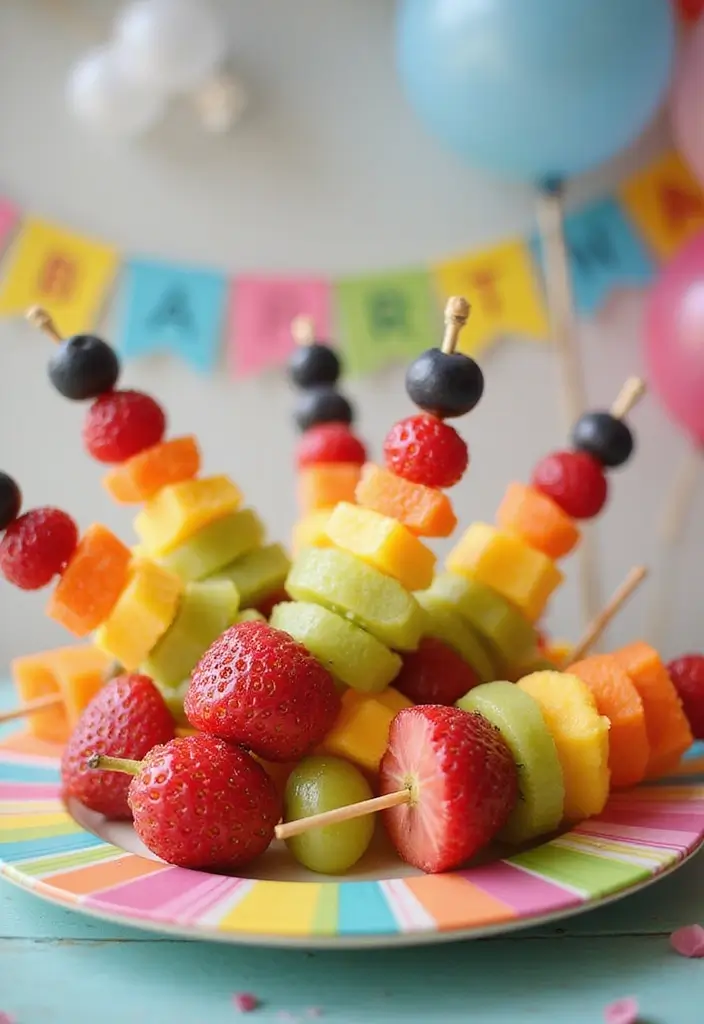
Add a splash of color and fun to your dessert table with Rainbow Fruit Skewers! These fruity creations are not only healthy but also a treat that kids will love. They look fantastic and are easy for little hands to grab. Plus, they bring a cheerful vibe to any gathering!
Start by picking your favorite fruits. Think strawberries, melon, pineapple, blueberries, and grapes. You can even use cookie cutters to shape the fruit into stars or hearts for an extra touch of whimsy. These skewers are perfect for parties, picnics, or just a fun snack at home.
Here’s how to make your Rainbow Fruit Skewers:
Recipe Overview:
– Servings: 4
– Prep Time: 10 minutes
– Cook Time: 0 minutes
– Total Time: 10 minutes
– Calories: Approximately 60 per skewer
Nutrition Information:
– Fat: 0g
– Carbohydrates: 15g
– Protein: 1g
Ingredients:
– 1 cup strawberries, hulled and halved
– 1 cup melon, cubed
– 1 cup pineapple, cubed
– 1 cup blueberries
– 1 cup grapes
– Optional: yogurt or honey for dipping
Instructions:
1. Wash all your fruits thoroughly and cut them into bite-sized pieces.
2. Take wooden skewers and thread the fruit onto them, creating a rainbow pattern.
3. For a tasty twist, serve with yogurt or honey for dipping.
Tips to make it even more fun:
– Use cookie cutters to create fun shapes from the fruit.
– Mix seasonal fruits to keep your skewers exciting and fresh.
Frequently Asked Questions:
– How long do they last? They are best eaten fresh but can be stored in the fridge for a day.
– Can I use other fruits? Yes! Feel free to swap in any of your favorites for a personalized touch.
With these Rainbow Fruit Skewers, you’ll add a burst of color and nutrition to your dessert offerings. They make healthy eating fun and are sure to be a hit with everyone!
Rainbow Fruit Skewers
Editor’s Choice


Halloween Cookie Cutters Set – 12 Pieces Stainless Steel Halloween Cooki…
 Amazon$4.99
LE TAUCI Sauce Cups 2 OZ, Small Dipping Bowls, Mini Ceramic Ramekins Sou…
 Amazon$9.99
24. S’mores Dip
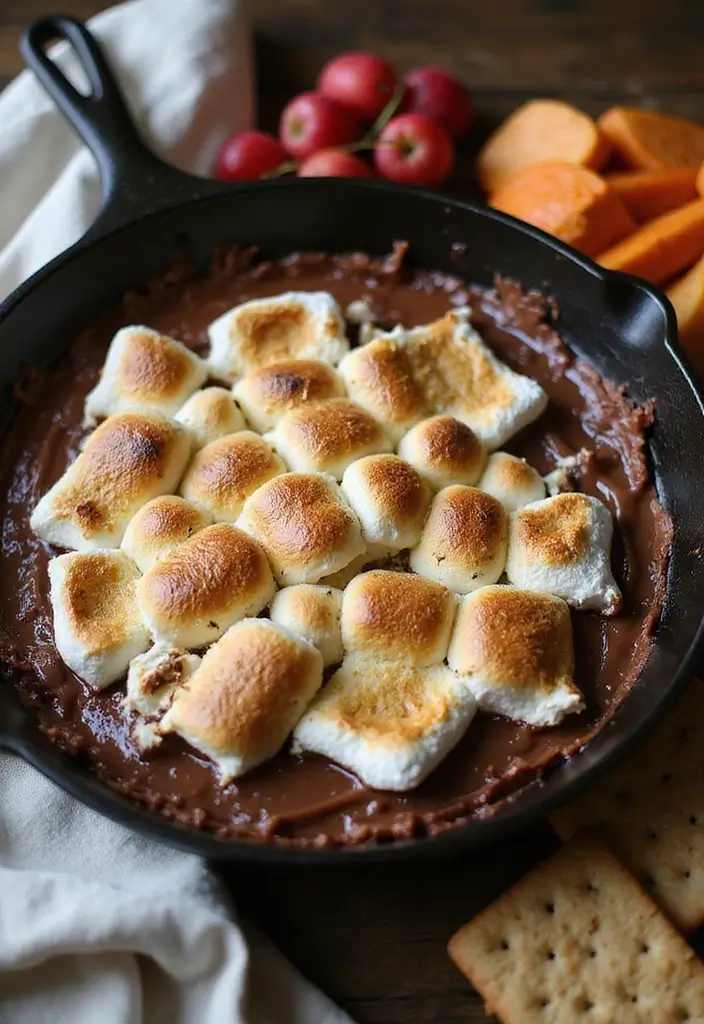
S’mores Dip is a delightful twist on a classic treat that everyone loves. Imagine gooey chocolate and fluffy marshmallows melting together, waiting for you to dip in your favorites like fresh fruit, gluten-free graham crackers, or cookies. This dessert is not only easy to whip up, but it also brings people together for a fun, interactive experience. You can enjoy the deliciousness of s’mores without needing a campfire, making it perfect for any gathering!
Ready to make this sweet treat? Here’s how you can do it effortlessly. In just 20 minutes, you can have a crowd-pleaser that kids and adults will adore. Plus, it’s budget-friendly and simple to prepare, so you won’t break the bank. Just think about the joy on your friends’ faces as they dip into this warm, melted goodness. It’s sure to create lasting memories!
Recipe Overview:
– Servings: 8
– Prep Time: 10 minutes
– Cook Time: 10 minutes
– Total Time: 20 minutes
– Calories: Approximately 180 per serving
Nutrition Information:
– Fat: 8g
– Carbohydrates: 24g
– Protein: 2g
Ingredients:
– 1 cup gluten-free chocolate chips
– 2 cups mini marshmallows
– 2 tablespoons coconut oil
– Optional: gluten-free graham crackers or fruits for dipping
Instructions:
1. Preheat your oven to 400°F (200°C).
2. Spread the chocolate chips evenly in an oven-safe dish.
3. Top with mini marshmallows and drizzle with coconut oil.
4. Bake for 10 minutes or until the marshmallows turn golden brown.
5. Serve warm with graham crackers or fruit for dipping.
Tips:
– Add a pinch of sea salt on top for a flavor boost!
– Try flavored chocolate chips for a creative twist.
Frequently Asked Questions:
– How long can the dip be stored? It’s best fresh but can last a day in the fridge.
– Can I prepare it ahead of time? You can set up the chocolate layer and add marshmallows right before baking!
This S’mores Dip is sure to shine at your dessert table. Enjoy every gooey bite!
S’mores Dip
Editor’s Choice
Kinnikinnick – Graham Style Crumbs – Gluten Free, Allergy Friendly Vegan…
 Amazon$9.99
Enjoy Life Baking Dark Chocolate Morsels, Dairy Free , Soy Free, Nut Fre…
 Amazon$5.84
DOWAN Casserole Dish, 9×13 Ceramic Baking Dish, Large Lasagna Pan Deep f…
 Amazon$29.99
25. Maple Banana Oatmeal Cookies
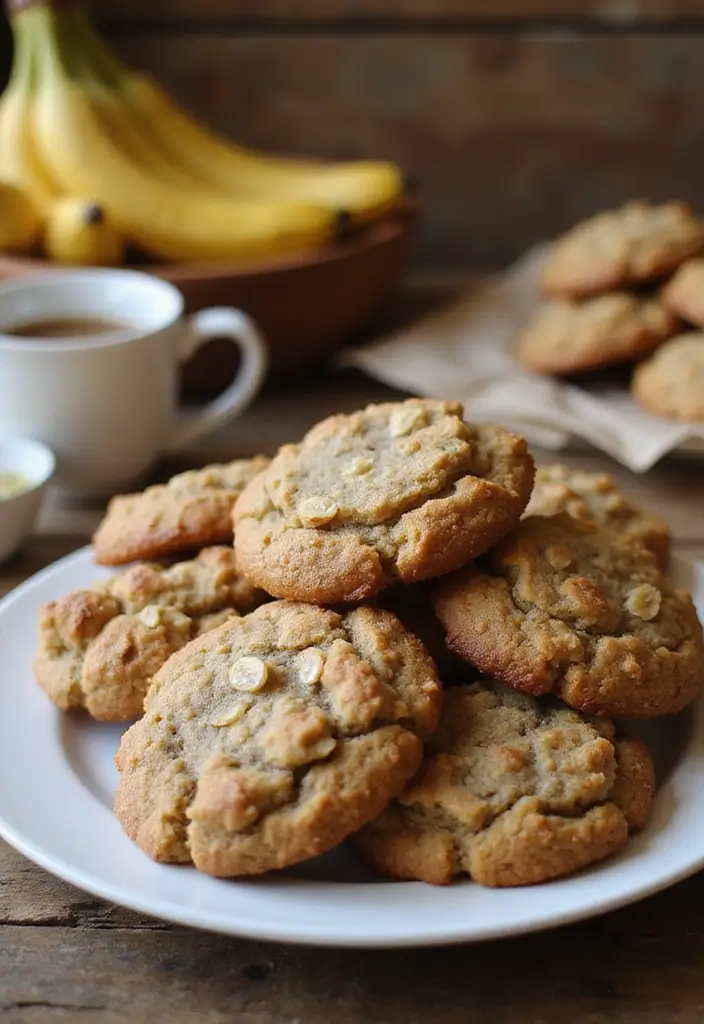
Are you looking for a simple yet delicious gluten-free treat? Let me introduce you to Maple Banana Oatmeal Cookies! These cookies combine the natural sweetness of ripe bananas with hearty oats, creating a soft and chewy dessert that’s perfect for any occasion. Plus, they’re a great way to use up those overripe bananas sitting on your counter, and I promise, even the kids will love them!
Imagine popping a warm cookie in your mouth, with the rich flavor of maple syrup mingling with the comforting taste of oats. These cookies make for a delightful snack or a quick dessert after dinner. They are easy to whip up, taking only about 25 minutes from start to finish!
Recipe Overview:
– Servings: 12
– Prep Time: 10 minutes
– Cook Time: 15 minutes
– Total Time: 25 minutes
– Calories: Approximately 100 per cookie
Nutrition Information:
– Fat: 4g
– Carbohydrates: 15g
– Protein: 2g
Ingredients:
– 2 cups gluten-free rolled oats
– 1 ripe banana, mashed
– 1/4 cup maple syrup
– 1/4 cup almond butter
– 1 teaspoon vanilla extract
Instructions:
1. Preheat your oven to 350°F (175°C) and line a baking sheet with parchment paper.
2. In a bowl, mix together the oats, mashed banana, maple syrup, almond butter, and vanilla extract until combined.
3. Drop spoonfuls of the dough onto the prepared baking sheet, spacing them out.
4. Bake for 12-15 minutes, or until the edges turn lightly golden.
5. Allow the cookies to cool on a wire rack before enjoying.
Want to add a little twist? Include chocolate chips or nuts for an extra burst of flavor! You’ll find that enjoying these cookies warm is the best way to experience their chewy goodness.
Frequently Asked Questions:
– How should I store the cookies? Keep them in an airtight container at room temperature for up to a week.
– Can I make them vegan? Absolutely! Just make sure to choose a vegan-friendly maple syrup.
These Maple Banana Oatmeal Cookies are not only tasty but also a healthier alternative to traditional desserts. Give them a try, and watch them disappear quickly!
Maple Banana Oatmeal Cookies
Editor’s Choice

Bob’s Red Mill Gluten Free Old Fashioned Rolled Oats, 32oz (Pack of 4) -…
 Amazon$23.92
Butternut Mountain Farm Pure Vermont Maple Syrup, Grade A, Dark Color, R…
 Amazon$17.97
MaraNatha Natural Creamy Almond Butter, No Stir, No Sugar or Salt Added,…
 Amazon$6.79
26. Honey Yogurt Parfaits
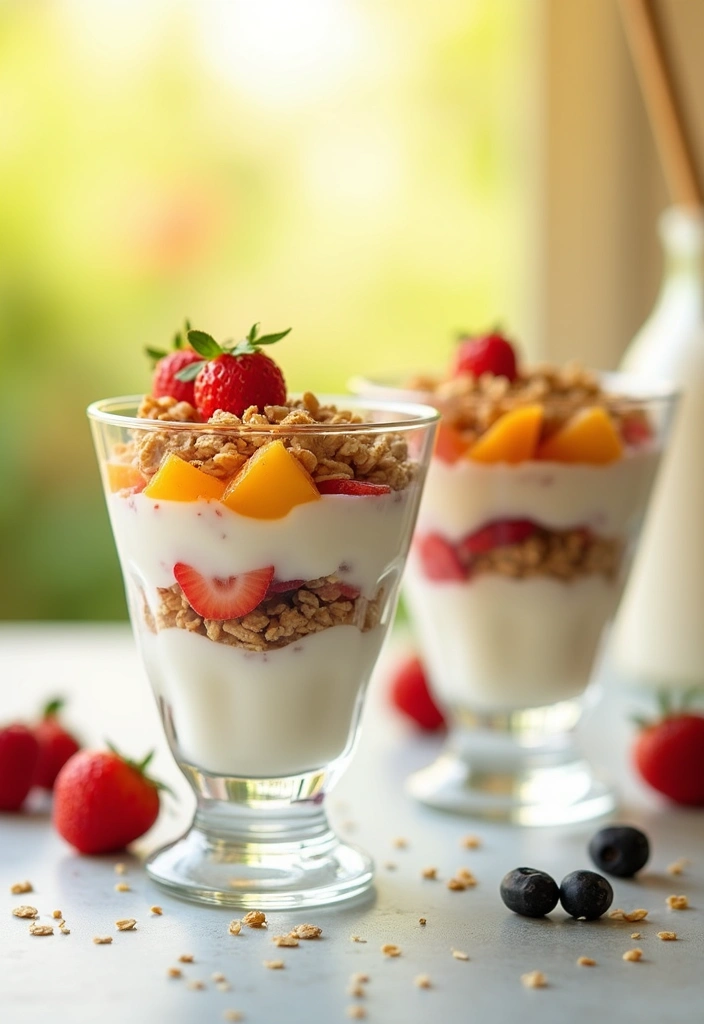
Indulge in the light and refreshing taste of Honey Yogurt Parfaits. These delightful desserts not only look beautiful but are also a breeze to make. Picture creamy yogurt layered with vibrant, fresh fruit and a sweet drizzle of honey. They’re perfect for any gathering and sure to impress your guests!
You can easily customize these parfaits with your favorite fruits. Think strawberries, blueberries, or even tropical mango! Prepare them ahead of time to save you stress on party day. Kids especially love digging into these colorful layers, making them a hit for family gatherings.
Let’s break down the recipe:
Recipe Overview:
– Servings: 4
– Prep Time: 10 minutes
– Cook Time: 0 minutes
– Total Time: 10 minutes
– Calories: Approximately 120 per parfait
Nutrition Information:
– Fat: 3g
– Carbohydrates: 20g
– Protein: 6g
Ingredients:
– 2 cups gluten-free yogurt (choose vanilla or plain)
– 2 cups assorted fresh fruit (like berries, kiwi, or banana)
– 1/4 cup honey
– Optional toppings: granola or nuts for crunch
Instructions:
1. Start by layering yogurt in serving glasses.
2. Add a layer of fresh fruit on top, followed by a drizzle of honey.
3. Repeat these layers until the glasses are full.
4. If you like, top with extra fruit or a sprinkle of granola for added texture.
5. Serve immediately, or chill for up to an hour before enjoying.
Feel free to experiment with different yogurt flavors for a fun twist! You can also prepare these parfaits in jars for an easy grab-and-go treat.
Frequently Asked Questions:
– How long do they last? Best enjoyed fresh, but you can store them in the fridge for up to a day.
– Can I use dairy-free yogurt? Absolutely!
These Honey Yogurt Parfaits are not just healthy; they are also a delicious dessert that everyone will love! Enjoy the sweet, creamy goodness today!
Honey Yogurt Parfaits
Editor’s Choice
Chobani® Low-Fat Vanilla Greek Yogurt, Mixed Berry on the Bottom 5.3oz 4…
 AmazonCheck Price

27. Chia Seed Pudding
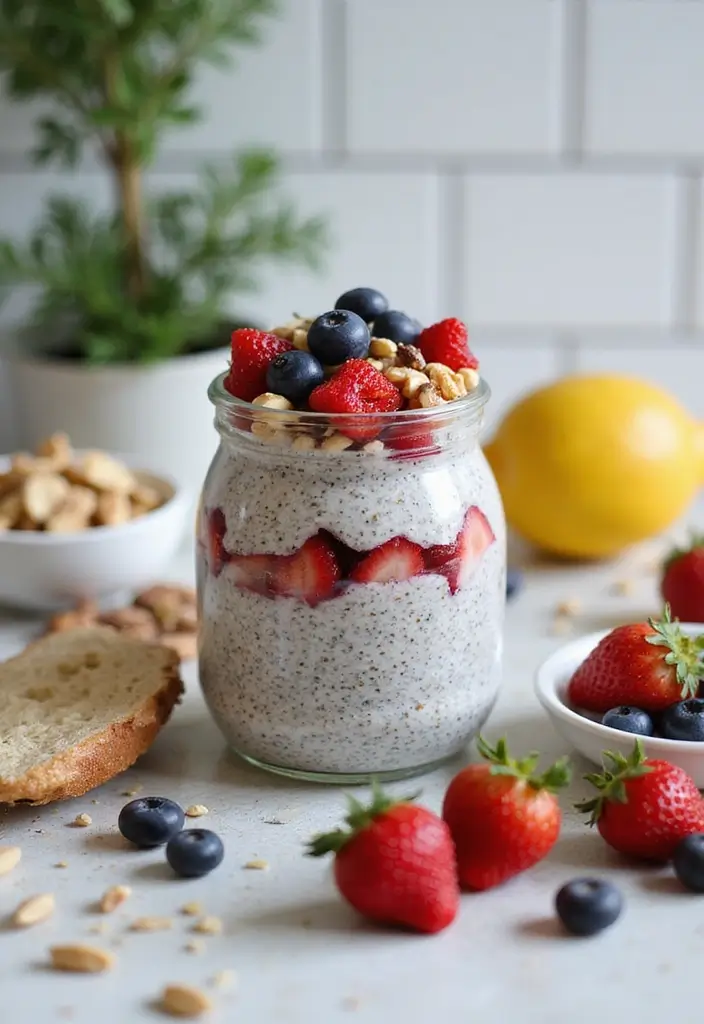
Indulge in a creamy, dreamy treat with Chia Seed Pudding! This gluten-free dessert is not just a passing trend; it’s a delicious and healthy option perfect for any occasion. With its silky texture and subtle sweetness, it’s sure to be a hit with kids and adults alike. Plus, it’s super simple to make!
You only need a few ingredients to whip up this delightful pudding. You can jazz it up with your favorite fruits, nuts, or granola for extra flavor and nutrition. It’s an ideal recipe to prepare in advance, making it a fantastic last-minute dessert. Just chill, serve, and enjoy!
Here’s how to make it:
Recipe Overview:
– Servings: 4
– Prep Time: 10 minutes
– Cook Time: 0 minutes
– Total Time: 10 minutes (plus chilling)
– Calories: Approximately 150 per serving
Nutrition Information:
– Fat: 6g
– Carbohydrates: 12g
– Protein: 5g
Ingredients:
– 1/2 cup chia seeds
– 2 cups almond milk (or any dairy-free milk)
– 1/4 cup honey or maple syrup
– Optional toppings: fresh fruits, nuts, or granola
Instructions:
1. In a bowl, combine chia seeds, almond milk, and honey or maple syrup.
2. Stir well to avoid clumps and let it sit for about 10 minutes.
3. Stir again, then cover and refrigerate for at least 2 hours or overnight.
4. Serve chilled and top with your favorite extras.
Want to enhance the flavor? Add a splash of vanilla extract!
Feeling creative? Layer it with different fruits for a colorful twist!
Frequently Asked Questions:
– How long does it last? Up to 5 days in the fridge.
– Can I use other kinds of milk? Absolutely! Any type of milk works great.
This Chia Seed Pudding is not just nourishing; it’s visually appealing and a delightful dessert everyone will adore! Enjoy making this simple yet satisfying treat!
Fun fact: chia seeds can absorb up to 12 times their weight in liquid, turning into a creamy pudding with only a few ingredients. This gluten free dessert is a reliable pick in gluten free dessert recipes easy for kids’ parties, delivering fiber, texture, and crowd-pleasing flavor.
Chia Seed Pudding
Editor’s Choice

Garden of Life Chia Seeds 100% Organic for Smoothies, Pudding – Raw Orga…
 AmazonCheck Price
Silk Shelf-Stable Almond Milk, Unsweetened Vanilla, Dairy-Free, Vegan, N…
 Amazon$11.27
Oneroot 100% Organic Canadian Wildflower Honey – 17.6 Oz/1.1 Lbs, Unheat…
 AmazonCheck Price
Conclusion

With these 27 easy gluten-free dessert recipes, you’re now equipped to impress at any gathering! Whether it’s a party for kids or a family get-together, these recipes are all about simplicity and deliciousness.
Each recipe is designed to be fun, engaging, and perfect for getting the little ones involved in the kitchen. From fruity popsicles to rich brownies, you have a wide range of treats to choose from. Happy baking and enjoy the sweetness of life!
Note: We aim to provide accurate product links, but some may occasionally expire or become unavailable. If this happens, please search directly on Amazon for the product or a suitable alternative.
This post contains Amazon affiliate links, meaning I may earn a small commission if you purchase through my links, at no extra cost to you.
Frequently Asked Questions
What Are Some Easy Gluten Free Dessert Recipes for Kids’ Parties?
Planning a kids’ party and need some sweet treats? Check out our collection of easy gluten free dessert recipes that are sure to delight! From gluten free brownies to fruit-flavored popsicles, these recipes are not only simple but also fun to make with the little ones.
These desserts are perfect for any occasion, ensuring that all kids, including those with gluten sensitivities, can enjoy delicious treats!
How Can I Make Gluten Free Baking Easier?
Gluten free baking can be a breeze with a few simple tips! Start by using gluten free flour blends, which are designed to mimic the texture of traditional flours. Don’t forget to include ingredients like xanthan gum or to help with binding.
Also, experimenting with simple dessert recipes can help you get comfortable with gluten free baking. Try starting with easy options like cookies or muffins that require minimal ingredients!
Are There Healthy Gluten Free Dessert Options for Kids?
Absolutely! Healthy gluten free dessert options can be both delicious and nutritious. You can whip up banana oatmeal cookies or yogurt parfaits with fresh fruits and nuts. These treats satisfy sweet cravings while providing essential nutrients.
Making desserts healthy also means using natural sweeteners like honey or maple syrup, so you can feel good about what your kids are enjoying!
What Are Some Simple Dessert Recipes That Are Gluten Free?
If you’re looking for simple dessert recipes that are gluten free, you’re in luck! Consider making chocolate mousse, rice pudding, or even no-bake cheesecake. These desserts require minimal effort and ingredients, making them perfect for any occasion.
These easy gluten free dessert recipes can be whipped up in no time, leaving you plenty of time to enjoy the party with your kids!
How Can I Incorporate Gluten Free Sweets into My Child’s Diet?
Incorporating gluten free sweets into your child’s diet can be fun and creative! Try to mix in a variety of gluten free dessert recipes that they can help make. This not only allows them to enjoy their favorite treats but also teaches them about cooking and healthy eating.
Consider swapping regular snacks for gluten free options, such as fruit-based desserts, or homemade gluten free granola bars. Kids love to be involved, making it a great way to ensure they eat well!
Related Topics
gluten free
easy dessert recipes
healthy sweets
kids' party treats
simple baking
gluten free baking
family friendly
quick desserts
no-bake options
dessert for occasions
gluten free desserts
easy gluten free


