Planning a gathering can feel overwhelming, especially when it comes to desserts. You want to impress your guests, but you also need recipes that won’t tie you down in the kitchen for hours. That’s why I created this collection of 25 easy dessert recipes for a crowd that everyone will love. Each recipe is designed to be simple, delicious, and stress-free, so you can focus on making memories instead of worrying about the menu.
If you’re a busy host, a parent organizing a school event, or just someone who loves to entertain, this post is for you. You care about serving treats that are not only tasty but also crowd-pleasers. You want desserts that cater to different tastes and preferences, so everyone leaves happy. This list will help you do just that, without the fuss of complicated instructions or hard-to-find ingredients.
What can you expect to find? These 25 recipes are not only straightforward but also satisfying and fun to share. From cookies that can be baked in batches to sweet treats that can be made ahead of time, there’s something for everyone. You’ll discover options that are perfect for your next birthday party, family reunion, or potluck. With this guide, dessert will be the highlight of your gathering, and you’ll shine as the host who knew exactly how to please the crowd. So, let’s dive in and make your next event deliciously memorable!
1. No-Bake Chocolate Cheesecake
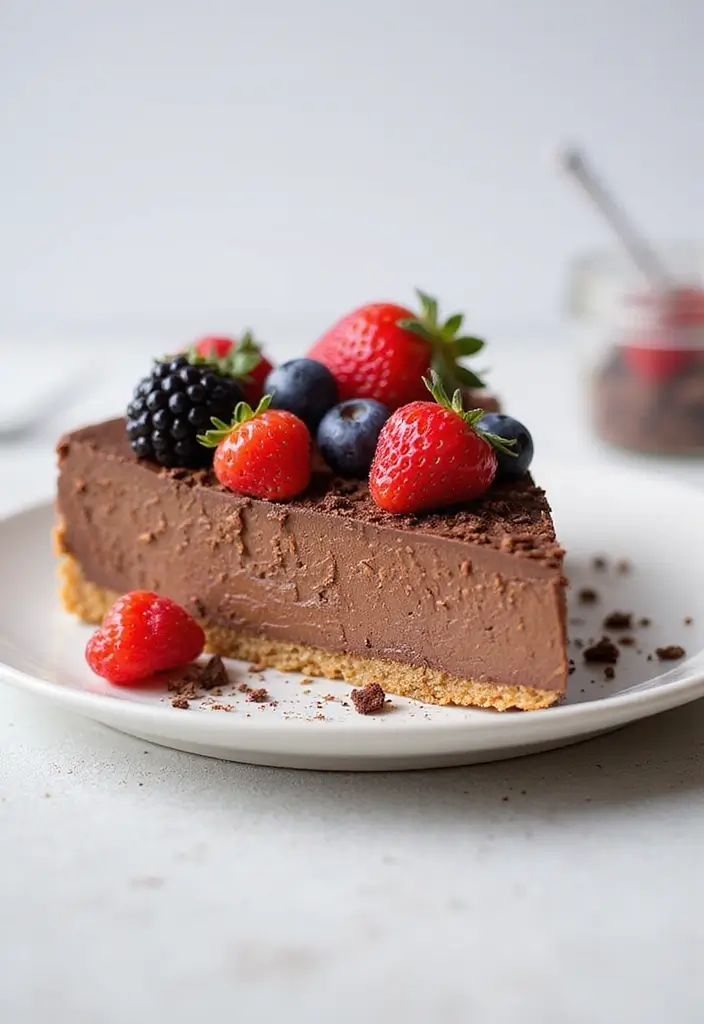
Overview: Looking for a dessert that will leave everyone buzzing with excitement? This creamy, no-bake chocolate cheesecake is your answer! It’s rich, decadent, and best of all, you don’t need to turn on the oven. Just whip it up, let it chill, and enjoy the compliments from your guests.
Prep Time: 20 minutes
Chill Time: 4 hours
Servings: 16
Imagine a dessert that perfectly balances smooth chocolate and cream cheese. This cheesecake does just that! With its velvety texture and rich flavor, it’s bound to impress. Plus, because it’s no-bake, you save time and avoid the heat of the kitchen. It’s a win-win!
Nutrition Information: Each slice contains about 250 calories, 15g fat, and 5g protein.
Ingredients:
– 1 cup crushed graham crackers
– 1/2 cup melted butter
– 2 cups cream cheese, softened
– 1 cup powdered sugar
– 1 cup unsweetened cocoa powder
– 1 cup whipped cream
Instructions:
1. In a bowl, combine the crushed graham crackers and melted butter. Stir until mixed.
2. Press this mixture firmly into the bottom of a 9-inch springform pan.
3. In a separate bowl, beat the softened cream cheese and powdered sugar together until smooth.
4. Add the cocoa powder and mix well until combined.
5. Gently fold in the whipped cream until everything is blended.
6. Pour the chocolate mixture over your graham cracker crust and smooth the top.
7. Cover and refrigerate for at least 4 hours, or overnight for best results.
Tips:
For a touch of elegance, sprinkle chocolate shavings or fresh berries on top before serving!
FAQ: Can I make this dessert a day ahead? Yes! It keeps well in the fridge for up to a week, making it perfect for parties or gatherings.
Now, get ready to serve up this showstopper and watch your friends and family enjoy every bite!
No-Bake Chocolate Cheesecake
Editor’s Choice


Hamilton Beach 6-Speed Electric Hand Mixer with Whisk, Traditional Beate…
 Amazon$27.95
Medley Hills Farm Graham cracker crumbs – in Resealable Bag – 1.5 lbs
 Amazon$13.99
2. Rainbow Fruit Skewers
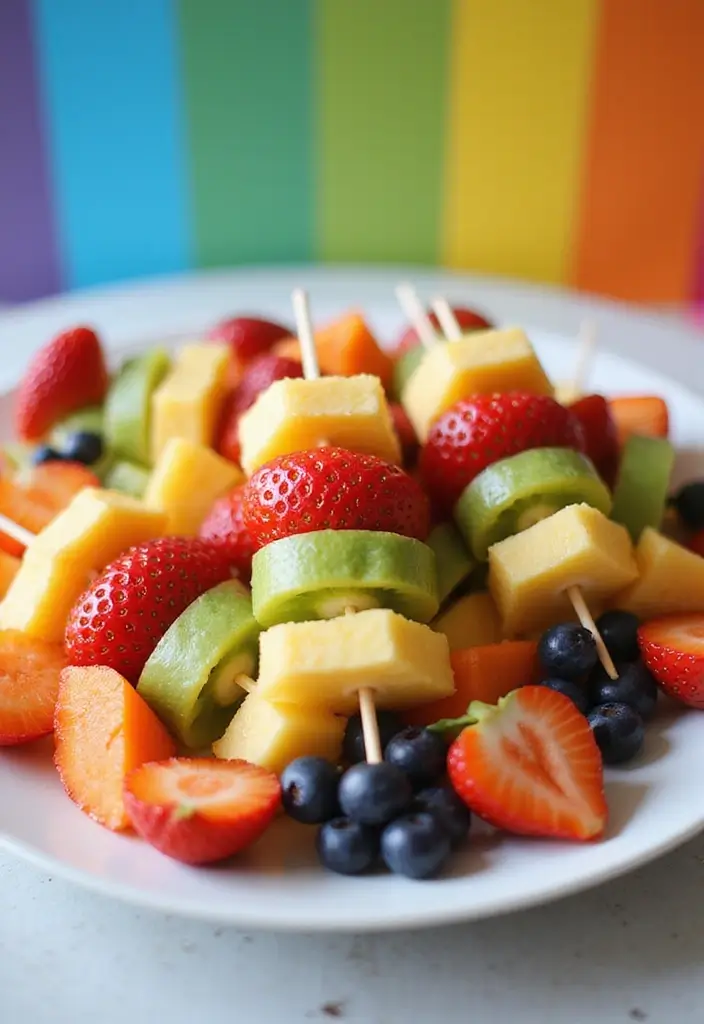
Brighten up any gathering with Rainbow Fruit Skewers! These lively treats are not just a feast for the eyes; they’re also a healthy snack that kids can easily enjoy. You’ll love how simple they are to make, and they require zero cooking! Perfect for birthday parties, picnics, or any festive occasion, these colorful skewers will make your dessert table pop.
Picture a vibrant array of strawberries, melons, pineapples, and blueberries, all neatly stacked on skewers. Each bite is juicy and refreshing, making these skewers a hit with both kids and adults. Plus, they’re a fantastic way to introduce more fruit into your little ones’ diets. Pinterest is buzzing with these fun ideas, and now you can create your own masterpiece!
Ready to make your own Rainbow Fruit Skewers? Here’s how:
Prep Time: 15 minutes
Servings: 20 skewers
Ingredients:
– 1 cup strawberries, halved
– 1 cup melon balls
– 1 cup pineapple chunks
– 1 cup blueberries
– Skewers
Instructions:
1. Wash and prepare all the fruit as needed.
2. Take a skewer and thread the fruits on, alternating colors for a beautiful effect.
3. Once all the fruit is on the skewer, arrange them on a platter.
4. Serve fresh and enjoy!
Pro Tip: For that extra touch, drizzle a little honey or serve with yogurt for dipping. The kids will love it even more!
FAQ:
Can I use frozen fruit? While fresh fruit is best, you can use thawed frozen fruit in a pinch. Just be aware it may not hold its shape as well as fresh fruit.
Now you’re all set to impress your guests with these colorful and tasty Rainbow Fruit Skewers. Enjoy the compliments!
Rainbow Fruit Skewers
Editor’s Choice

HOPELF 12″ Natural Bamboo Skewers for BBQ,Appetiser,Fruit,Cocktail,Kabob…
 Amazon$6.99
Oaki Bitty Bites Bundle | 3-in-1 Fruit Cutter Set | Apple, Grape, Strawb…
 Amazon$23.99
DELLING Large Serving Platter Set 16/14/12inch Large Serving Tray – Rect…
 Amazon$38.99
3. Easy Chocolate Chip Cookie Bars
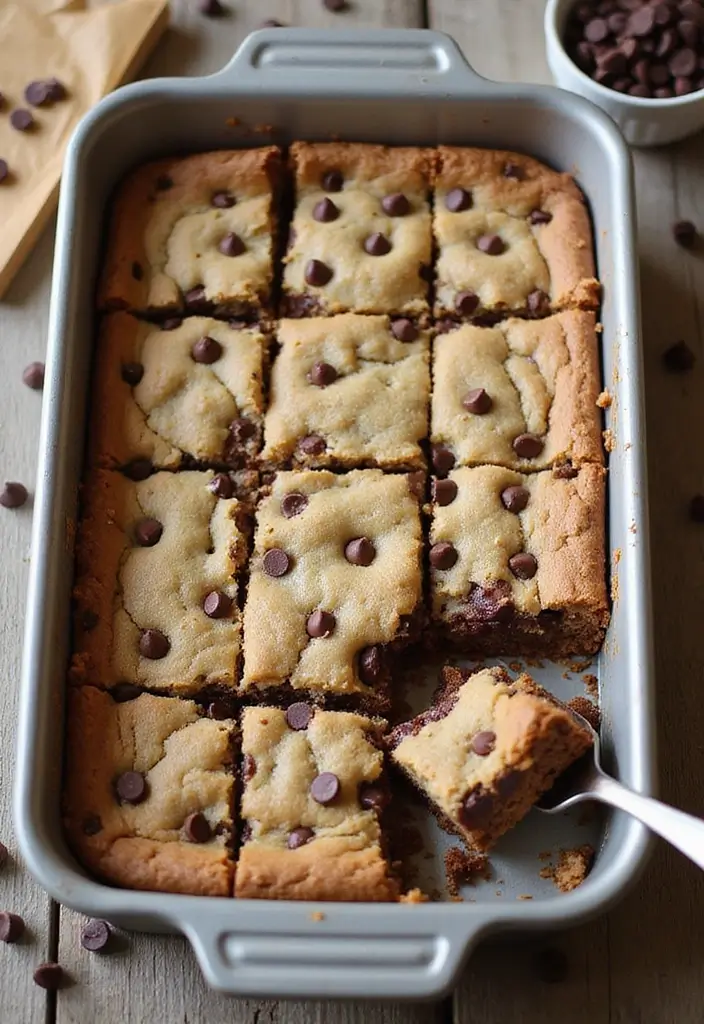
Overview: Are you ready to delight your friends and family with a treat everyone adores? These Easy Chocolate Chip Cookie Bars are your answer! They combine the classic taste of chocolate chip cookies into a simple bar form, making them a breeze to serve to a crowd.
Imagine warm, gooey bars filled with rich chocolate chips. You can easily cut them into squares, making them perfect for parties, picnics, or family gatherings. Plus, the best part? You can personalize them! Add nuts, dried fruit, or even a sprinkle of sea salt to elevate the flavor.
Prep Time: 10 minutes
Bake Time: 25 minutes
Servings: 24
Nutrition Information: Each cookie bar contains around 180 calories, 8g of fat, and 2g of protein.
Ingredients:
– 1 cup butter, softened
– 1 cup brown sugar
– 1/2 cup white sugar
– 2 eggs
– 2 tsp vanilla extract
– 2 1/4 cups all-purpose flour
– 1 tsp baking soda
– 2 cups chocolate chips
Instructions:
1. Preheat your oven to 350°F (175°C). Grease a baking dish.
2. In a large bowl, cream together the softened butter, brown sugar, and white sugar until smooth.
3. Add the eggs one at a time, mixing well after each addition. Stir in the vanilla extract.
4. In a separate bowl, mix the flour and baking soda. Gradually add this to the creamed mixture until just combined.
5. Gently fold in the chocolate chips.
6. Spread the dough evenly in the prepared baking dish.
7. Bake for 20-25 minutes or until the edges are golden brown. Let cool before cutting into squares.
Tips: Want to add a special touch? Sprinkle a bit of sea salt on top before baking. It creates a delightful contrast to the sweetness!
FAQ: Can you freeze these bars? Yes, they freeze beautifully! Just wrap them tightly to prevent freezer burn. Enjoy these delicious bars anytime!
Easy Chocolate Chip Cookie Bars
Editor’s Choice

Farberware Nonstick Bakeware Baking Pan / Nonstick Cake Pan, Rectangle -…
 Amazon$15.99
4. Strawberry Shortcake Cups
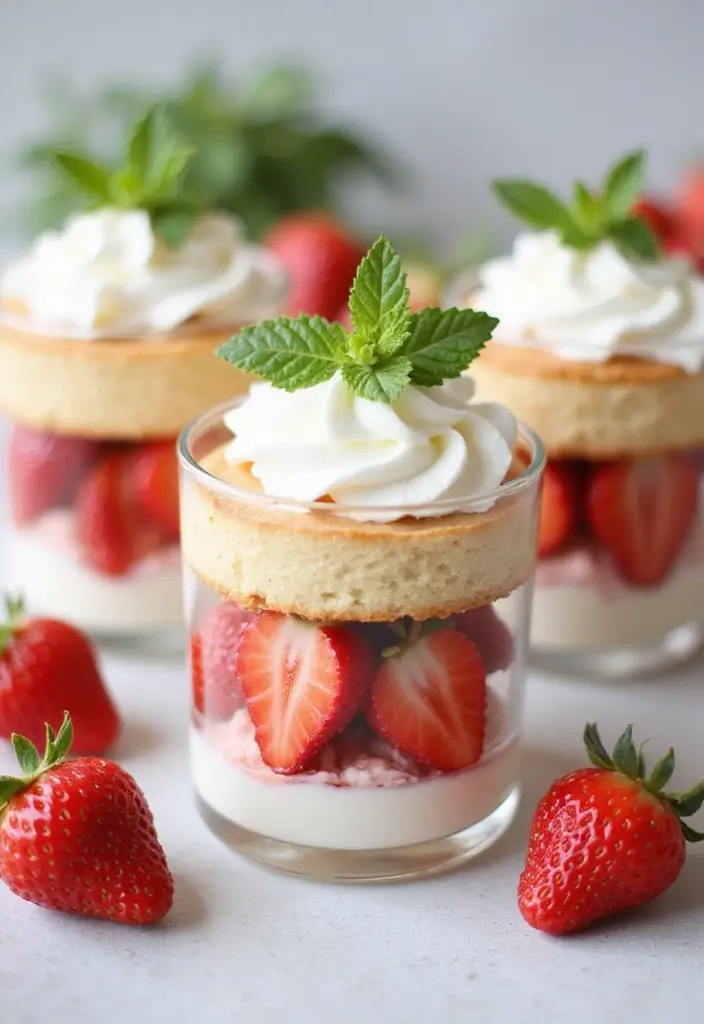
Overview: Looking for a sweet treat that’s sure to impress? Try these adorable strawberry shortcake cups! They’re a fun, individual twist on the classic dessert that everyone loves.
Prep Time: 15 minutes
Chill Time: 30 minutes
Servings: 12
These cups are a delightful mix of fluffy whipped cream, juicy strawberries, and soft crumbled cake. You’ll love how easy they are to put together, and they look beautiful on any dessert table. Plus, kids will enjoy having their own personal servings!
Nutrition Information: Each cup has around 150 calories, filled with fresh fruit goodness.
Ingredients:
– 2 cups diced strawberries
– 1 cup whipped cream
– 1 pound sponge cake, crumbled
– Mint leaves for garnish (optional)
Instructions:
1. Start by layering crumbled sponge cake at the bottom of small cups.
2. Next, add a layer of whipped cream, followed by a layer of diced strawberries.
3. Repeat the layering until the cups are full.
4. If you like, garnish with mint leaves and chill in the fridge before serving.
Tips: Want a pop of color? Mix in some blueberries with your strawberries for a fun twist!
FAQ: Can I use frozen strawberries? Fresh strawberries taste best, but thawed frozen ones can work in a pinch.
Enjoy these strawberry shortcake cups at your next gathering! They’re not just delicious; they add a lovely touch to your dessert spread.
Strawberry Shortcake Cups
Editor’s Choice
5-ounce transparent square dessert Cups (50 dessert Cups+50 Spoons)
 Amazon$10.99
EurKitchen Professional Aluminum Whipped Cream Dispenser – Leak-Free Whi…
 AmazonEUR 37.16
Jovvily Tres Leches Sponge Cake Mix – 2 lb – Sweet – Moist – Easy to Make
 Amazon$14.99
5. Mini Cupcakes

Mini Cupcakes: The Perfect Party Treat
Mini cupcakes are the ultimate crowd-pleaser at any gathering. Their small size makes them easy for kids and adults to enjoy without the mess. Plus, you can choose from a wide range of flavors, from classic vanilla to rich chocolate. Top them with colorful frosting and sprinkles to make them even more appealing. These treats are not just cute; they’re delicious!
With a quick prep time of just 15 minutes and a bake time of another 15, you can whip up a batch of 36 mini cupcakes in no time. Each mini cupcake is around 100 calories, making them a sweet option that won’t weigh you down.
Here’s how to make these delightful desserts:
Ingredients:
– 1 1/2 cups all-purpose flour
– 1 cup sugar
– 1/2 cup butter, softened
– 2 eggs
– 1/2 cup milk
– 1 tsp vanilla extract
Instructions:
1. Preheat your oven to 350°F (175°C). Line your mini muffin tins with liners.
2. In a large bowl, cream together the butter and sugar until light and fluffy.
3. Beat in the eggs one at a time, then stir in the vanilla extract.
4. Gradually mix in the flour and milk until just combined.
5. Fill each liner about two-thirds full with batter. Bake for 12-15 minutes or until a toothpick comes out clean.
6. Allow them to cool completely before decorating with your favorite frosting.
Tips: Add gel food coloring to your frosting for bright, eye-catching colors!
You might wonder if you can make these a day in advance. Absolutely! Store them in an airtight container, and they’ll stay fresh for up to two days.
These mini cupcakes not only taste great but also look fantastic on any dessert table. They are perfect for birthday parties, family gatherings, or any celebration where you want to impress your guests.
• Choose fun flavors like red velvet or lemon for variety.
• Decorate with themed colors for holidays or events.
• Use mini cupcake liners for a neat presentation.
• Get creative with toppings like edible glitter or fresh fruit.
Mini cupcakes are easy to make and even easier to love. So why not bake a batch for your next event? Your guests will thank you!
Mini Cupcakes
Editor’s Choice

Nonstick 24 Cups Mini Muffin Pan with Extended Handles for Easy Grip, Ca…
 Amazon$9.99
Chefmaster – Neon Liqua-Gel Food Coloring – Fade Resistant – 6 Pack of 2…
 AmazonCheck Price
Riccle Piping Bags and Tips Set, 11.8 Inch 100 Anti Burst Piping Bags, 1…
 Amazon$7.99
6. Funfetti Cake Mix Cookies
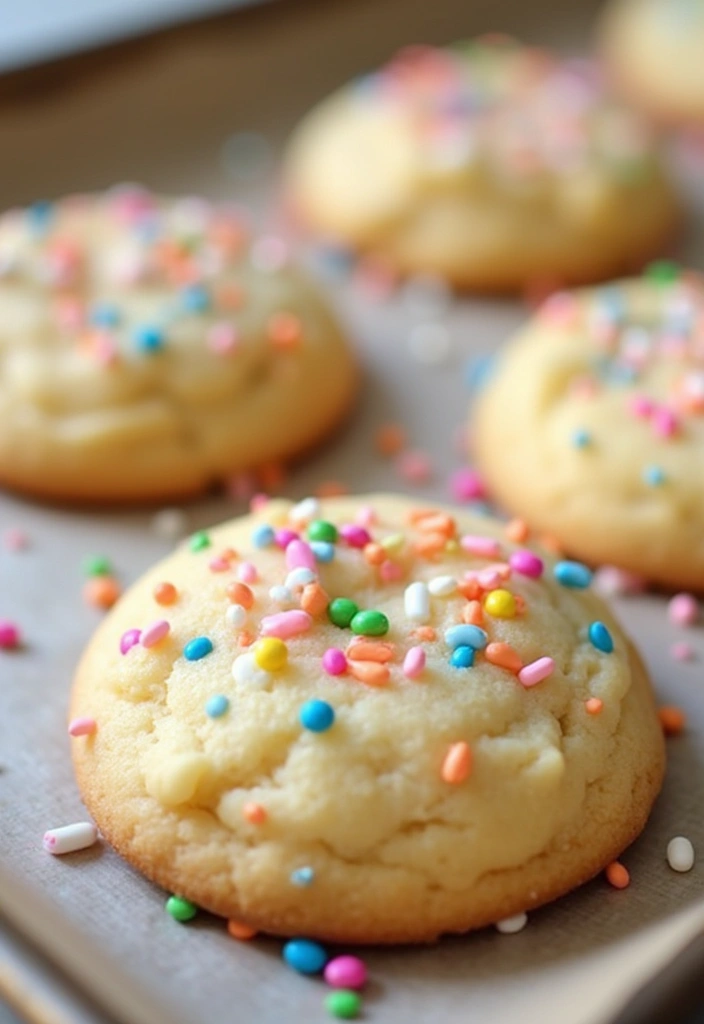
Overview: Are you ready to brighten up your dessert table? These Funfetti Cake Mix Cookies are not just cookies; they’re little bites of joy! Bursting with colorful sprinkles, they bring a festive feel to any gathering. Plus, they’re simple to make, so you can whip them up whenever you want something sweet.
Prep Time: 10 minutes
Bake Time: 10 minutes
Servings: 24
These cookies are soft, chewy, and oh-so-delicious. Using cake mix means you can bake them in a snap, making them perfect for last-minute parties or when you want to treat yourself. Picture this: a warm cookie fresh from the oven, the sweet smell filling your kitchen, and the colorful sprinkles making you smile.
Nutrition Information: Each cookie contains about 130 calories, and they’re sure to bring you happiness with every bite!
Ingredients:
– 1 box Funfetti cake mix
– 1/2 cup unsalted butter, softened
– 2 large eggs
– 1/2 cup colorful sprinkles
Instructions:
1. Preheat your oven to 350°F (175°C).
2. In a mixing bowl, cream the softened butter until it’s nice and fluffy.
3. Add in the eggs and mix until combined.
4. Gradually add the Funfetti cake mix, stirring until the dough comes together.
5. Fold in the sprinkles for that festive touch.
6. Scoop tablespoon-sized portions of the dough onto a baking sheet lined with parchment paper.
7. Bake for 8-10 minutes, or until the edges are lightly golden.
Tips: Don’t hesitate to experiment! You can use any cake mix flavor for different cookie variations.
FAQ: Can I freeze the dough? Yes! You can freeze it for up to 3 months. Just scoop the dough into balls and freeze them on a baking sheet. Then transfer them to a freezer bag. When you’re ready, bake straight from the freezer, adding a couple of extra minutes to the baking time.
Funfetti Cake Mix Cookies
Editor’s Choice

Pillsbury Funfetti Party Size Cake Mix & Frosting, Makes 48 Cupcakes, 61…
 Amazon$16.50
Amazon Basics Parchment Paper for Baking, Non-Stick, 90 Sq Ft Roll, 1 Pack
 Amazon$6.79
Amazon Basics Silicone Rectangular Baking Mat, Non-Stick Reusable Oven B…
 Amazon$16.79
7. Rice Krispie Treats
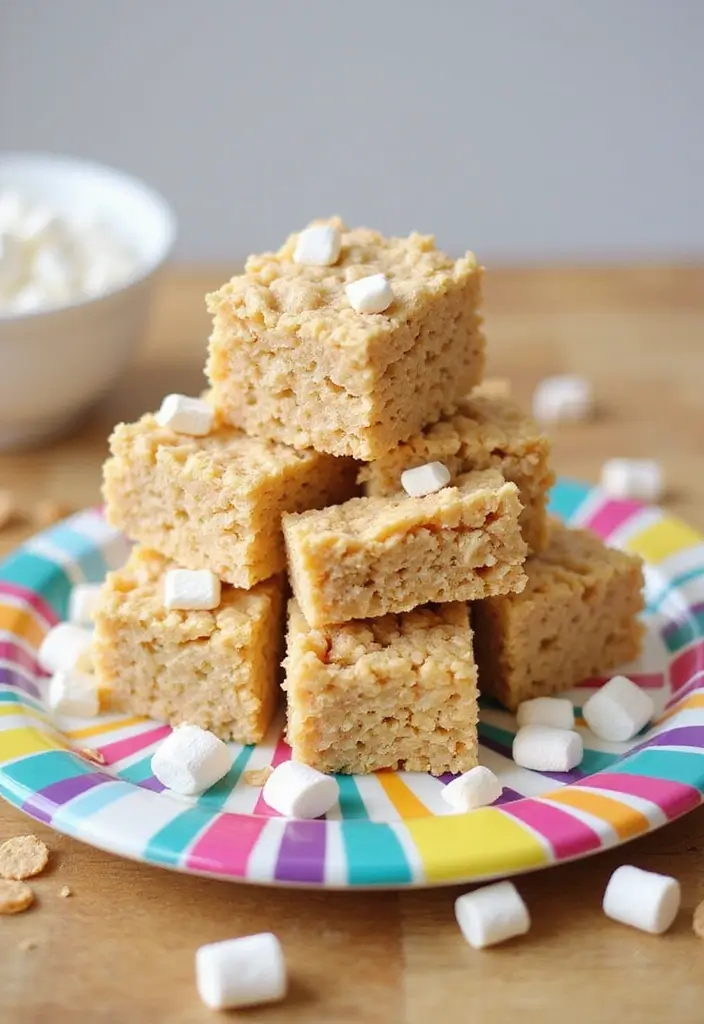
Rice Krispie Treats: A Crowd-Pleasing Classic
When you’re looking for a dessert that everyone will adore, Rice Krispie treats are a top choice. These sweet, marshmallowy squares are not just easy to make; they also bring back fond memories for many. Kids love their chewy texture, while adults appreciate their nostalgic charm. Plus, they are quick to whip up, making them an ideal last-minute treat for parties or gatherings.
Prep Time: 10 minutes
Set Time: 30 minutes
Servings: 24
Imagine the smell of melted marshmallows mixing with buttery goodness. It’s irresistible! You can easily customize these treats by adding chocolate chips, nuts, or colorful sprinkles. Picture a platter filled with these squares, each one a different color. Pinterest is buzzing with creative variations on this classic, so you can make them uniquely yours.
To make perfect Rice Krispie treats at home, follow these simple steps. Don’t worry about breaking the bank; this recipe is budget-friendly and requires just a few ingredients.
Ingredients:
– 6 cups Rice Krispies cereal
– 4 cups mini marshmallows
– 3 tablespoons butter
Instructions:
1. In a large saucepan, melt the butter over low heat, stirring gently.
2. Add the mini marshmallows and stir until they are completely melted and smooth.
3. Remove the saucepan from heat. Quickly add the Rice Krispies cereal, stirring until every piece is coated.
4. Transfer the mixture to a greased pan and press it down evenly. Let it set for 30 minutes.
5. Once set, cut into squares and arrange them on a serving platter.
Tips: Try drizzling melted chocolate on top for a gourmet touch! You can also mix in your favorite cereals to give it a crunchy twist.
• Use mini marshmallows for a smoother texture.
• Choose a fun, colorful sprinkles for a festive look.
• Add chocolate chips to make it extra indulgent.
• Try different cereals for unique flavors and textures.
These Rice Krispie treats are perfect for birthday parties, family gatherings, or just a sweet snack at home. They’re easy to make, fun to customize, and sure to bring smiles to everyone’s faces!
Rice Krispie Treats
Editor’s Choice

Silicone Baking Mat, 3 Pack Reusable Baking Mat, Non-Stick, Food Safe Si…
 Amazon$9.99
Cold Breakfast Cereal, 8 Vitamins and Minerals, Rice Krispies Treats, La…
 Amazon$4.23
8. Chocolate-Dipped Pretzels
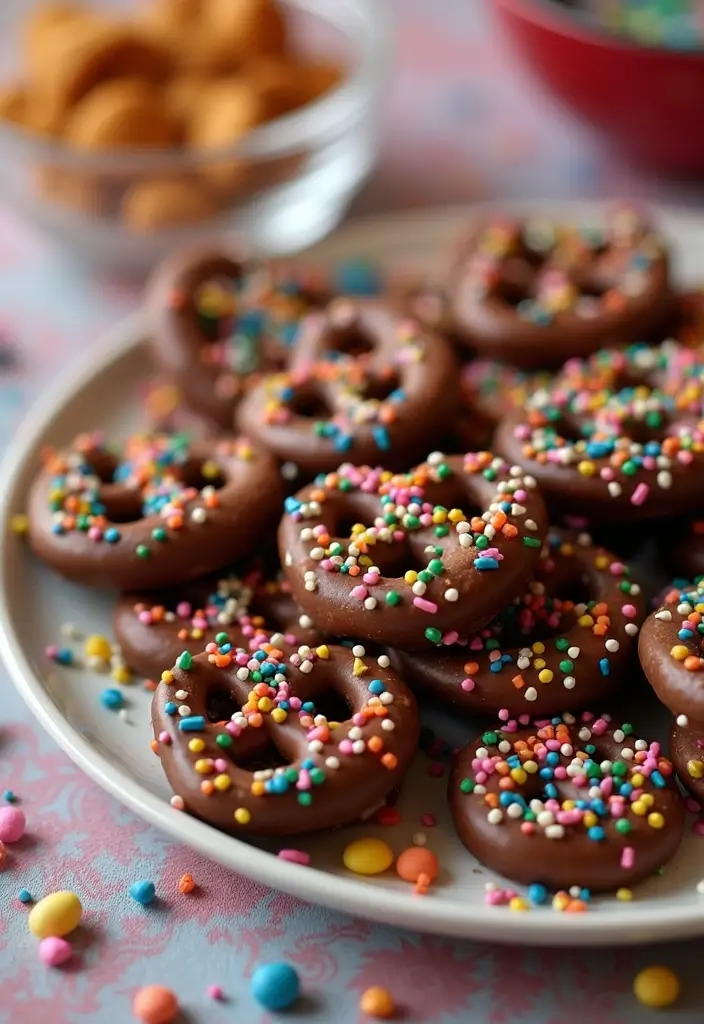
Overview: Indulge in the perfect blend of sweet and salty with chocolate-dipped pretzels. These delightful treats are not just easy to make; they’re also a hit at any gathering. Imagine the crunch of pretzels coated in rich chocolate, creating a snack that everyone can’t resist. They’re simple enough for kids to help with, turning snack time into a fun family activity!
Prep Time: 15 minutes
Chill Time: 30 minutes
Servings: 30
Here’s how to make them. You’ll need just a few ingredients, and the process is quick. Plus, you can customize them with colorful sprinkles for a festive look, making them perfect for parties or potlucks.
Ingredients:
– 12 oz chocolate chips
– 30 pretzel rods
– Sprinkles (optional)
Instructions:
1. Start by melting the chocolate chips in a microwave-safe bowl. Heat in short bursts, stirring until smooth.
2. Dip each pretzel rod halfway into the melted chocolate. Let the excess chocolate drip back into the bowl.
3. Place the dipped pretzels on a sheet of parchment paper. If you want, sprinkle colorful toppings on them before the chocolate sets.
4. Put the pretzels in the refrigerator for about 30 minutes or until the chocolate is firm.
Tips: Want a twist? Use white chocolate for a fun variation! You can also experiment with different toppings like crushed nuts or coconut flakes.
FAQ: How long do these treats last? Keep them in an airtight container at room temperature for up to a week. They make a great snack for movie nights and gatherings!
These chocolate-dipped pretzels are not only easy to make but also a crowd-pleaser. Enjoy the smiles when you serve them!
Chocolate-Dipped Pretzels
Editor’s Choice

Amazon Basics Silicone Rectangular Baking Mat, Non-Stick Reusable Oven B…
 Amazon$16.79
Pyrex Essentials (3-Piece) Glass Mixing Bowls Set For Prepping, Baking a…
 AmazonEUR 15.55
Wilton Candy Melts Melting Pot, Perfect for Dipping, Drizzling & Decorat…
 Amazon$28.14
9. Brownie Bites
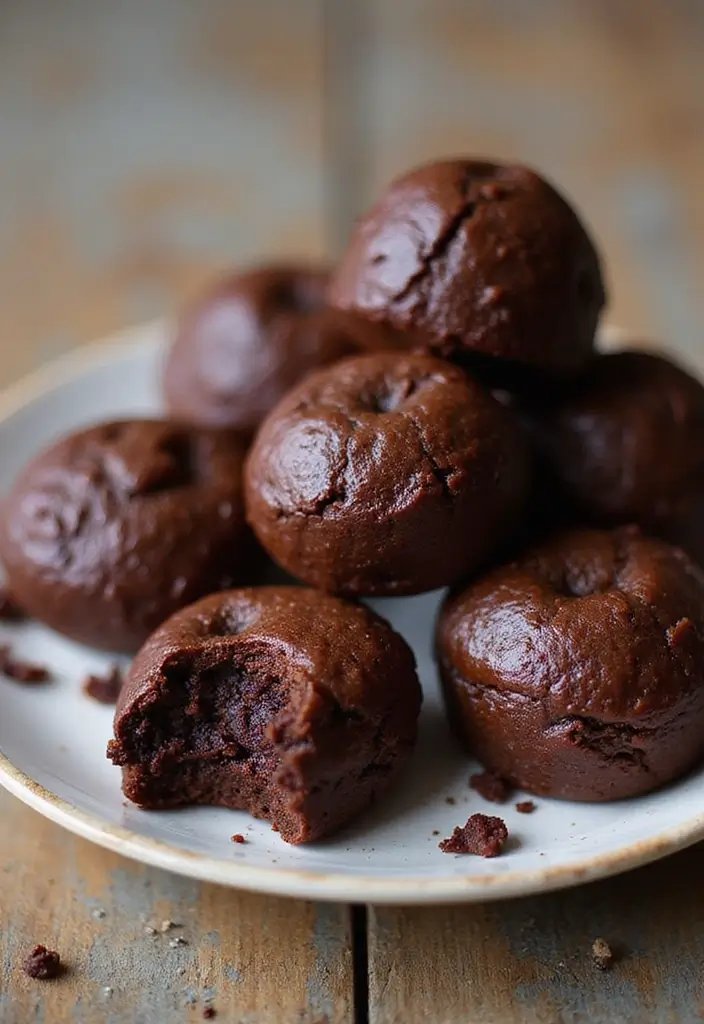
Overview: If you’re looking for a sweet treat that everyone will adore, these brownie bites are the answer. They pack all the rich, chocolatey flavor of a classic brownie into convenient, bite-sized pieces. Perfect for parties or gatherings, these fudgy delights are sure to satisfy any chocolate lover’s cravings without the guilt of a full-sized brownie.
Prep Time: 10 minutes
Bake Time: 20 minutes
Servings: About 24 bites
With a soft, chewy texture and a decadent taste, these brownie bites are easy to whip up. They’re great for sharing and can be made in no time, making them a go-to recipe for any occasion. Plus, each bite contains around 120 calories, so you can indulge without overdoing it.
Ingredients:
– 1/2 cup butter, melted
– 1 cup granulated sugar
– 2 large eggs
– 1/3 cup unsweetened cocoa powder
– 1/2 cup all-purpose flour
– 1/4 teaspoon baking powder
– 1/4 teaspoon salt
Instructions:
1. Preheat your oven to 350°F (175°C) and prepare a mini muffin tin by greasing it lightly.
2. In a saucepan over low heat, melt the butter. Once melted, take it off the stove and stir in the sugar, eggs, and a splash of vanilla extract for extra flavor.
3. Next, mix in the cocoa powder, flour, baking powder, and salt until just combined. Don’t overmix; you want it to be smooth but not too airy.
4. Spoon the batter into your prepared mini muffin tin, filling each cup about three-quarters full.
5. Bake for 18-20 minutes, or until a toothpick inserted into the center comes out with a few moist crumbs.
6. Allow to cool for a few minutes before gently removing them from the tin.
Tips:
– Add a handful of chocolate chips to the batter for an extra chocolatey kick!
– Want to make them gluten-free? Swap regular flour for a gluten-free variety.
These brownie bites are a simple, crowd-pleasing dessert that’s sure to brighten up any gathering. Enjoy sharing them with friends and family, or keep them all to yourself—they’re that good!
Brownie Bites
Editor’s Choice

Wilton Gold Premium Non-Stick Warp-Resistant Bakeware, Made without PFAs…
 Amazon$18.99
5 Pieces Silicone Spatula Set, Food Grade Rubber Spatula, Upgrade Strong…
 Amazon$8.99
King Arthur Measure for Measure Gluten-Free Flour: All-Purpose 1:1 Subst…
 Amazon$8.62
10. Pudding Parfaits
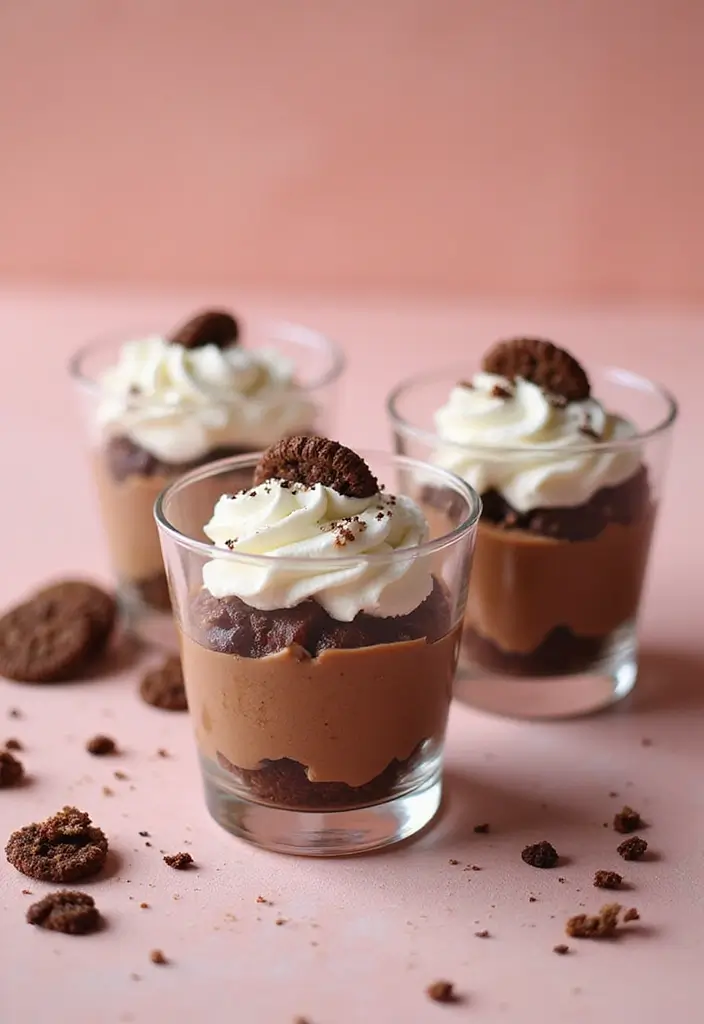
Overview: Looking for a quick and tasty dessert that pleases a crowd? Pudding parfaits are your answer! They’re fun to make and even more enjoyable to eat, with layers that create a beautiful presentation.
Prep Time: 10 minutes
Chill Time: 20 minutes
Servings: 12
Imagine rich chocolate pudding nestled between fluffy whipped cream and crunchy cookie crumbles. These parfaits not only taste amazing, but they also look impressive on any table. You can easily switch up the flavors or toppings to match your guests’ preferences, making each batch unique.
Nutrition Information: Each parfait contains about 180 calories, making them a delightful yet manageable dessert choice.
Ingredients:
– 3 cups chocolate pudding
– 2 cups whipped cream
– 1 cup crushed cookies (like Oreos)
Instructions:
1. Start by taking a clear cup. Spoon in a layer of chocolate pudding.
2. Add a layer of whipped cream on top of the pudding.
3. Sprinkle some crushed cookies over the whipped cream.
4. Repeat these layers until the cup is full, finishing with whipped cream and cookie crumbles on top.
5. Chill them in the refrigerator for at least 20 minutes before serving.
Tips: Want to make them even more exciting? Try using different pudding flavors like vanilla or butterscotch. You can also add fruit, like sliced strawberries or bananas, for a fresh twist!
FAQ: Can I prepare these parfaits in advance? Yes! You can make them a day ahead and keep them in the fridge. This makes them a perfect choice for parties or gatherings.
Pudding parfaits are not just a treat; they’re a delightful way to impress your friends and family without spending hours in the kitchen. Enjoy making this easy dessert!
Pudding Parfaits
Editor’s Choice

50Pcs Square Mini Plastic Dessert Cups,3.5Oz Clear Plastic Parfait Appet…
 Amazon$8.99
EurKitchen Professional Aluminum Whipped Cream Dispenser – Leak-Free Whi…
 Amazon$42.99
Lotus Biscoff Crumble – Crumbled Caramelized Biscuit Cookies – 1.65 lbs bag
 Amazon$9.99
11. S’mores Dip
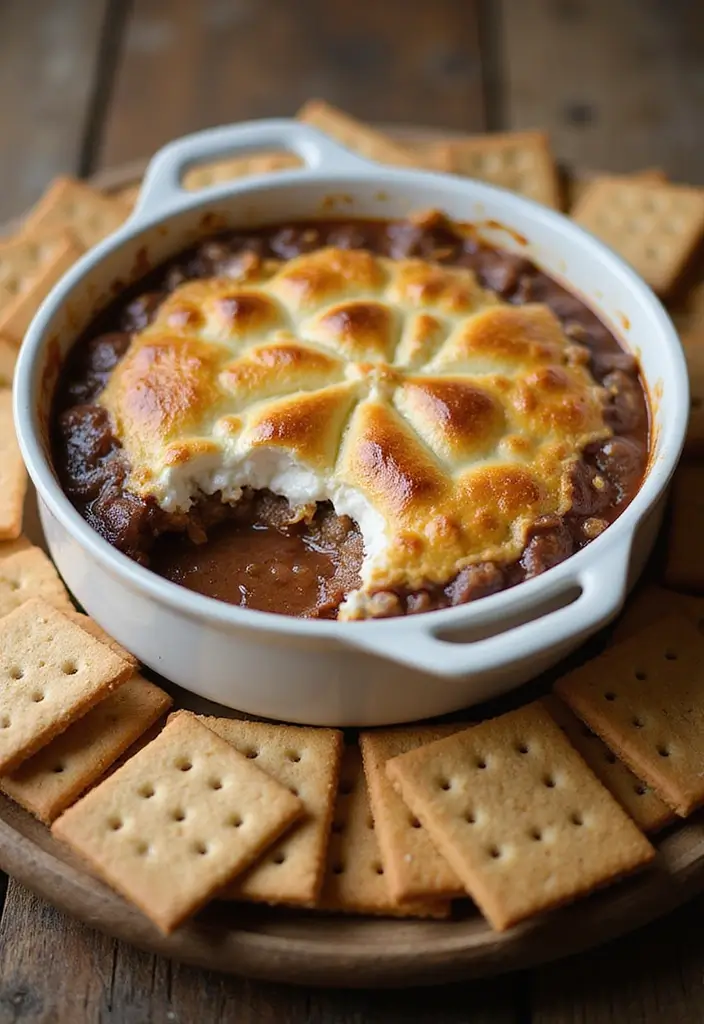
Overview: Imagine sinking your spoon into a warm, gooey s’mores dip that bursts with all the classic flavors you love. This dessert is not just a treat; it’s an experience, perfect for sharing with friends and family. Gather around the table and watch everyone dive in!
Prep Time: 10 minutes
Bake Time: 15 minutes
Servings: 8
This s’mores dip combines rich, melted chocolate, fluffy mini marshmallows, and crunchy graham crackers. The best part? You can customize it to your taste! Kids will love the interactive element of dipping, making it a delightful dessert for parties or cozy gatherings.
Nutrition Information: Each serving has around 250 calories, depending on the type of dipping crackers you choose.
Ingredients:
– 1 cup chocolate chips
– 1 cup mini marshmallows
– 1 cup graham crackers, for dipping
Instructions:
1. Preheat your oven to 400°F (200°C).
2. In a baking dish, create a layer of chocolate chips. Spread mini marshmallows evenly on top.
3. Bake for approximately 15 minutes, or until the marshmallows turn golden brown and bubbly.
4. Serve the dip warm with graham crackers for dipping.
Tips:
– Choose dark chocolate for a richer flavor.
– Mix in some peanut butter chips for a twist.
– For a fun twist, add crushed candy bars on top before baking.
FAQ:
Can I prepare this in advance? Yes! Layer the ingredients in your baking dish and cover. Bake just before serving for the best results.
S’mores Dip
Editor’s Choice

DOWAN Casserole Dish, 9×13 Ceramic Baking Dish, Large Lasagna Pan Deep f…
 Amazon$29.99
CHIPS AHOY! Original Chocolate Chip Cookies, 20 Snack Packs (2 Cookies P…
 AmazonCheck Price
12. Cookie Dough Truffles
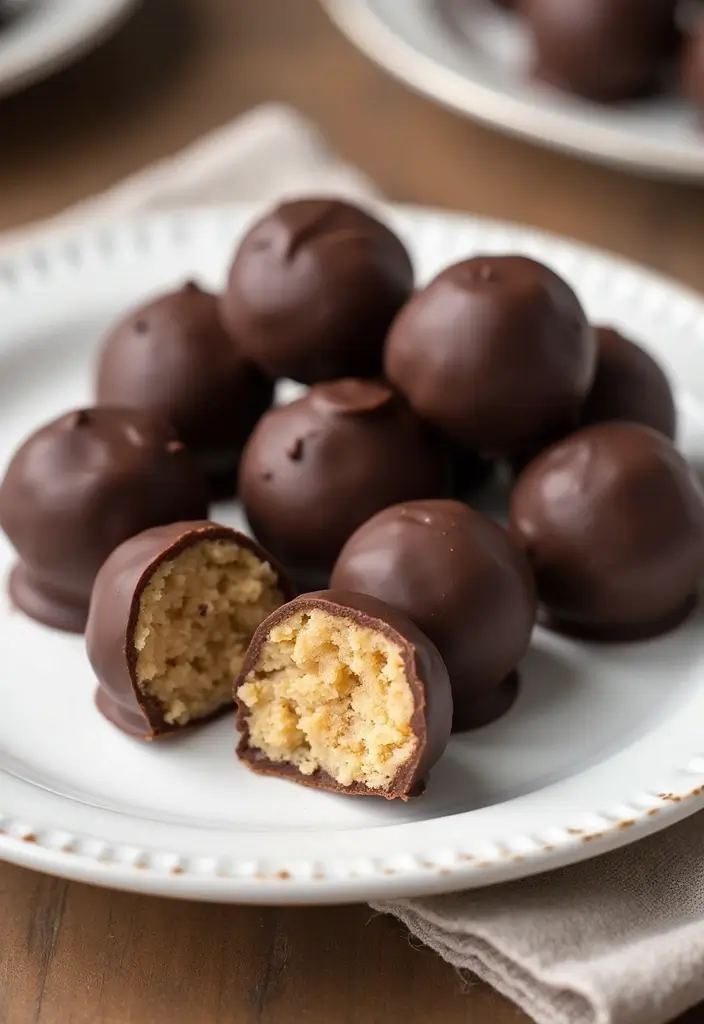
Sweet Delight: Cookie Dough Truffles
Craving a treat that pleases both kids and adults? Look no further than these cookie dough truffles! These bite-sized wonders are packed with the delicious flavor of classic cookie dough and are coated in rich chocolate. They’re perfect for parties, potlucks, or just a cozy night in when your sweet tooth calls. Imagine the satisfaction of biting into one of these creamy delights, with chocolate melting in your mouth and a taste of nostalgia flooding back.
Making these truffles is quick and easy. With just a little prep time, you’ll have a crowd-pleaser that everyone will rave about. Plus, they only require a few simple ingredients that you likely already have in your kitchen. Let’s get started on this delightful recipe!
Prep Time: 20 minutes
Chill Time: 30 minutes
Servings: 24
Ingredients:
– 1/2 cup butter, softened
– 1 cup brown sugar
– 2 cups flour (make sure to heat-treat it)
– 1 tsp vanilla extract
– 1/2 cup chocolate chips
– 12 oz chocolate for coating
Instructions:
1. In a mixing bowl, cream together the softened butter and brown sugar until the mixture is light and fluffy.
2. Gradually add in the heat-treated flour and vanilla extract. Mix until everything is well combined, then gently fold in the chocolate chips.
3. Roll the dough into small balls, about one inch in diameter, and place them on a baking sheet. Refrigerate for at least 30 minutes to firm them up.
4. While the truffles chill, melt the chocolate in a microwave-safe bowl or over a double boiler. Stir until smooth.
5. Once chilled, dip each truffle into the melted chocolate, ensuring they are fully coated. Place them back on the baking sheet to set.
6. Let the chocolate harden completely before serving, and enjoy your homemade treats!
Tips: Want to make these truffles even more fun? Add some crushed nuts or colorful sprinkles to the mix before rolling them into balls. It’s an easy way to customize your truffles and impress your guests!
FAQ: Are these cookie dough truffles safe to eat? Yes! Just make sure to use heat-treated flour, which eliminates any potential bacteria. Enjoy your sweet creation with peace of mind!
Get ready to share these cookie dough truffles with everyone! They’re sure to be a hit at any gathering, and you might just find yourself making them again and again.
Cookie Dough Truffles
Editor’s Choice

Silicone Baking Mat, 3 Pack Reusable Baking Mat, Non-Stick, Food Safe Si…
 Amazon$9.99
Spring Chef Heavy Duty Ice Cream Scoop with Comfortable Handle – Profess…
 Amazon$9.99
Double Boiler Pot Set,1250ML/1.1QT Mixing Bowl for Chocolate Melting, 22…
 Amazon$19.98
13. Lemon Bars
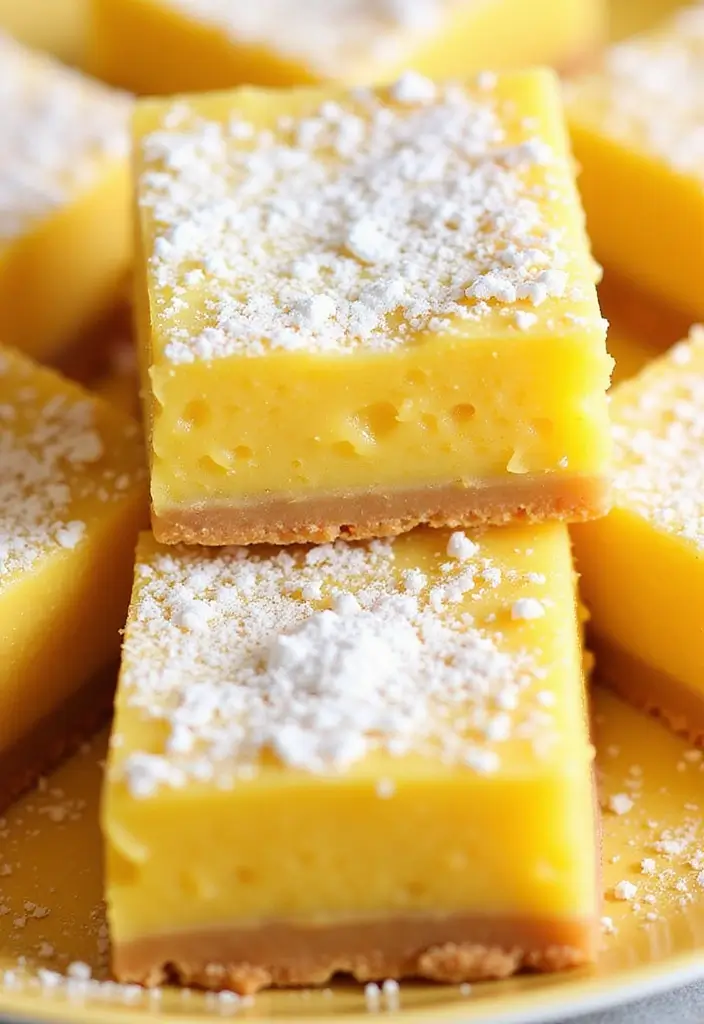
Overview: Looking for a dessert that brightens your gathering? Lemon bars are the perfect choice! Their bright, zesty flavor and sweet buttery crust make them a crowd-pleaser. These treats are especially refreshing on warm days, bringing a burst of sunshine to any table.
Prep Time: 15 minutes
Bake Time: 25 minutes
Servings: 16
Imagine sinking your teeth into a rich, buttery crust topped with a luscious lemon filling. You’ll find that balance of sweet and tart irresistible. Perfect for barbecues, picnics, or family gatherings, lemon bars are sure to impress your guests.
Nutrition Information: Each bar has about 200 calories, making it a delightful yet manageable treat.
Ingredients:
– 1 cup butter, softened
– 1 1/2 cups sugar
– 1 cup flour
– 4 eggs
– 1/2 cup lemon juice
Instructions:
1. Start by preheating your oven to 350°F (175°C). Grease a baking dish to prevent sticking.
2. In a mixing bowl, cream together the softened butter and sugar until it’s smooth and fluffy.
3. Gradually mix in the flour until just combined, then press this mixture firmly into the bottom of the prepared dish.
4. In another bowl, whisk the eggs and lemon juice together until well blended. Pour this mixture over the crust.
5. Bake for 25 minutes, or until the filling is set and slightly golden. Allow it to cool, then cut into squares.
Tips: Give your lemon bars a finishing touch by dusting them with powdered sugar before serving. This small detail adds elegance and a hint of sweetness!
FAQ: Wondering how long these treats will last? You can store your lemon bars in the refrigerator for up to a week. Perfect for those who love to snack!
Enjoy making and sharing these delightful lemon bars. They’re not just a dessert; they’re a refreshing experience everyone will love!
Fun fact: Lemon bars can be cut into 16 shareable squares, perfect for easy dessert recipes for a crowd. The bright lemon zing pairs with a buttery crust for a 40-minute wow that disappears fast.
Lemon Bars
Editor’s Choice

8-Piece Deep Glass Baking Dish Set with Plastic lids,Rectangular Glass B…
 Amazon$35.99
Elite Gourmet ETS740 BPA-Free Electric Citrus Juicer with 2 Cones, Compa…
 Amazon$22.31
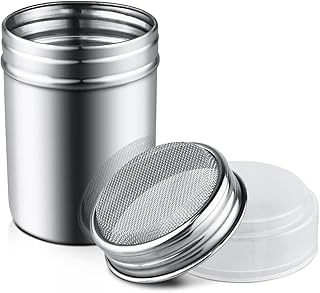
1Pcs Stainless Steel Powder Sugar Shaker Duster with Lid, Fine Mesh Shak…
 Amazon$5.99
14. Peanut Butter Cup Brownies
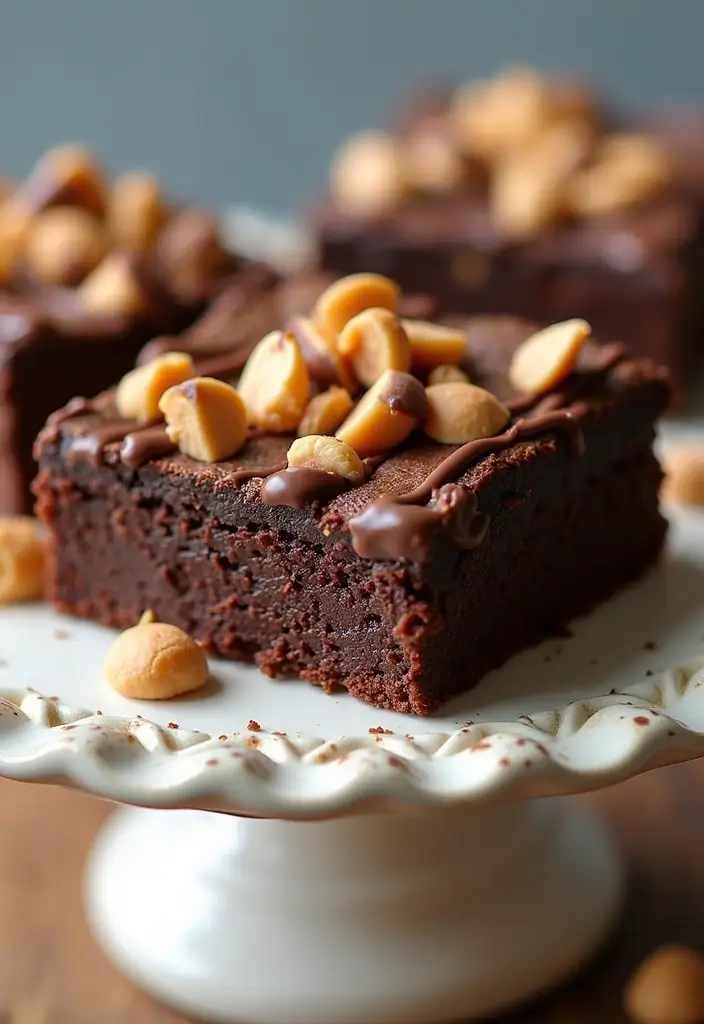
Overview: If you adore peanut butter, these brownies will quickly become your new favorite treat! They are rich, fudgy, and topped with mini peanut butter cups, making them irresistible at any gathering.
Prep Time: 15 minutes
Bake Time: 30 minutes
Servings: 24
Imagine serving these warm, gooey brownies at your next party. The sweet aroma fills the room, and everyone will be eager to grab a piece. They’re perfect for birthdays, potlucks, or just a cozy night in with friends.
Nutrition Information: Each brownie contains about 200 calories, making them a delightful indulgence.
Ingredients:
– 1 cup butter
– 1 cup sugar
– 4 eggs
– 1 cup flour
– 1 cup cocoa powder
– 1 cup mini peanut butter cups, chopped
Instructions:
1. Preheat your oven to 350°F (175°C). Grease a baking dish to prevent sticking.
2. In a bowl, melt the butter. Then mix in sugar and eggs until smooth.
3. Gradually stir in the flour and cocoa powder until the batter is smooth and creamy.
4. Pour the mixture into the greased pan. Sprinkle the chopped peanut butter cups on top for that extra treat.
5. Bake for 30 minutes. Check with a toothpick; it should come out clean when done.
Tips: Serve these brownies warm with a scoop of vanilla ice cream. It’s a match made in dessert heaven!
FAQ: Can I use crunchy peanut butter? Absolutely! It adds a delightful texture that everyone will love.
This recipe is not just simple; it’s a guaranteed crowd-pleaser. Try it out, and watch your guests come back for seconds!
Peanut Butter Cup Brownies
Editor’s Choice

DOWAN Casserole Dish, 9×13 Ceramic Baking Dish, Large Lasagna Pan Deep f…
 Amazon$29.99
Silicone Spatula Set, Food Grade Rubber Spatula-4 Piece Nonstick Rubber …
 AmazonEUR 8.55
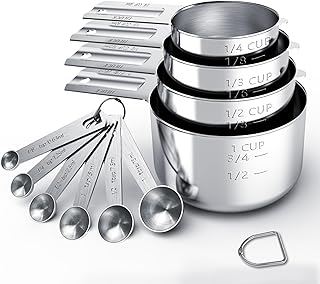
TILUCK Stainless Steel Measuring Cups & Spoons Set, Cups and Spoons,Kitc…
 Amazon$15.99
15. Apple Crisp Cups
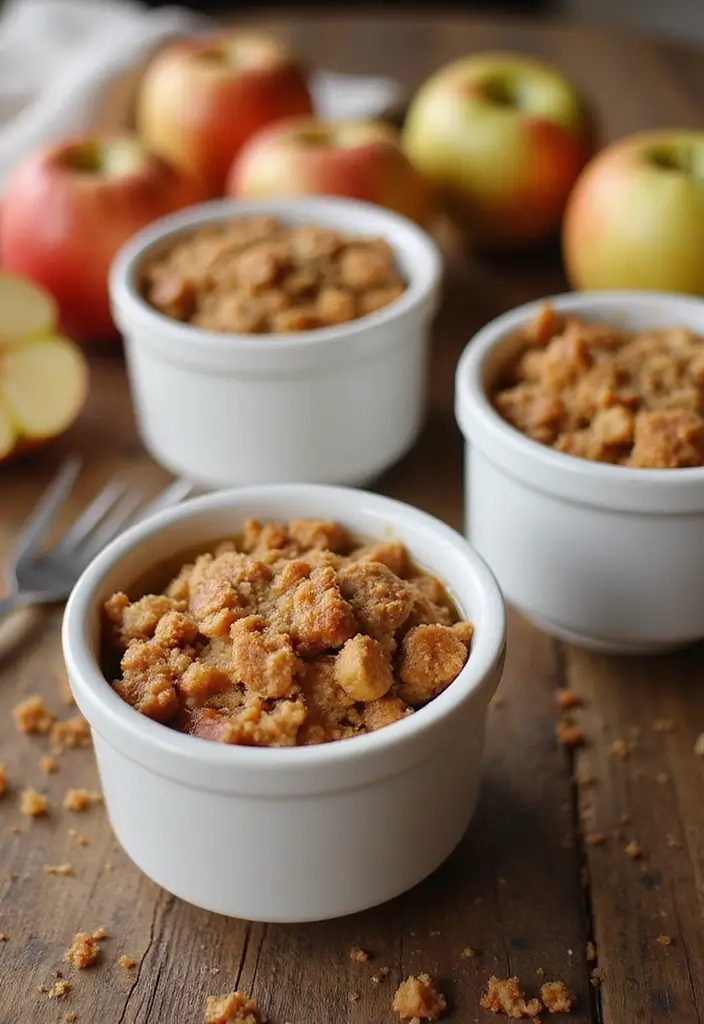
Delicious Apple Crisp Cups
Are you looking for a cozy dessert that’s perfect for gatherings? These individual Apple Crisp Cups are a delightful way to enjoy the warm flavors of fall any time of the year. Picture soft, spiced apples nestled beneath a golden, buttery crumble. Each bite is a comforting hug for your taste buds!
These cups are not only easy to prepare but also a hit with guests. You can whip them up in just 15 minutes and bake them in 20, making them a quick dessert option for any occasion. Plus, they serve 12, so you can easily satisfy a crowd.
Nutrition Information: Each cup has about 180 calories, making it a sweet treat you can enjoy without guilt.
Ingredients:
– 4 cups of sliced apples
– 1 tablespoon of lemon juice
– 1 cup of oats
– 1/2 cup of brown sugar
– 1/4 cup of flour
– 1/4 cup of melted butter
Instructions:
1. Preheat your oven to 350°F (175°C).
2. In a mixing bowl, toss the apple slices with lemon juice until coated.
3. In a separate bowl, mix oats, brown sugar, flour, and melted butter until crumbly.
4. Fill your cups with the apple mixture, then generously sprinkle the crumble on top.
5. Bake for about 20 minutes, or until the tops are golden and the apples are bubbling.
Tips: Serve these cups warm with a scoop of vanilla ice cream for a truly scrumptious experience!
FAQ: Can I switch fruits? Absolutely! Pears or peaches make excellent alternatives, adding a unique twist to this classic dessert.
With these Apple Crisp Cups, you can create a warm, inviting dessert that everyone will love. They’re perfect for family dinners, potlucks, or even a cozy night in. Enjoy the sweet aroma filling your kitchen as they bake, and watch your loved ones delight in this homemade treat!
Apple Crisp Cups
Editor’s Choice

Non-stick 200pcs Standard Cupcake Liners for Baking, Natural, Food-grade…
 Amazon$5.39
PrepWorks Dishwasher Safe Apple Slicer and Corer – 16-Slice Thin Apple C…
 Amazon$13.99
Comsmart BBQ Gloves, 1472 Degree F Heat Resistant Grilling Gloves Silico…
 AmazonEUR 8.64
16. Chocolate Mousse
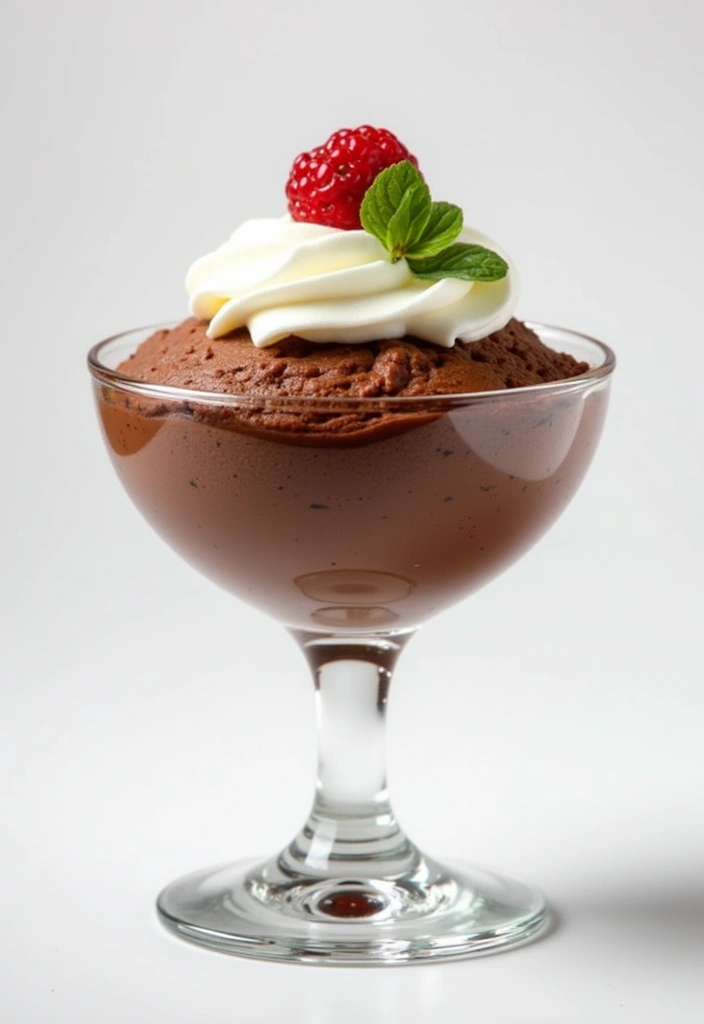
Indulge in Chocolate Mousse
Imagine a dessert that feels like a cloud of chocolate melting in your mouth. That’s what chocolate mousse delivers! This rich and creamy treat is perfect for gatherings, impressing your guests with its elegance and simplicity. Plus, it’s a breeze to whip up. With just a few ingredients, you can create a luxurious dessert that will have chocolate lovers raving.
As you prepare this delightful mousse, you’ll experience the joy of mixing silky chocolate with fluffy cream. Pinterest users adore this dessert for its classy appearance and delightful taste. It’s a crowd-pleaser that’s sure to elevate your dessert game!
Ready to make your own chocolate mousse? Here’s how:
Prep Time: 20 minutes
Chill Time: 2 hours
Servings: 6
Ingredients:
– 1 cup heavy cream
– 3/4 cup chocolate, melted
– 2 eggs, separated
– 1/4 cup sugar
Instructions:
1. Start by whipping the heavy cream until soft peaks form. Set it aside.
2. In another bowl, mix the egg yolks and sugar until they turn pale. Then, blend in the melted chocolate until smooth.
3. Gently fold the whipped cream into the chocolate mixture. This is where your mousse gets its airy texture.
4. In a separate bowl, beat the egg whites until stiff peaks form. Carefully fold these into the chocolate cream mixture.
5. Spoon the mousse into serving dishes. Chill in the refrigerator for at least 2 hours before serving.
Tips: For an extra touch, serve your mousse with a dollop of whipped cream or fresh berries. It adds color and flavor!
FAQ: Can I use store-bought whipped cream? Yes, but homemade whipped cream tastes richer and fresher.
This chocolate mousse is not just a dessert; it’s an experience. Each bite is creamy, rich, and utterly satisfying. Enjoy this sweet treat at your next gathering, and watch everyone fall in love!
Chocolate Mousse
Editor’s Choice

Horizon Organic Heavy Whipping Cream, Great for Making Organic Whipped C…
 Amazon$5.99
Lindt EXCELLENCE 90% Cocoa Dark Chocolate Candy Bar, Dark Chocolate, 3.5…
 Amazon$2.78
Umite Chef Mixing Bowls with Airtight Lids Set, 8PCS Stainless Steel Kha…
 Amazon$29.99
17. Vanilla Pudding with Graham Cracker Crust
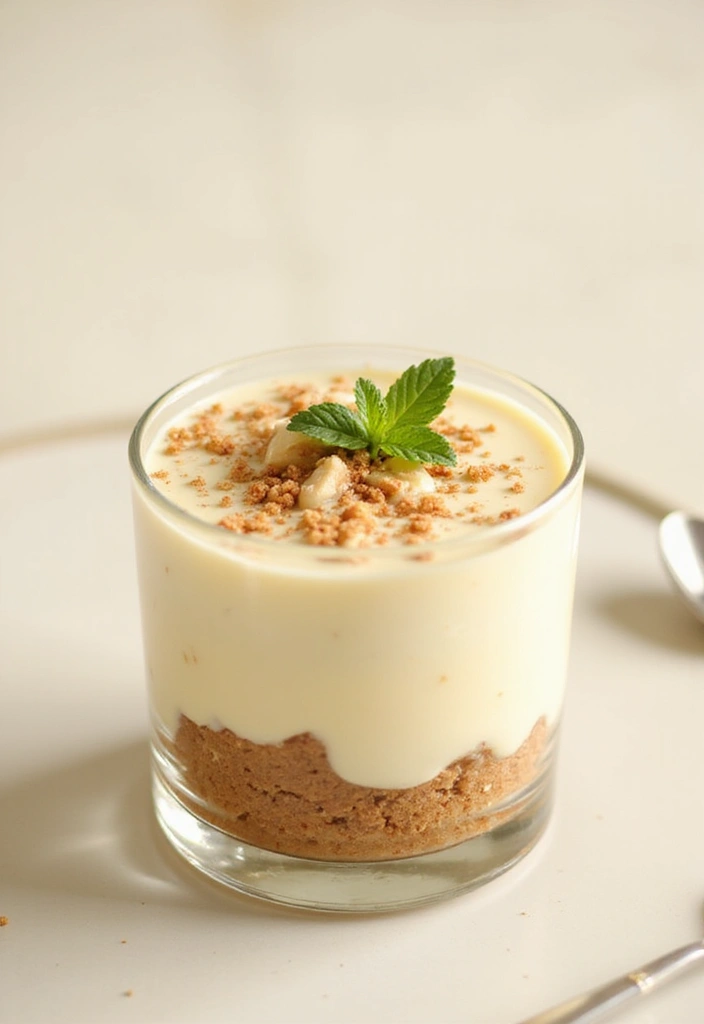
Overview: Looking for a crowd-pleasing dessert? This Vanilla Pudding with Graham Cracker Crust is your answer! It’s a delightful combination of creamy vanilla pudding layered over a crunchy graham cracker crust. This simple yet satisfying treat is perfect for gatherings, and it’s easy to prepare in advance.
You’ll love the way the smooth, silky pudding contrasts with the crispy crust. Kids and adults alike will enjoy this dessert. Plus, you can customize it with toppings like fresh fruit or whipped cream to make it even more special!
Prep Time: 15 minutes
Chill Time: 2 hours
Servings: 8
Nutrition Information: Each serving contains around 180 calories.
Ingredients:
– 1 cup vanilla pudding mix
– 2 cups milk
– 1 cup crushed graham crackers
– 1/2 cup butter, melted
Instructions:
1. In a mixing bowl, combine the pudding mix with the milk. Follow the package instructions for the right consistency.
2. In a separate bowl, mix the crushed graham crackers with the melted butter until combined.
3. Layer the graham cracker mixture at the bottom of your serving dishes. Spoon the pudding mixture on top.
4. Cover and refrigerate for at least 2 hours before serving.
Tips: For an extra layer of flavor, top your pudding with whipped cream and seasonal fruit like strawberries or blueberries!
FAQ: Can I use store-bought pudding? Yes! Store-bought pudding is a great time-saver and tastes delicious too.
Now, you have a quick and easy dessert that’s sure to impress your guests. Enjoy making and sharing this delightful treat!
Fun fact: 70% of guests say vanilla pudding desserts are their favorites at gatherings. Make-ahead vanilla pudding with graham cracker crust lets you prep in minutes, then slice and serve—perfect for easy dessert recipes for a crowd.
Vanilla Pudding with Graham Cracker Crust
Editor’s Choice

Jell-O Cook & Serve Vanilla Pudding & Pie Filling Mix (4.6 oz Box) (Pack…
 AmazonCheck Price
HONEY MAID Graham Crackers, Lunch Snacks, Party Size, 28.8 oz
 Amazon$6.48
EurKitchen Professional Aluminum Whipped Cream Dispenser – Leak-Free Whi…
 Amazon$42.99
18. Mini Cheesecakes
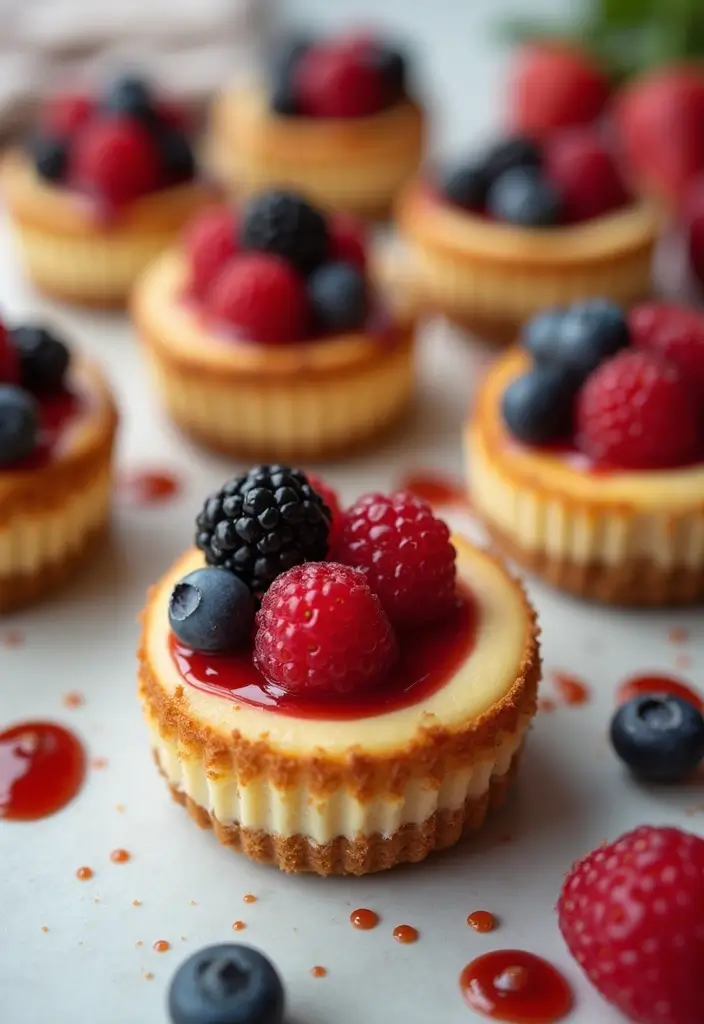
Overview: Looking for a crowd-pleasing dessert that’s easy to make? Mini cheesecakes are your answer! These delightful, bite-sized treats are creamy, rich, and perfect for any party. Whether you’re hosting a birthday bash or a casual get-together, these mini cheesecakes are sure to impress your guests.
Prep Time: 20 minutes
Bake Time: 20 minutes
Chill Time: 2 hours
Servings: 12
Each cheesecake can be topped with fresh fruit, chocolate drizzle, or caramel sauce, giving you endless options for customization. Plus, their individual portions make serving easy and fun!
Nutrition Information: Each mini cheesecake has about 200 calories.
Ingredients:
– 1 cup crushed graham crackers
– 2 tablespoons sugar
– 2 tablespoons butter, melted
– 16 oz cream cheese, softened
– 1 cup sugar
– 2 large eggs
– 1 teaspoon vanilla extract
Instructions:
1. Preheat the oven to 325°F (165°C). Line a muffin tin with paper liners or grease with cooking spray.
2. In a mixing bowl, combine the crushed graham crackers, 2 tablespoons of sugar, and melted butter. Stir until the mixture resembles wet sand.
3. Press the mixture firmly into the bottom of each muffin liner to form a crust.
4. In another bowl, beat the softened cream cheese and 1 cup of sugar with an electric mixer until smooth.
5. Add the eggs, one at a time, mixing well after each addition. Stir in the vanilla extract.
6. Pour the cheesecake filling over the crusts, filling each liner about 3/4 full.
7. Bake for 15-20 minutes or until the centers are set but still slightly jiggly.
8. Remove from the oven and let cool at room temperature before chilling in the refrigerator for at least 2 hours.
Tips:
– Use flavored cream cheese, like strawberry or chocolate, for a fun twist!
– Experiment with different toppings, such as berry compote or whipped cream, to elevate the flavor.
FAQ: Can you make these ahead of time? Absolutely! They store well in the fridge for about 3-4 days, making them perfect for meal prep or last-minute gatherings.
With their creamy texture and endless topping possibilities, these mini cheesecakes are bound to be a hit. So, grab your ingredients and whip up a batch today!
Mini Cheesecakes
Editor’s Choice

Amazon Basics Nonstick Round Muffin Baking Pan, 12 Cups, Set of 2, Gray,…
 Amazon$14.97
Hamilton Beach 6-Speed Electric Hand Mixer with Whisk, Traditional Beate…
 Amazon$27.95
Amazon Brand, Happy Belly Cinnamon Graham Crackers, 14.4 Oz (Pack of 3)
 AmazonCheck Price
19. Chocolate Covered Strawberries

Overview: Looking for a simple yet elegant dessert that everyone will adore? Chocolate-covered strawberries are just the ticket! This classic treat combines the sweetness of fresh strawberries with the rich, creamy taste of chocolate. They’re not only delicious but also visually stunning, making them perfect for any gathering.
Prep Time: 15 minutes
Chill Time: 30 minutes
Servings: 12
With just a little effort, you can whip up these delightful bites. They shine on dessert tables and are a hit at parties, family gatherings, or romantic evenings. Plus, they offer a fresh twist to your dessert lineup.
Nutrition Information: Each strawberry contains about 60 calories, so you can indulge without the guilt!
Ingredients:
– 12 fresh strawberries
– 6 oz chocolate chips
Instructions:
1. Start by melting the chocolate chips in a microwave-safe bowl. Heat in short bursts, stirring until smooth.
2. Dip each strawberry into the melted chocolate, ensuring it’s well-coated.
3. Place the dipped strawberries on a sheet of parchment paper.
4. Chill them in the refrigerator for about 30 minutes, or until the chocolate hardens.
Tips:
– Add sprinkles or a drizzle of white chocolate for a fun touch!
– Choose high-quality chocolate for the best flavor.
– Use any type of chocolate, like dark or milk, to suit your taste.
FAQ:
– Can I use any type of chocolate? Yes! Feel free to experiment with dark, milk, or white chocolate to find your favorite combination.
– How do I store leftover chocolate-covered strawberries? Keep them in an airtight container in the fridge for up to two days.
Get ready to impress your guests with these chocolate-covered strawberries. They’re simple to make and will surely put a smile on everyone’s face!
Chocolate Covered Strawberries
Editor’s Choice

Cuisinart Fondue Pot, 3 Quart, For Chocolate, Cheese, Broth, Oil, Stainl…
 Amazon$59.99

Amazon Basics Parchment Paper for Baking, Non-Stick, 90 Sq Ft Roll, 1 Pack
 Amazon$6.79
20. Coconut Macaroons
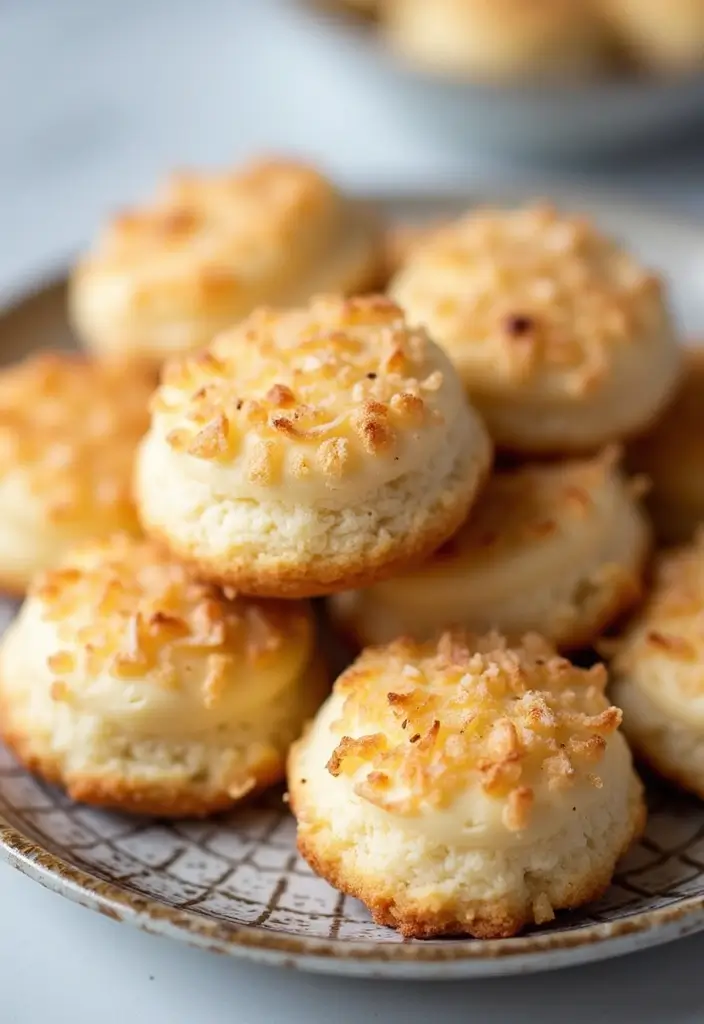
Overview: If you’re craving something sweet and easy to make, these coconut macaroons are the perfect choice! They’re chewy, delicious, and sure to please a crowd. Imagine biting into a soft, coconut-filled treat that’s both satisfying and simple to prepare.
You can whip these up in just 30 minutes, making them an excellent option for large gatherings or last-minute dessert plans. These macaroons are naturally gluten-free, allowing everyone to indulge without worry. Plus, you can easily double the recipe for even more servings!
Prep Time: 10 minutes
Bake Time: 20 minutes
Servings: 24
Nutrition Information: Each macaroon contains about 70 calories.
Ingredients:
– 2 1/2 cups sweetened shredded coconut
– 1/2 cup sweetened condensed milk
– 2 egg whites
– 1 tsp vanilla extract
Instructions:
1. Preheat your oven to 325°F (165°C) and line a baking sheet with parchment paper.
2. In a mixing bowl, combine the shredded coconut, sweetened condensed milk, egg whites, and vanilla extract. Stir until everything is well mixed.
3. Using a tablespoon, scoop out portions of the mixture and drop them onto the prepared baking sheet, spacing them apart.
4. Bake in the oven for about 20 minutes or until the tops are golden brown and slightly crispy.
Tips: Want to take these macaroons to the next level? Dip them in melted chocolate before serving! It adds a rich flavor that complements the coconut beautifully.
FAQ: Can I use unsweetened coconut? Absolutely! If you prefer a less sweet option, unsweetened coconut works just as well. Just keep in mind that it will alter the flavor slightly, making it more subtle.
These coconut macaroons are not just a treat; they’re a hit at parties, potlucks, and family gatherings. They’re quick, easy, and always deliver a satisfying bite of sweetness!
Coconut Macaroons
Editor’s Choice

Amazon Basics Silicone Rectangular Baking Mat, Non-Stick Reusable Oven B…
 Amazon$16.79
Umite Chef Mixing Bowls with Airtight Lids Set, 8PCS Stainless Steel Kha…
 Amazon$29.99
Ice Cream Scoop, 18/8 Stainless Steel Cookie Scoop, Cookie Scoops for Ba…
 Amazon$7.49
21. Peanut Butter Bliss Balls
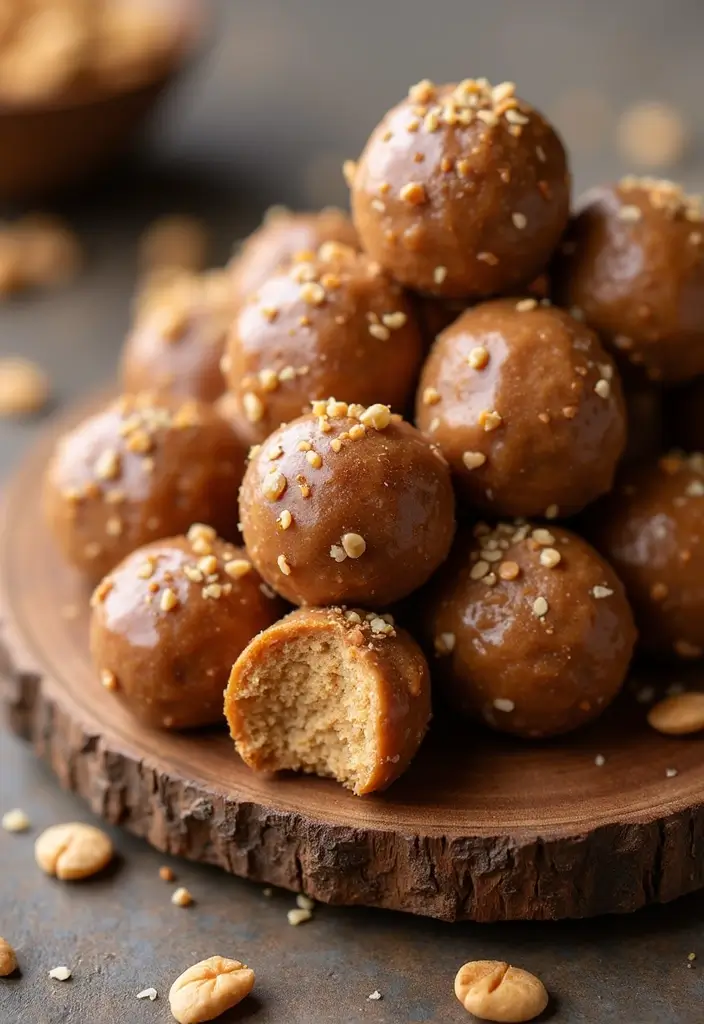
Overview: Looking for a sweet, healthy treat that everyone will love? Try these quick and easy no-bake peanut butter bliss balls! They’re a fantastic option for after-school snacks or party desserts, and they take just minutes to whip up. With their rich peanut butter flavor, kids and adults alike will be asking for more!
Prep Time: 10 minutes
Chill Time: 30 minutes
Servings: 12
You only need a few simple ingredients: oats, peanut butter, and honey. This no-fuss recipe is not only nutritious but also perfect for busy days when you want something sweet without the guilt.
Nutrition Information: Each bliss ball has about 100 calories, making them a guilt-free delight!
Ingredients:
– 1 cup oats
– 1/2 cup peanut butter
– 1/4 cup honey
Instructions:
1. In a mixing bowl, combine the oats, peanut butter, and honey until everything is well blended.
2. Roll the mixture into 1-inch balls using your hands.
3. Place the balls on a plate and refrigerate for 30 minutes to set.
Tips: Want to kick it up a notch? Add chocolate chips or dried fruit for extra flavor and fun!
FAQ: How long do they last? Keep these bliss balls in the fridge for up to a week for a quick snack anytime!
These peanut butter bliss balls are not just tasty; they’re a hit at gatherings! They offer a wonderful combination of sweetness and energy, making them a go-to choice for any crowd. Enjoy making these delightful bites, and watch them disappear in no time!
Peanut Butter Bliss Balls
Editor’s Choice

Umite Chef Mixing Bowls with Airtight Lids Set, 8PCS Stainless Steel Kha…
 Amazon$29.99
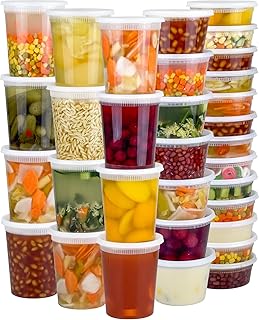
60 Sets (120-Piece) Deli Containers with Lids, 32/16/8 oz X 20 Set Each,…
 Amazon$21.99
22. Oatmeal Raisin Cookies
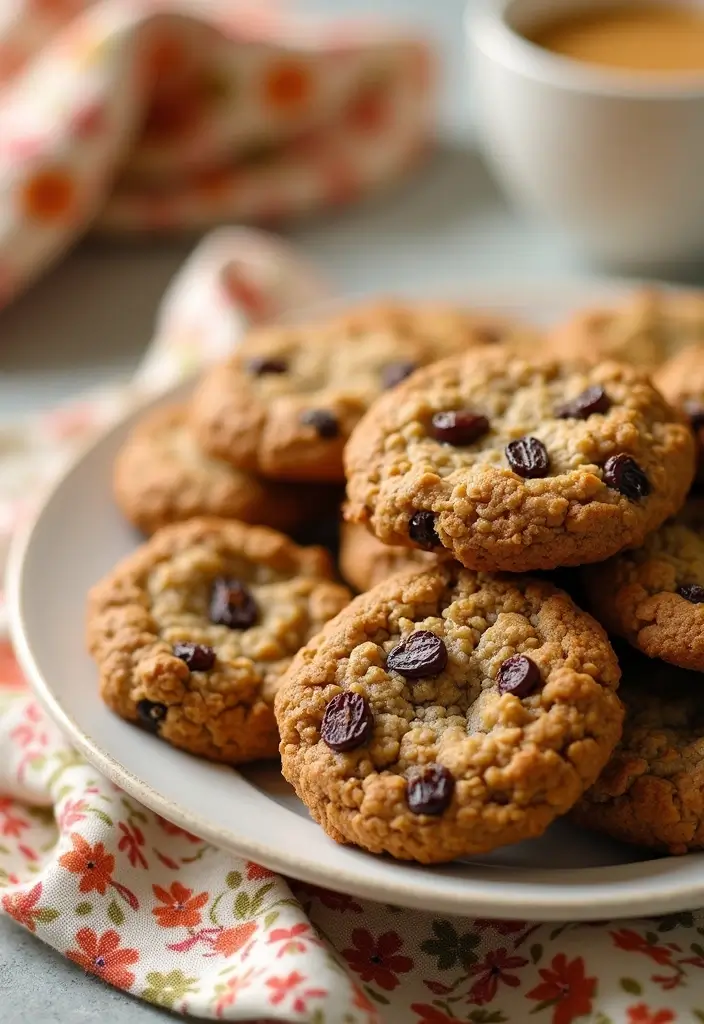
Overview: If you’re looking for a crowd-pleaser, oatmeal raisin cookies are a fantastic choice! These cookies offer the perfect balance of chewiness and flavor. With wholesome ingredients, they satisfy sweet cravings while feeling a bit healthier.
Prep Time: 10 minutes
Bake Time: 12 minutes
Servings: 24 cookies
Imagine biting into a warm cookie filled with oats and sweet raisins. These cookies are not just tasty; they’re also easy to make! They fit right in at any dessert buffet or family gathering. Plus, who can resist the aroma of freshly baked cookies wafting through the house?
Nutrition Information: Each cookie has around 120 calories.
Ingredients:
– 1 cup butter, softened
– 1 cup brown sugar
– 1/2 cup white sugar
– 2 eggs
– 1 1/2 cups rolled oats
– 1 1/4 cups all-purpose flour
– 1 tsp baking soda
– 1 cup raisins
Instructions:
1. Preheat your oven to 350°F (175°C).
2. In a large mixing bowl, cream together the softened butter, brown sugar, and white sugar until smooth.
3. Add the eggs one at a time, mixing well after each addition.
4. Stir in the oats, flour, baking soda, and raisins until everything is well combined.
5. Drop spoonfuls of dough onto a lined baking sheet, leaving space between each cookie.
6. Bake for 10-12 minutes, or until the edges are golden brown.
Tips: Want to take these cookies up a notch? Add a pinch of cinnamon for a warm, cozy flavor!
FAQ: Can I swap the raisins for chocolate chips? Absolutely! Feel free to customize your cookies with chocolate chips or nuts for a different twist.
These oatmeal raisin cookies are not just simple to make; they’re also a delightful treat that everyone will enjoy. So gather your ingredients and start baking a batch that will disappear in no time!
Oatmeal Raisin Cookies
Editor’s Choice

Amazon Basics Silicone Rectangular Baking Mat, Non-Stick Reusable Oven B…
 Amazon$16.79
Ice Cream Scoop, 18/8 Stainless Steel Cookie Scoop, Cookie Scoops for Ba…
 Amazon$7.49
Umite Chef Mixing Bowls with Airtight Lids Set, 8PCS Stainless Steel Kha…
 AmazonEUR 25.93
23. Marshmallow Popcorn Balls
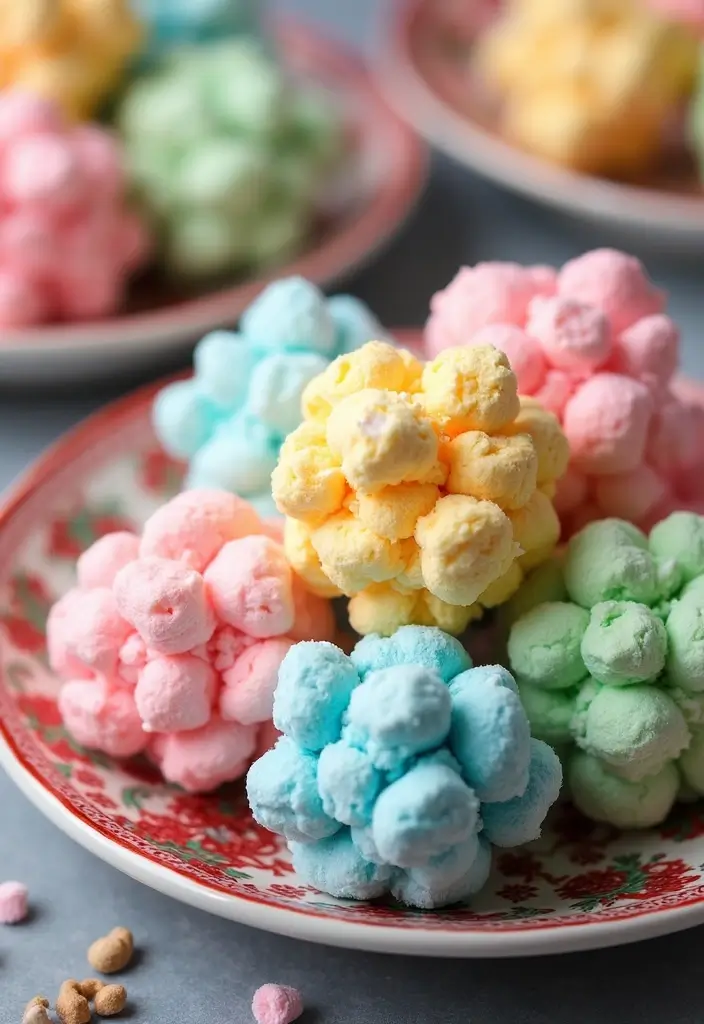
Overview: Looking for a fun and easy treat that will impress a crowd? Marshmallow popcorn balls are your answer! These delightful snacks bring a mix of crunchy and chewy textures, making them a favorite at any gathering. Plus, they are simple enough for kids to help make, turning your kitchen into a lively spot of creativity.
Prep Time: 10 minutes
Chill Time: 30 minutes
Servings: 12
These popcorn balls are not just tasty; they are highly customizable. You can add colorful sprinkles, chocolate candies, or even nuts to suit any occasion. Perfect for birthday parties, holiday gatherings, or just a fun afternoon snack, these treats will surely put a smile on everyone’s face.
Nutrition Information: Each popcorn ball contains about 100 calories, making them a sweet yet manageable indulgence.
Ingredients:
– 6 cups popped popcorn
– 1 cup mini marshmallows
– 1/4 cup butter
Instructions:
1. Start by melting the butter in a saucepan over low heat. Add in the mini marshmallows and stir gently until they are completely melted and smooth.
2. In a large mixing bowl, pour the melted marshmallow mixture over the popped popcorn. Stir quickly to coat all the popcorn evenly.
3. With slightly greased hands, grab handfuls of the mixture and shape them into tight balls.
4. Place the formed balls on a baking sheet lined with parchment paper and let them cool for about 30 minutes.
Tips: For an extra festive touch, use colored popcorn or add seasonal sprinkles! These are perfect for any celebration and can be made a few days in advance. Just store them in an airtight container to keep them fresh.
FAQ: Can I prepare these popcorn balls ahead of time? Absolutely! They can be made a few days in advance and stored away. This makes them a convenient option for busy event planning.
Marshmallow Popcorn Balls
Editor’s Choice

Amazon Basics Silicone Rectangular Baking Mat, Non-Stick Reusable Oven B…
 Amazon$16.79
DASH Hot Air Popcorn Popper Maker with Measuring Cup to Portion Popping …
 Amazon$19.99
TILUCK Measuring Cups & Spoons Set, Stackable Cups and Spoons, Nesting M…
 Amazon$9.99
24. Fruit Pizza
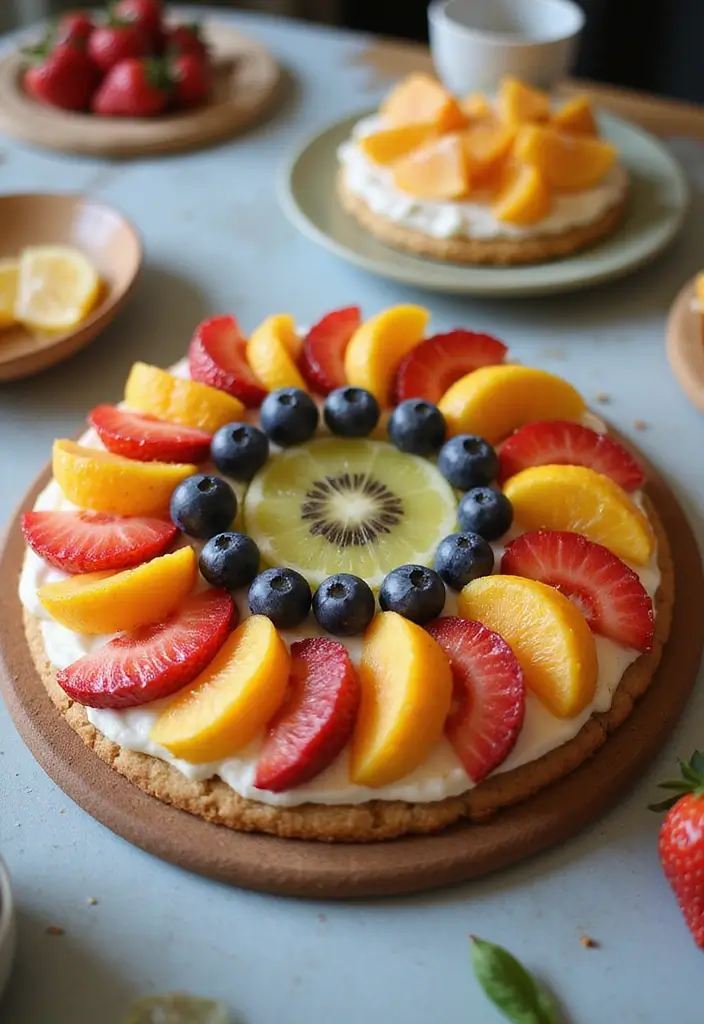
Overview: Are you looking for a dessert that’s sure to wow a crowd? Try making a Fruit Pizza! This delightful treat transforms the classic idea of pizza into a sweet masterpiece. It’s colorful, tasty, and perfect for any gathering. Plus, kids will love getting involved in decorating!
Prep Time: 15 minutes
Chill Time: 1 hour
Servings: 12
Imagine a cookie crust topped with creamy frosting and a rainbow of fresh fruits. Each slice is not just a feast for the eyes but also a burst of flavor. Let’s dive into how to create this fun dessert that everyone will adore!
Nutrition Information: Each slice has about 180 calories.
Ingredients:
– 1 package of cookie dough or homemade dough
– 8 oz cream cheese, softened
– 1/2 cup powdered sugar
– Assorted fresh fruits (strawberries, kiwi, blueberries, etc.)
Instructions:
1. Preheat your oven according to the cookie dough package instructions.
2. Roll out the dough to fit a pizza pan and bake until golden brown.
3. While the crust cools, beat together the softened cream cheese and powdered sugar until smooth.
4. Spread the cream cheese mixture over the cooled crust.
5. Get creative! Arrange your choice of fruits on top in a fun pattern.
Tips: For the best flavor, choose seasonal fruits. They not only taste better but also make your fruit pizza look stunning!
FAQ:
How long can this be stored? This dessert is best enjoyed fresh, but you can keep it in the fridge for up to a day.
With its vibrant colors and delicious flavors, this Fruit Pizza is not just a dessert; it’s a celebration on a plate! Perfect for parties, picnics, or just because, you’ll find it’s a hit wherever you serve it.
Fruit Pizza shows that easy dessert recipes for a crowd can be stunning. With a simple cookie crust, creamy frosting, and a rainbow of toppings, kids love decorating—and everyone loves slices served fast. Your next party will be delicious, colorful, and totally doable.
Fruit Pizza
Editor’s Choice

GoodCook AirPerfect Nonstick 16” Pizza Pan – Pizza Tray for Oven, Perfor…
 Amazon$21.99
WHYSKO Meal Prep Stainless Steel Mixing Bowl (5-Piece Set) Home, Refrige…
 Amazon$24.99
Fruit Slicer Cup – Strawberry, Banana, Grape Cutter, Egg Slicer for Hard…
 Amazon$6.99
25. Chocolate Lava Cakes
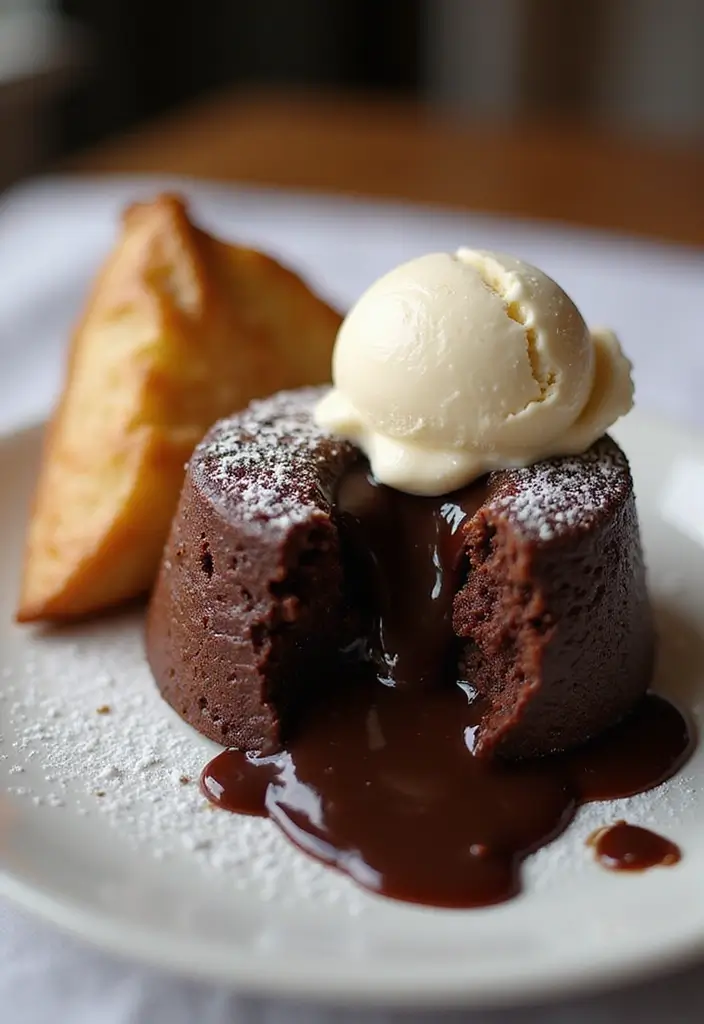
Chocolate Lava Cakes: A Decadent Delight
If you’re looking to impress your guests, chocolate lava cakes are a surefire way to do it. These individual desserts have a molten chocolate center that flows out as you cut into them. Imagine the joy on your friends’ faces as they dig into these warm, gooey treats! Plus, they’re surprisingly easy to make, making them perfect for any gathering.
Here’s how to whip up these delightful cakes in no time. With just a bit of prep and baking, you can have a dessert that feels fancy without the fuss. This recipe serves eight people, so it’s great for dinner parties or family celebrations. And don’t forget the scoop of vanilla ice cream on the side for that perfect contrast in texture and flavor!
Prep Time: 15 minutes
Bake Time: 12 minutes
Servings: 8
Nutrition Information: Approximately 350 calories per cake.
Ingredients:
– 1/2 cup butter
– 1 cup chocolate chips
– 2 large eggs
– 1/2 cup granulated sugar
– 1/4 cup all-purpose flour
Instructions:
1. Preheat your oven to 425°F (220°C). Grease eight ramekins with butter.
2. Melt the butter and chocolate chips together in a microwave or over a double boiler until smooth.
3. In a mixing bowl, beat the eggs and sugar until thick and pale. This usually takes about 2-3 minutes.
4. Stir the melted chocolate mixture into the egg mixture. Gently fold in the flour until just combined.
5. Pour the batter evenly into the prepared ramekins. Bake for 12 minutes, or until the edges are firm but the center is soft.
6. Let them cool for a minute, then carefully invert onto plates.
Tips: Top your lava cakes with a dusting of powdered sugar or some fresh berries for an extra touch. They’re best served warm, right out of the oven!
FAQ:
Can I prepare these in advance? Yes! You can make the batter ahead of time and keep it in the fridge. Just pour it into the ramekins and bake just before serving for that fresh-baked taste.
Enjoy these luscious chocolate lava cakes at your next gathering, and watch as everyone raves about your baking skills! They’re not just a dessert; they’re an experience.
Chocolate Lava Cakes
Editor’s Choice

DOWAN 8 oz Ramekins Oven Safe for Creme Brulee, Souffle Dish Baking Bowl…
 Amazon$18.99
Wilton Candy Melts Melting Pot, Perfect for Dipping, Drizzling & Decorat…
 Amazon$28.14
Conclusion

With these 25 easy dessert recipes for a crowd, you’re all set to impress at your next gathering. Each treat is designed for maximum fun with minimal effort, ensuring everyone leaves with a smile and a satisfied sweet tooth. So gather your ingredients, rally the little helpers, and create some delicious memories together!
Happy baking!
Note: We aim to provide accurate product links, but some may occasionally expire or become unavailable. If this happens, please search directly on Amazon for the product or a suitable alternative.
This post contains Amazon affiliate links, meaning I may earn a small commission if you purchase through my links, at no extra cost to you.
Frequently Asked Questions
What Are Some Easy Dessert Recipes for a Crowd That Kids Will Love?
Looking for easy dessert recipes for a crowd that will delight kids? You can’t go wrong with options like chocolate chip cookie bars or funfetti cake pops. These crowd-pleasing desserts are not only simple to make, but they also offer a fun twist that kids adore! You can even personalize them with colorful sprinkles or their favorite candies to make them extra special!
How Can I Make Quick Sweet Treats for a Last-Minute Party?
If you’re in a pinch and need quick sweet treats for a last-minute party, consider recipes like no-bake cheesecake cups or chocolate-covered pretzels. These simple dessert ideas require minimal time and effort, yet they pack a flavor punch that guests will love. Just gather your ingredients, and you’ll have delicious desserts ready in no time!
What Are Some Simple Dessert Ideas for Large Gatherings?
When hosting a large gathering, large batch desserts like brownie bites or a fruit pizza can be a lifesaver! These desserts are not only easy to prepare but also cater to various tastes. Plus, you can prepare them ahead of time, leaving you free to enjoy the party with your guests. Everyone will appreciate these crowd-pleasing desserts!
Can I Prepare Party Dessert Recipes in Advance?
Absolutely! Many party dessert recipes can be made in advance, making your life easier when hosting. Desserts like frozen chocolate mousse or layered trifle can be prepared a day or two ahead and stored in the fridge. Just make sure to check the recipe for storage instructions, so your treats stay fresh and delicious until it’s time to serve!
What Are Some Tips for Serving Easy Dessert Recipes for a Crowd?
When serving easy dessert recipes for a crowd, presentation is key! Use vibrant platters or tiered stands to showcase your crowd-pleasing desserts. It’s also a great idea to label each dessert, especially if they cater to specific dietary needs. Lastly, consider providing small serving utensils to allow guests to try a variety of desserts without overwhelming their plates!
Related Topics
easy dessert recipes for a crowd
crowd-pleasing desserts
simple dessert ideas
party dessert recipes
quick sweet treats
large batch desserts
kids' party desserts
family-friendly treats
no-bake desserts
budget-friendly desserts
easy baking
time-saving recipes

