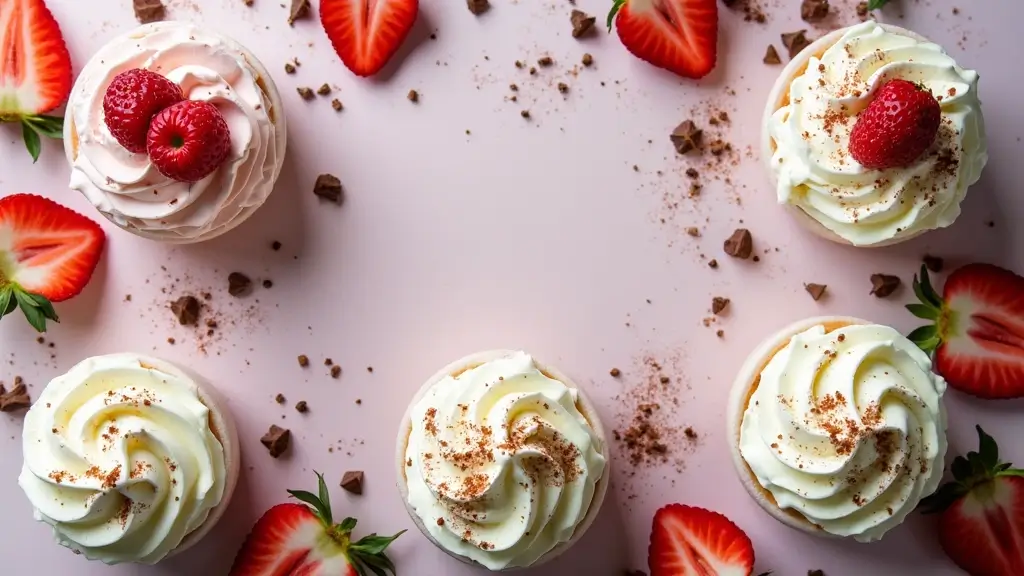
We all have those moments when we crave something sweet and fluffy. Maybe it’s a warm evening or a special occasion. Whatever the reason, nothing quite hits the spot like whipped cream. It brings that light, airy texture and creamy sweetness that makes desserts feel extra special. That’s why I created this post—because I know you want to indulge in some dreamy treats that will satisfy your cravings.
If you’re someone who loves baking or simply enjoys delicious desserts, this collection is for you. Whether you’re hosting a gathering, celebrating a birthday, or just treating yourself after a long day, these recipes will help you impress your friends and family. Even if you’re not a master baker, these ideas are easy to follow and full of flavor.
In this post, you’ll find over 30 dessert recipes that feature whipped cream in all its glory. From classic favorites like whipped cream fruit parfaits to unique twists like whipped cream brownies, each recipe is designed to be fluffy and delightful. Get ready to discover how you can transform simple ingredients into magical treats that will leave everyone wanting more.
So grab your mixing bowl and whisk! You’re about to dive into a world of fluffy wonders that will not only satisfy your sweet tooth but also spark joy in your kitchen. Let’s make some dreamy desserts that everyone will love!
1. Classic Vanilla Whipped Cream
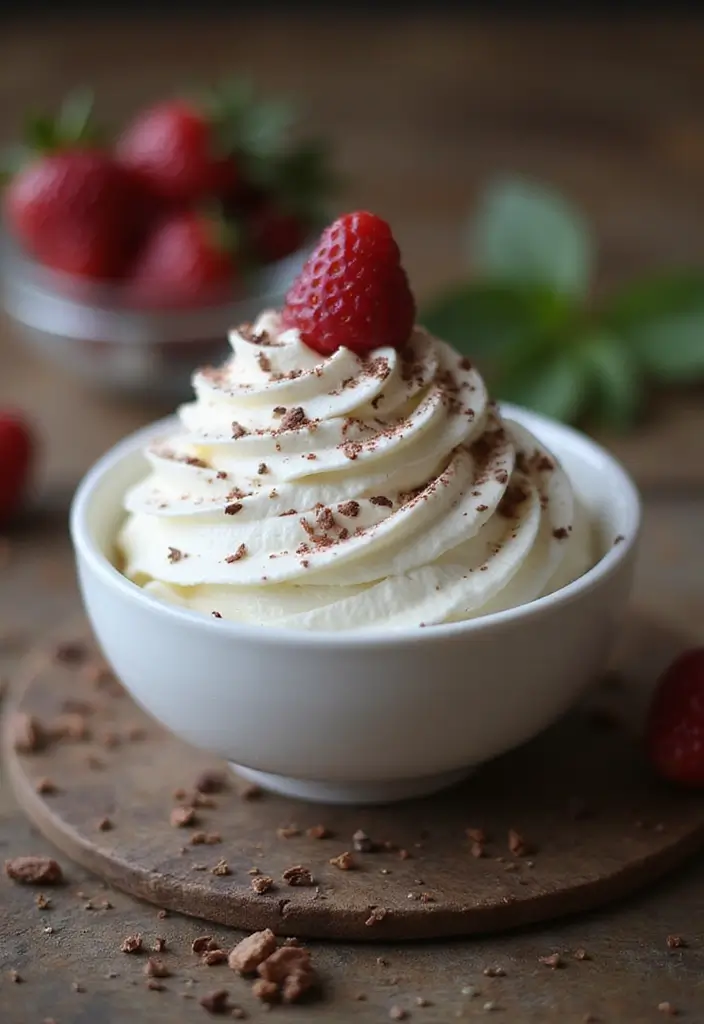
Classic vanilla whipped cream is a must-have in your dessert toolkit. This fluffy, sweet topping transforms ordinary treats into mouthwatering delights. Picture a slice of chocolate cake, topped with a generous dollop of creamy vanilla goodness. It’s not just a topping; it’s the finishing touch that makes every bite unforgettable.
Making this whipped cream is quick and easy. You can whip it up in just 10 minutes, and it adds a rich vanilla flavor that pairs perfectly with cakes, pies, and fresh fruit. You’ll find yourself wanting to use it in all your favorite desserts.
Recipe Overview:
– Servings: 2 cups
– Prep Time: 10 minutes
– Cook Time: 0 minutes
– Total Time: 10 minutes
– Calories: About 50 per tablespoon
Nutritional Information:
– Total Fat: 5g
– Saturated Fat: 3g
– Cholesterol: 15mg
– Sodium: 5mg
– Total Carbohydrates: 1g
– Sugars: 1g
– Protein: 0g
Ingredients:
– 1 cup heavy cream
– 2 tablespoons powdered sugar
– 1 teaspoon vanilla extract
Instructions:
1. Start by pouring the heavy cream into a large mixing bowl. Add the powdered sugar and vanilla extract.
2. Use an electric mixer to beat the mixture on medium-high speed. You’ll see soft peaks form in about 3-5 minutes.
3. If you prefer stiffer peaks, keep mixing for an extra minute, but be careful not to go too far. Over-whipping can turn it into butter!
4. Use it right away or store it in the fridge for up to 2 hours.
Tips:
– Chill your mixing bowl and beaters in the fridge before using them for the best texture.
– Feel free to adjust the sugar based on your sweetness preference.
FAQs:
1. Can I use this as a filling? Yes, it’s fantastic as a filling for cakes and pastries!
2. How long does it last? For the best flavor and texture, use it within 2 hours after whipping.
This classic vanilla whipped cream is your ticket to creating dreamy desserts. Enjoy every fluffy bite!
Classic Vanilla Whipped Cream
Editor’s Choice

Hamilton Beach 6-Speed Electric Hand Mixer with Whisk, Traditional Beate…
 Amazon$27.95
Umite Chef Mixing Bowls with Airtight Lids Set, 8PCS Stainless Steel Kha…
 AmazonEUR 25.93
Anthony’s Heavy Cream Powder, 1 lb, Gluten Free, Non-GMO, Keto Friendly,…
 Amazon$19.99
2. No-Bake Strawberry Shortcake
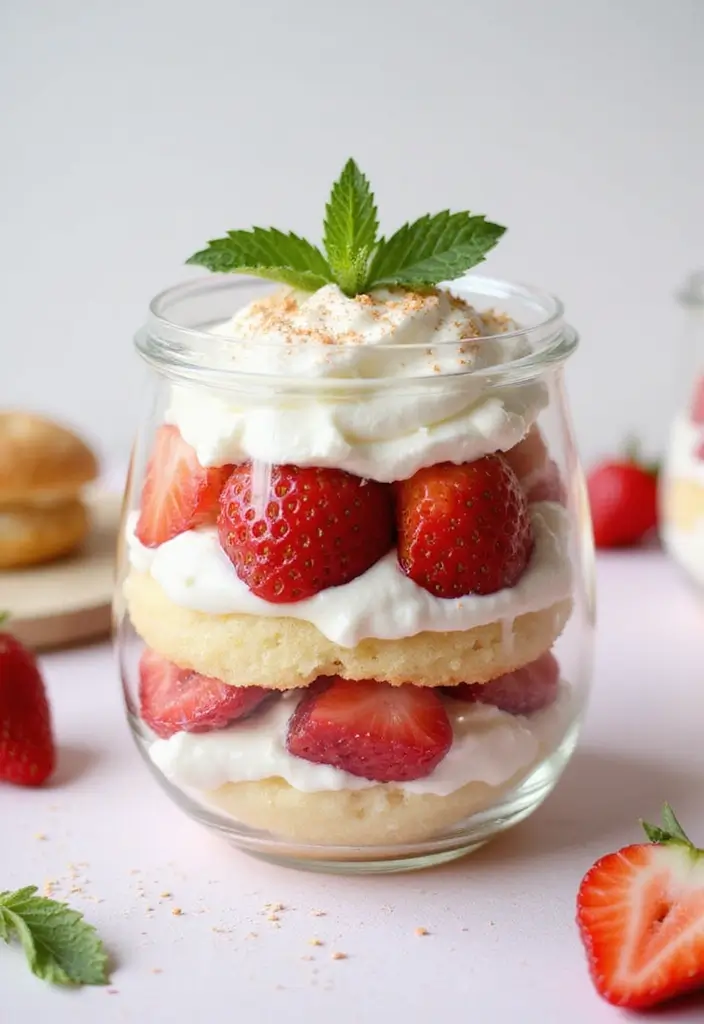
Get ready for a dessert that’s as easy to make as it is delightful to eat! This No-Bake Strawberry Shortcake is a perfect choice for warm days. You’ll love how fresh strawberries and fluffy whipped cream come together in layers, creating a treat that feels light and satisfying.
Start by gathering your ingredients. You’ll want a sweet base with sponge cake or ladyfingers, topped with ripe strawberries and dreamy whipped cream. Each bite offers a burst of freshness that’s sure to impress anyone you share it with.
Recipe Overview:
– Servings: 6
– Prep Time: 20 minutes
– Cook Time: 0 minutes
– Total Time: 20 minutes
– Calories: Approximately 250 per serving
Nutritional Information:
– Total Fat: 9g
– Saturated Fat: 5g
– Cholesterol: 30mg
– Sodium: 180mg
– Total Carbohydrates: 38g
– Sugars: 22g
– Protein: 3g
Ingredients:
– 1 cup heavy whipping cream
– 2 tablespoons sugar
– 1 teaspoon vanilla extract
– 2 cups sliced strawberries
– 1 package of sponge cake or ladyfingers
Instructions:
1. In a mixing bowl, whip the heavy cream, sugar, and vanilla until soft peaks form. This creates a light and fluffy texture.
2. In a trifle dish or a large glass bowl, start layering. Place a layer of sponge cake at the bottom, followed by a layer of sliced strawberries, and then a generous layer of whipped cream.
3. Repeat the layers until you run out of ingredients, making sure to finish with whipped cream on top.
4. Chill the dessert in the fridge for at least 1 hour. This helps the flavors blend together beautifully.
Tips:
– Use fresh, ripe strawberries for the best taste.
– Add a splash of lemon juice to the strawberries for a zesty kick!
FAQs:
1. Can I use frozen strawberries?
– Yes, just thaw them first and drain any excess liquid.
2. How do I store leftovers?
– Cover and refrigerate for up to one day for the best quality.
With this quick and delightful No-Bake Strawberry Shortcake, you’re all set for a sweet treat that’s sure to brighten your day! Enjoy every fluffy, fruity bite!
No-Bake Strawberry Shortcake
Editor’s Choice

365 By Whole Foods Market, Heavy Whipping Cream, 32 Fl Oz
 Amazon$6.99
St Michel Madeleine’s Traditional French Sponge Cakes, 8.8 Ounce
 AmazonCheck Price
3. Chocolate Mousse with Whipped Cream
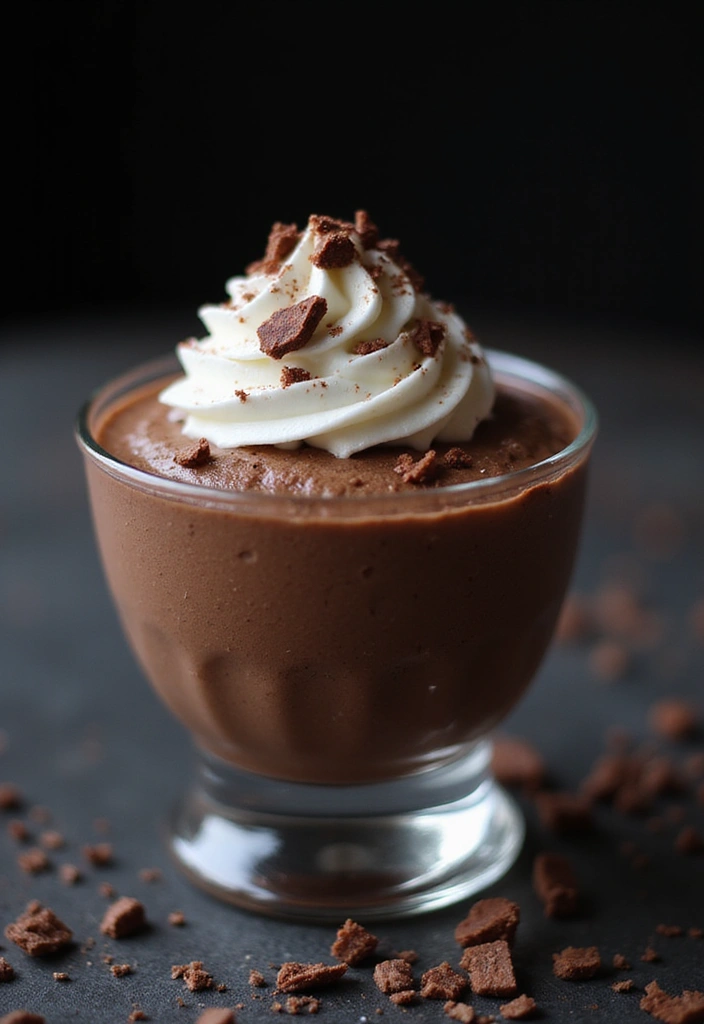
Indulge in the creamy delight of chocolate mousse topped with fluffy whipped cream! This dessert feels like a treat from a fancy restaurant, yet it’s surprisingly simple to whip up at home. The rich chocolate combined with airy whipped cream creates a texture that’s both luxurious and light. Perfect for date nights or a sweet ending to any meal, you can satisfy your chocolate cravings without turning on the oven!
Here’s how to make it. Gather your ingredients, and in just 15 minutes, you’ll have a dreamy dessert ready to chill. Let’s get started!
Recipe Overview:
– Servings: 4
– Prep Time: 15 minutes
– Cook Time: 0 minutes
– Total Time: 15 minutes
– Calories: About 350 per serving
Nutritional Information:
– Total Fat: 25g
– Saturated Fat: 15g
– Cholesterol: 90mg
– Sodium: 20mg
– Total Carbohydrates: 30g
– Sugars: 20g
– Protein: 5g
Ingredients:
– 6 ounces dark chocolate, chopped
– 2 tablespoons butter
– 1 ½ cups heavy cream
– 2 tablespoons powdered sugar
– 1 teaspoon vanilla extract
Instructions:
1. Melt the chocolate and butter together in a double boiler. Stir until smooth and let it cool a bit.
2. In another bowl, whip the heavy cream, powdered sugar, and vanilla until soft peaks form.
3. Gently fold the melted chocolate into the whipped cream until everything is blended.
4. Spoon the mousse into serving dishes and chill for at least 2 hours before enjoying.
Tips:
– Choose a mix of dark and milk chocolate for a sweeter touch.
– Before serving, add extra whipped cream and chocolate shavings for a stunning presentation.
FAQs:
1. Can I prepare this ahead of time?
Yes, it stays fresh in the fridge for 2-3 days!
2. Can I swap the chocolate for something else?
Absolutely! Milk chocolate works well for a sweeter version.
Now you’re ready to impress your friends and family with this delightful chocolate mousse. Enjoy every spoonful of this fluffy, chocolatey goodness!
Fun fact: you can whip a rich chocolate mousse topped with fluffy whipped cream in under 15 minutes. Dessert recipes with whipped cream don’t need an oven to impress—just chill, whisk, and savor a restaurant-worthy treat at home.
Chocolate Mousse with Whipped Cream
Editor’s Choice

Hoosier Hill Farm Heavy Cream Powder, 2LB (Pack of 1)
 Amazon$28.99
Baker’s Unsweetened Chocolate Premium Baking Bar with 100 % Cacao (4 oz …
 Amazon$1.12
Double Boiler Pot Set,1250ML/1.1QT Mixing Bowl for Chocolate Melting, 22…
 Amazon$19.98
4. Easy No-Bake Banana Cream Pie
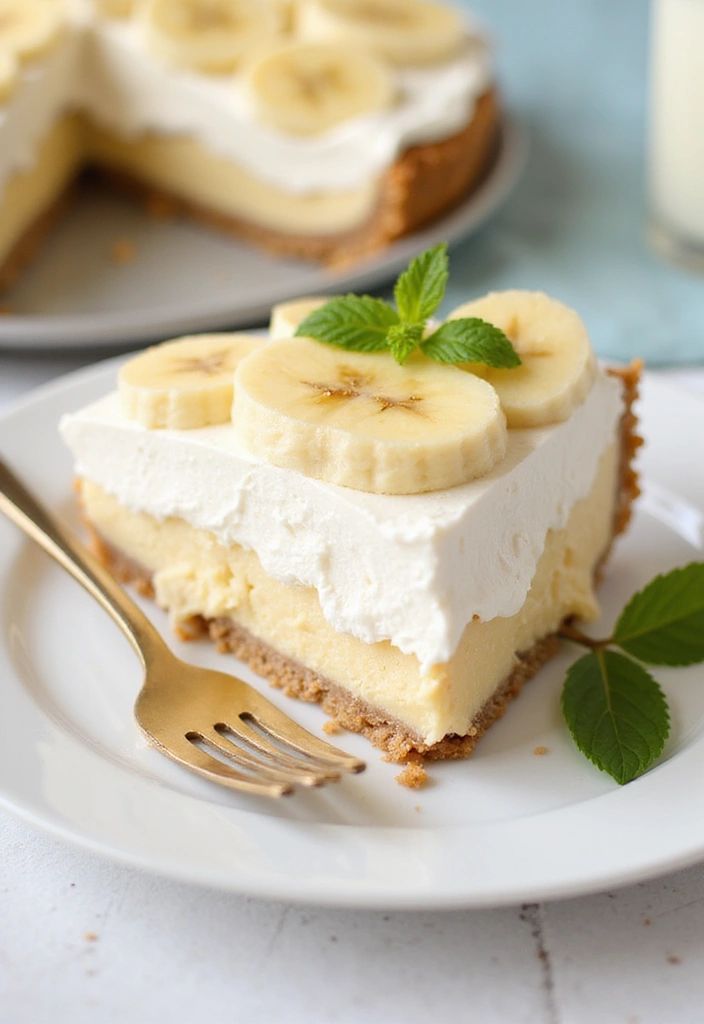
Imagine a dessert that captures the essence of summer: a creamy, dreamy no-bake banana cream pie. This delightful treat is perfect for any gathering or just a cozy evening at home. With its crisp graham cracker crust, luscious layers of ripe bananas, and fluffy whipped cream, you’ll be diving into a slice of pure bliss. It’s simple to make and requires no oven time, making it a favorite among dessert lovers.
Let’s get into how to make this scrumptious pie. You’ll need only a handful of ingredients, most of which you probably already have in your kitchen. Gather your family or friends to share this easy recipe, because everyone will want a taste!
Recipe Overview:
– Servings: 8
– Prep Time: 15 minutes
– Total Time: 15 minutes
– Calories: About 280 per serving
Nutritional Information:
– Total Fat: 12g
– Saturated Fat: 6g
– Cholesterol: 30mg
– Sodium: 100mg
– Total Carbohydrates: 38g
– Sugars: 18g
– Protein: 3g
Ingredients:
– 1 pre-made graham cracker crust
– 2 cups heavy cream
– 1/2 cup powdered sugar
– 1 teaspoon vanilla extract
– 2 ripe bananas, sliced
– 1 package instant vanilla pudding mix (optional)
Instructions:
1. Whip the heavy cream in a bowl with powdered sugar and vanilla until stiff peaks form. This will make your whipped cream super fluffy!
2. If you want to use the pudding mix, prepare it according to the package instructions for an extra layer of creaminess.
3. Layer the banana slices in the bottom of the crust. Then, spread half of your whipped cream on top.
4. If using pudding, add it on top of the whipped cream layer, and finish with the remaining whipped cream.
5. Chill the pie in the refrigerator for at least 2 hours before serving. This allows the flavors to meld beautifully.
Tips:
– To stop bananas from browning, toss them in a little lemon juice before layering.
– Garnish with extra banana slices and a sprinkle of cinnamon for a lovely finish.
FAQs:
1. How long will the pie last in the fridge?
– It’s best to enjoy it within 2 days for the freshest taste.
2. Can I use a different type of crust?
– Absolutely! A chocolate crust can give this pie a fun twist!
Now, you’re ready to impress your family and friends with this easy no-bake banana cream pie. Enjoy every creamy bite!
Easy No-Bake Banana Cream Pie
Editor’s Choice

Medley Hills Farm Graham cracker crumbs – in Resealable Bag – 1.5 lbs (P…
 AmazonCheck Price
5. Raspberry Whipped Cream Parfaits
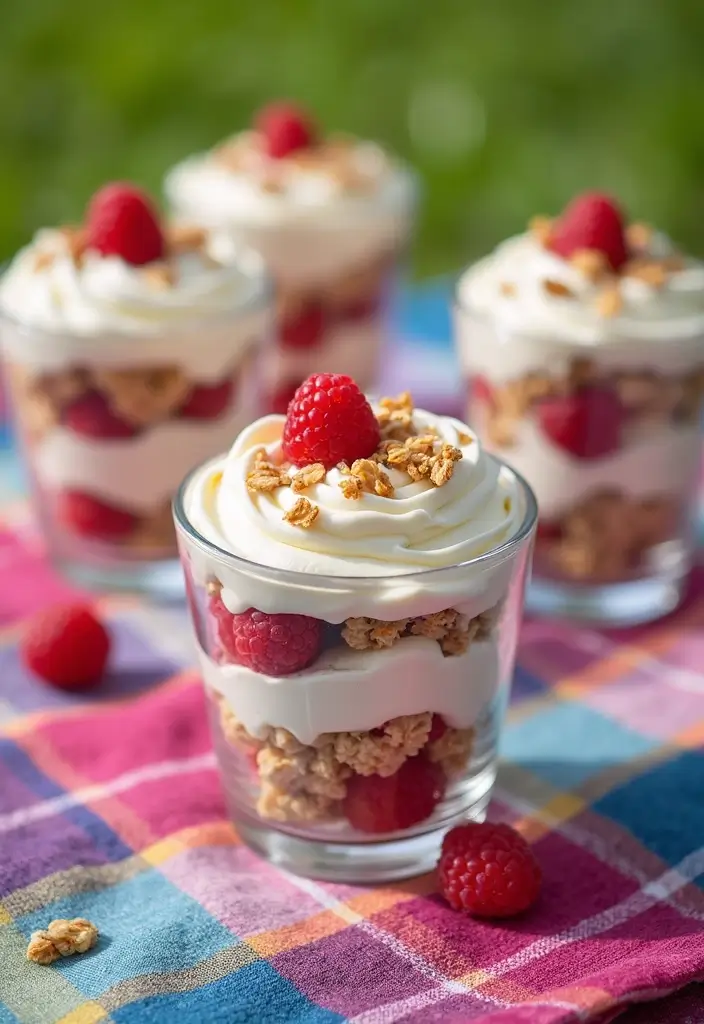
Raspberry whipped cream parfaits are a delightful treat that you can whip up in no time! These layered desserts combine the tartness of fresh raspberries with the light, fluffy texture of whipped cream. The result? A sweet and tangy experience that’s visually stunning and perfect for any occasion.
Imagine serving these parfaits at brunch or as a light dessert after dinner. They not only taste amazing but also look beautiful in clear glasses, making them a hit with both kids and adults alike. Plus, you can make them in just ten minutes!
Recipe Overview:
– Servings: 4
– Prep Time: 10 minutes
– Cook Time: 0 minutes
– Total Time: 10 minutes
– Calories: Approximately 200 per serving
Nutritional Information:
– Total Fat: 12g
– Saturated Fat: 7g
– Cholesterol: 50mg
– Sodium: 25mg
– Total Carbohydrates: 20g
– Sugars: 15g
– Protein: 3g
Ingredients:
– 1 cup heavy cream
– 1/4 cup powdered sugar
– 1 teaspoon vanilla extract
– 2 cups fresh raspberries
– 1 cup granola or crushed cookies (optional)
Instructions:
1. In a mixing bowl, beat the heavy cream, powdered sugar, and vanilla extract until soft peaks form. This will create the perfect whipped cream base.
2. Take serving glasses and start layering. Begin with a layer of fresh raspberries, followed by a generous dollop of whipped cream. If you like a crunch, add granola or crushed cookies next.
3. Repeat the layers until the glasses are filled, making sure to finish with whipped cream on top.
4. Serve these delicious parfaits immediately or chill them in the refrigerator for about 30 minutes for a refreshing treat.
Tips:
– Use blueberries or strawberries instead of raspberries for a fun twist.
– Drizzle with honey or maple syrup for added sweetness if you like.
FAQs:
1. Can I prepare these ahead of time?
– Yes, just remember to add the granola right before serving to keep it crunchy!
2. What type of fruit works best?
– You can use any fresh fruit. Just adjust the sugar based on the sweetness of the fruit you choose!
These raspberry parfaits are not only simple to make but also a fantastic way to impress your guests. Enjoy making this fluffy and dreamy dessert!
Raspberry Whipped Cream Parfaits
Editor’s Choice

Amazon Grocery, Heavy Whipping Cream, Ultra-Pasteurized, 16 Fl Oz (Previ…
 Amazon$2.27
UrbanRoots 300 Pack Clear Plastic Dessert Cups(5 oz),Disposable Parfait …
 Amazon$23.99
6. No-Bake Oreo Cheesecake
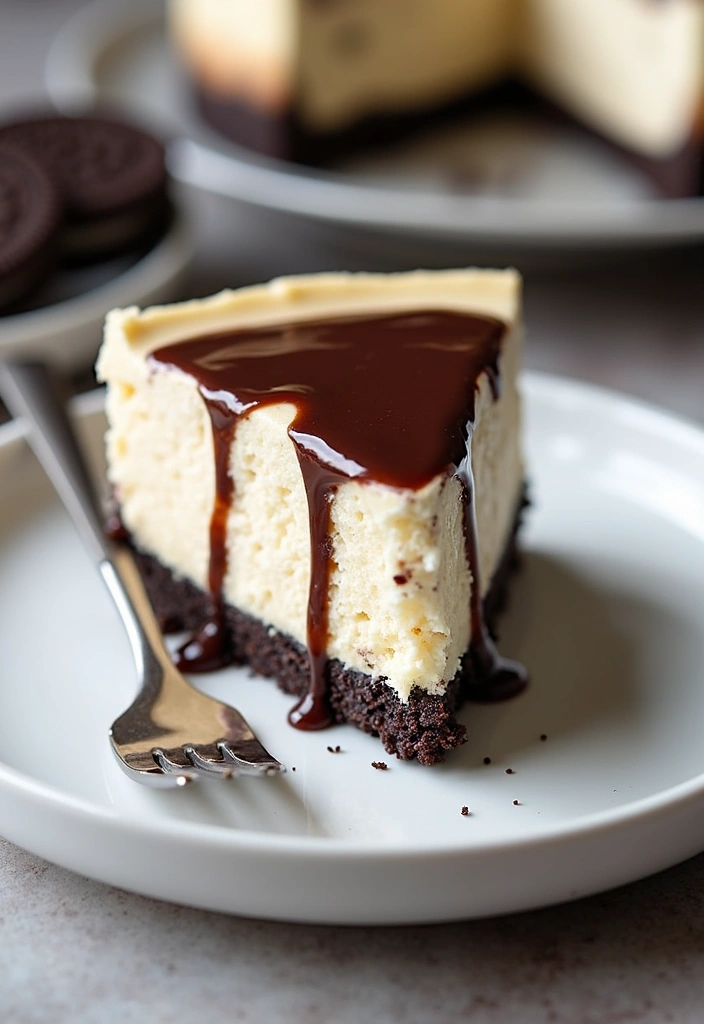
Dive into a dessert that’s both rich and easy to make: the No-Bake Oreo Cheesecake! Imagine a crunchy Oreo crust, perfectly paired with a creamy, fluffy filling that will thrill chocolate lovers everywhere. This cheesecake is not only a delight to your taste buds but also a lifesaver for busy hosts looking for an impressive treat without the hassle of baking.
This dessert shines at parties or cozy nights in. Its simple preparation means you can focus on enjoying your time with friends and family. Plus, it’s a crowd-pleaser that’s sure to earn you compliments!
Recipe Overview:
– Servings: 8
– Prep Time: 20 minutes
– Chill Time: 4 hours or overnight
– Calories: Roughly 350 per serving
Nutritional Information:
– Total Fat: 25g
– Saturated Fat: 15g
– Cholesterol: 60mg
– Sodium: 250mg
– Total Carbohydrates: 30g
– Sugars: 15g
– Protein: 5g
Ingredients:
– 24 Oreo cookies, crushed
– 5 tablespoons butter, melted
– 2 cups cream cheese, softened
– 1 cup heavy cream
– 1/2 cup powdered sugar
– 1 teaspoon vanilla extract
Instructions:
1. Mix the crushed Oreos with melted butter in a bowl. Press this mixture into the bottom of a springform pan to create the crust.
2. In a separate bowl, beat the softened cream cheese, powdered sugar, and vanilla extract until smooth and creamy.
3. Whip the heavy cream in another bowl until stiff peaks form. Carefully fold this whipped cream into the cream cheese mixture until well blended.
4. Pour the creamy filling onto your crust, smoothing the top. Cover and chill in the fridge for at least 4 hours or overnight for the best texture.
Tips:
– Add some crushed Oreos to the filling for an extra chocolatey kick.
– Let the cheesecake sit at room temperature for 10-15 minutes before slicing for cleaner pieces.
FAQs:
1. Can I use a different type of cookie?
– Absolutely! Any chocolate sandwich cookie will work nicely.
2. How long can I keep this dessert?
– It stays fresh for up to 5 days in the fridge.
This no-bake cheesecake will be your new go-to dessert for any occasion. With its creamy texture and chocolatey goodness, everyone will be coming back for seconds!
No-Bake Oreo Cheesecake
Editor’s Choice


EurKitchen Professional Aluminum Whipped Cream Dispenser – Leak-Free Whi…
 Amazon$42.99
7. Lemon Lush Dessert
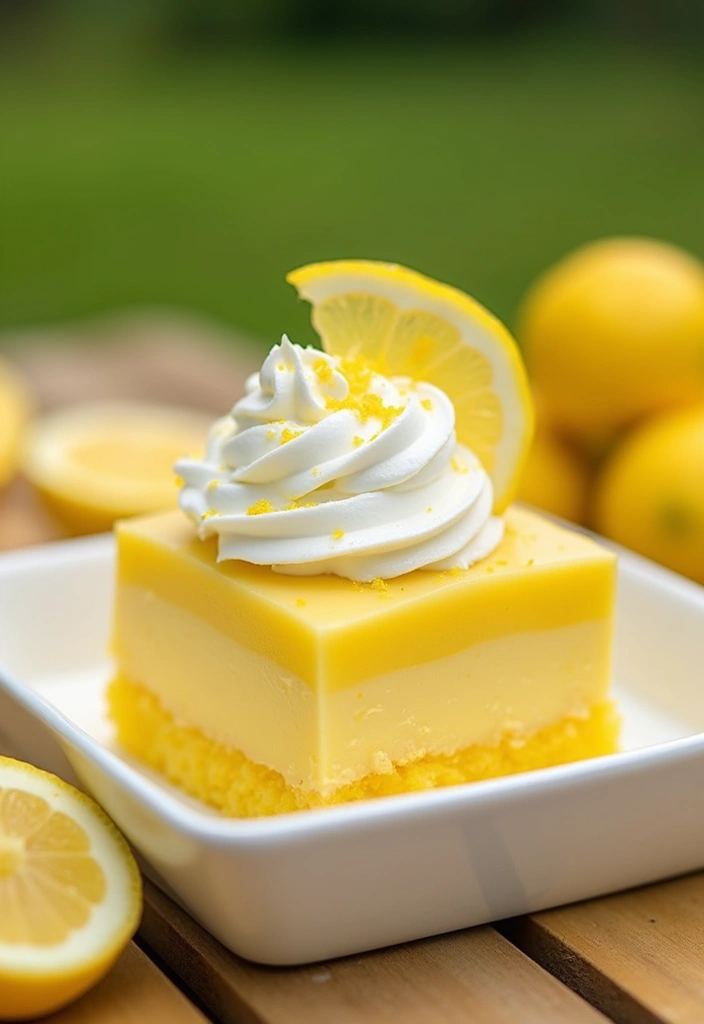
If you’re craving a dessert that combines zesty lemon flavor with a fluffy texture, the Lemon Lush Dessert is your perfect match! This delightful treat features layers of lemon pudding, cream cheese, and whipped cream. Each bite is a refreshing burst of citrus sweetness that will brighten up any occasion. Imagine serving this no-bake dessert at your next summer picnic or family gathering; it’s sure to impress!
Making Lemon Lush Dessert is simple and requires just 20 minutes of prep time. Plus, it’s a crowd-pleaser that everyone will love. Here’s how you can whip it up:
Recipe Overview:
– Servings: 9
– Prep Time: 20 minutes
– Cook Time: 0 minutes
– Total Time: 20 minutes
– Calories: Approximately 220 per serving
Nutritional Information:
– Total Fat: 10g
– Saturated Fat: 6g
– Cholesterol: 30mg
– Sodium: 100mg
– Total Carbohydrates: 28g
– Sugars: 15g
– Protein: 3g
Ingredients:
– 1 cup graham cracker crumbs
– 1/2 cup butter, melted
– 8 ounces cream cheese, softened
– 1 cup powdered sugar
– 1/2 cup lemon juice
– 1 cup heavy cream
– 1 package of instant lemon pudding mix
Instructions:
1. Start by mixing the graham cracker crumbs and melted butter in a bowl. Press this mixture into the bottom of a 9×9 dish to form a crust.
2. In a separate bowl, beat the softened cream cheese and powdered sugar until it’s smooth. Gently fold in half of the whipped cream to keep it airy.
3. Spread the cream cheese mixture over the crust. Next, pour the prepared lemon pudding over this layer.
4. Finally, top it off with the remaining whipped cream. Chill for at least 2 hours before serving to let the flavors meld together.
Tips:
– Garnish with fresh lemon zest or slices for an extra pop of flavor.
– Feel free to adjust the sugar in the cream cheese layer to match your taste.
FAQs:
1. Can I substitute the lemon juice?
– Absolutely! Lime juice gives a fun twist to this dessert.
2. How long will it last in the fridge?
– This dessert stays fresh for up to 3 days when covered in the fridge.
With its light and creamy layers, the Lemon Lush Dessert is a fantastic way to satisfy your sweet tooth while enjoying a refreshing taste of summer. Try it out, and watch it disappear from the table!
Lemon Lush Dessert
Editor’s Choice

EurKitchen Professional Aluminum Whipped Cream Dispenser – Leak-Free Whi…
 Amazon$42.99
Deiss PRO Citrus Lemon Zester & Cheese Grater — Parmesan Cheese, Lemon, …
 Amazon$10.72
NUTRIUPS 9 x 9 Glass Baking Dish with Lid, 9 x 9 Baking Pan, 2.75QT LARG…
 Amazon$24.99
8. Creamy Chocolate Chip Fluff
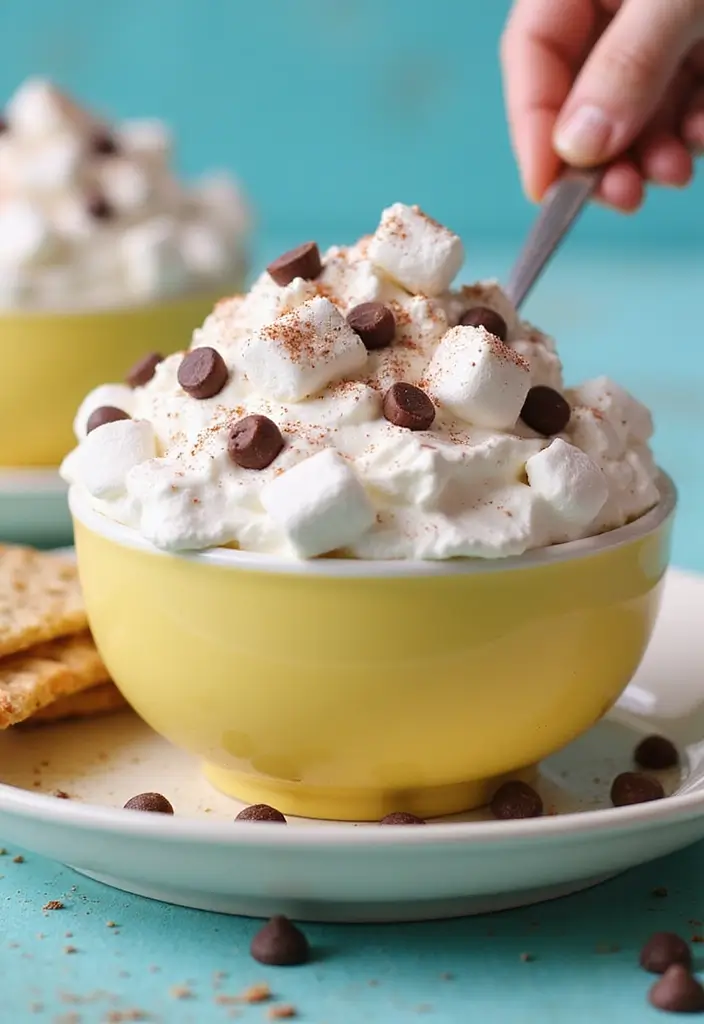
Indulge in the delightful experience of Creamy Chocolate Chip Fluff! This dessert is a lovely mix of whipped cream, mini chocolate chips, and fluffy marshmallows. It’s perfect for parties, family gatherings, or simply satisfying your sweet tooth. With its light texture and sweet taste, this treat feels like a nostalgic blast from the past. Plus, you can easily tweak it to match your favorite flavors, whether you want to add nuts, fruits, or even different kinds of chocolate.
Making this delicious fluff is a breeze. In just 15 minutes, you can whip up a dessert that everyone will love. Chill it for a bit to let the flavors mingle, and you’re all set! Here’s how to create this sweet masterpiece.
Recipe Overview:
– Servings: 8
– Prep Time: 15 minutes
– Total Time: 15 minutes
– Calories: Approximately 180 per serving
Nutritional Information:
– Total Fat: 8g
– Saturated Fat: 5g
– Cholesterol: 30mg
– Sodium: 40mg
– Total Carbohydrates: 25g
– Sugars: 15g
– Protein: 2g
Ingredients:
– 2 cups heavy whipping cream
– 1 cup mini chocolate chips
– 1/2 cup mini marshmallows
– 1/4 cup powdered sugar
– 1 teaspoon vanilla extract
Instructions:
1. In a large bowl, whip the heavy cream, powdered sugar, and vanilla extract until soft peaks form. This will help create that fluffy texture you want!
2. Gently fold in the mini chocolate chips and marshmallows. Be careful not to deflate your whipped cream too much; you want it light and airy!
3. Transfer your fluff to a serving dish. Chill it in the fridge for about 30 minutes. This step allows the flavors to blend beautifully.
Tips:
– Add chopped nuts for a satisfying crunch.
– Serve in individual cups for a fun and fancy presentation.
FAQs:
1. Can I prepare this dessert a day ahead?
– Yes, it keeps well in the fridge for up to 2 days, making it a great make-ahead option!
2. How can I customize it?
– Feel free to swap in different flavored chips or add fresh fruit for a twist!
Now you’re ready to impress your friends and family with this easy and scrumptious dessert. Enjoy every fluffy bite!
Creamy Chocolate Chip Fluff
Editor’s Choice

Amazon Grocery, Heavy Whipping Cream, Ultra-Pasteurized, 16 Fl Oz (Previ…
 Amazon$2.96
365 by Whole Foods Market, Mini Semi-Sweet Chocolate Baking Chips, 12 Ounce
 Amazon$5.39
Domino Confectioners Sugar 10X Powdered Pure Cane Sugar, 4 Lb
 Amazon$12.47
9. Coconut Cream Delight
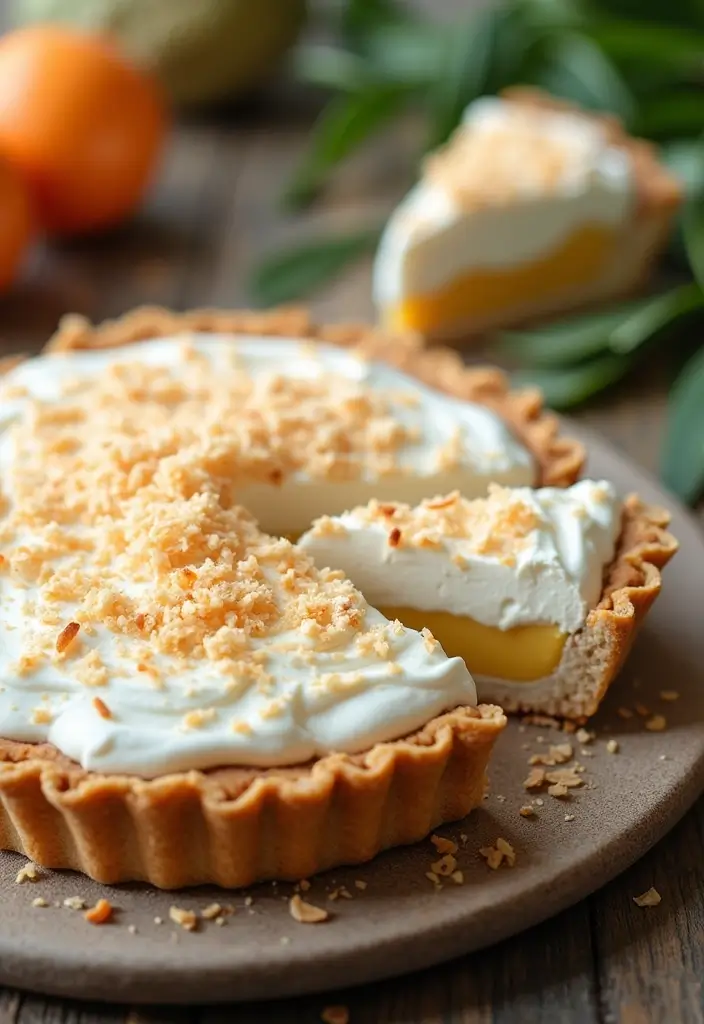
Imagine indulging in a slice of tropical bliss with Coconut Cream Delight! This no-bake dessert is a dream come true for coconut enthusiasts. It features layers of creamy coconut filling and fluffy whipped cream, all resting on a crunchy graham cracker crust. Topped with toasted coconut flakes, this treat not only tastes fantastic but looks stunning on any dessert table.
Making this dessert is a breeze. In just 20 minutes, you can whip up something that will impress your family and friends. Plus, you don’t need to turn on the oven! It’s a perfect dessert for warm days or any time you crave something light and fluffy.
Recipe Overview:
– Servings: 8
– Prep Time: 20 minutes
– Total Time: 20 minutes
– Calories: About 300 per serving
Nutritional Information:
– Total Fat: 20g
– Saturated Fat: 12g
– Cholesterol: 30mg
– Sodium: 150mg
– Total Carbohydrates: 30g
– Sugars: 15g
– Protein: 3g
Ingredients:
– 1 cup graham cracker crumbs
– 1/2 cup butter, melted
– 1 (8 ounce) package cream cheese, softened
– 1 cup powdered sugar
– 1 cup heavy cream
– 1 cup sweetened shredded coconut
Instructions:
1. Start by combining the graham cracker crumbs and melted butter in a bowl. Press this mixture firmly into the bottom of a 9-inch pie plate to form your crust.
2. In a separate bowl, beat the softened cream cheese and powdered sugar until smooth and creamy.
3. Gently fold in the heavy cream and shredded coconut until everything is well mixed.
4. Pour this luscious coconut mixture over the crust and spread it evenly.
5. Chill in the refrigerator for at least 2 hours before serving to let it set.
Tips:
– Use unsweetened coconut for a less sweet flavor.
– Add more toasted coconut on top for an extra crunch.
FAQs:
1. Can I swap the cream cheese?
– Yes! Mascarpone cheese makes a great alternative.
2. How long will this dessert last?
– It stays fresh for up to 4 days in the fridge.
Dive into this Coconut Cream Delight and enjoy a slice of summer any time of year!
Coconut Cream Delight
Editor’s Choice

Z Natural Foods Heavy Cream Powder – Nutrient-Dense, Delicious Powdered …
 AmazonCheck Price
Medley Hills Farm Graham cracker crumbs – in Resealable Bag – 1.5 lbs
 Amazon$13.99
365 by Whole Foods Market, Organic Shredded Coconut, 8 Ounce (Pack of 2)
 AmazonCheck Price
10. Peanut Butter Whipped Cream Tarts
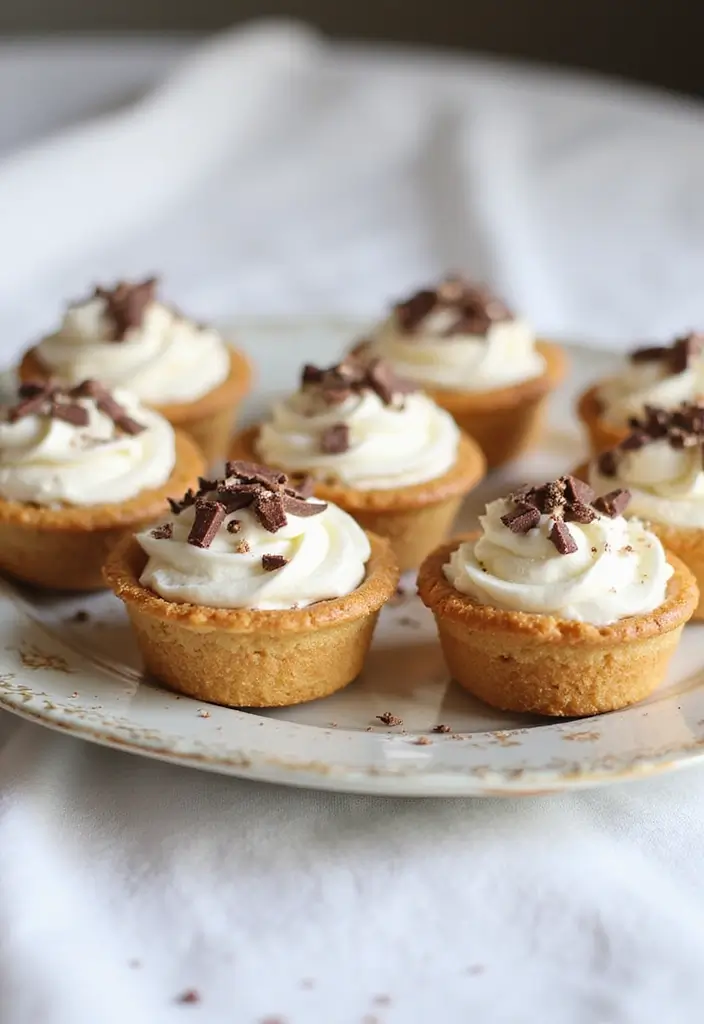
Indulge your love for peanut butter with these delightful mini peanut butter whipped cream tarts! If you crave a sweet treat that combines creamy textures with a crunchy crust, you’re in for a real treat. These individual tarts are not just delicious; they’re perfect for any gathering, offering a bite-sized dessert that will have everyone coming back for more.
The heart of these tarts lies in the smooth peanut butter whipped cream. This fluffy filling sits atop a buttery graham cracker crust, creating a balance that’s simply irresistible. Imagine the first bite—the rich peanut butter flavor melts in your mouth, complemented by the lightness of the whipped cream. Plus, you can easily customize them to suit your taste or the season!
Recipe Overview:
– Servings: 12
– Prep Time: 30 minutes
– Cook Time: 0 minutes
– Total Time: 30 minutes
– Calories: Approximately 220 per tart
Nutritional Information:
– Total Fat: 15g
– Saturated Fat: 5g
– Cholesterol: 10mg
– Sodium: 125mg
– Total Carbohydrates: 20g
– Sugars: 10g
– Protein: 4g
Ingredients:
– 1 cup crushed graham crackers
– 1/3 cup unsalted butter, melted
– 1 cup creamy peanut butter
– 1/2 cup powdered sugar
– 1 cup heavy cream
Instructions:
1. Start by mixing the crushed graham crackers with melted butter. Press this mixture into the bottoms of mini tart pans to form a sturdy crust.
2. In a separate bowl, blend the creamy peanut butter with powdered sugar until smooth and combined.
3. Whip the heavy cream in another bowl until stiff peaks form. Gently fold this whipped cream into the peanut butter mixture until fully incorporated.
4. Spoon the luscious filling into your prepared tart shells and chill them for at least 1 hour before serving. This helps the flavors meld beautifully!
Tips:
– Top your tarts with chocolate shavings or crushed peanuts for a crunchy finish.
– Make sure your tart shells have cooled completely before adding the filling to avoid melting the cream.
FAQs:
1. Can I prepare these tarts in advance?
– Absolutely! You can make them a day before and store them in the fridge.
2. What can I use if I don’t have graham crackers?
– Crushed cookies or pretzels make great substitutes and add a unique twist!
Now you’re ready to impress your friends and family with these delightful peanut butter whipped cream tarts. Enjoy every fluffy bite!
Peanut Butter Whipped Cream Tarts
Editor’s Choice

Mini Tart Pans with Removable Bottom 4 inch Set of 10, Non-stick Round Q…
 Amazon$12.78
Hoosier Hill Farm Heavy Cream Powder, 2LB (Pack of 1)
 Amazon$28.99
11. Berry Whipped Cream Cake
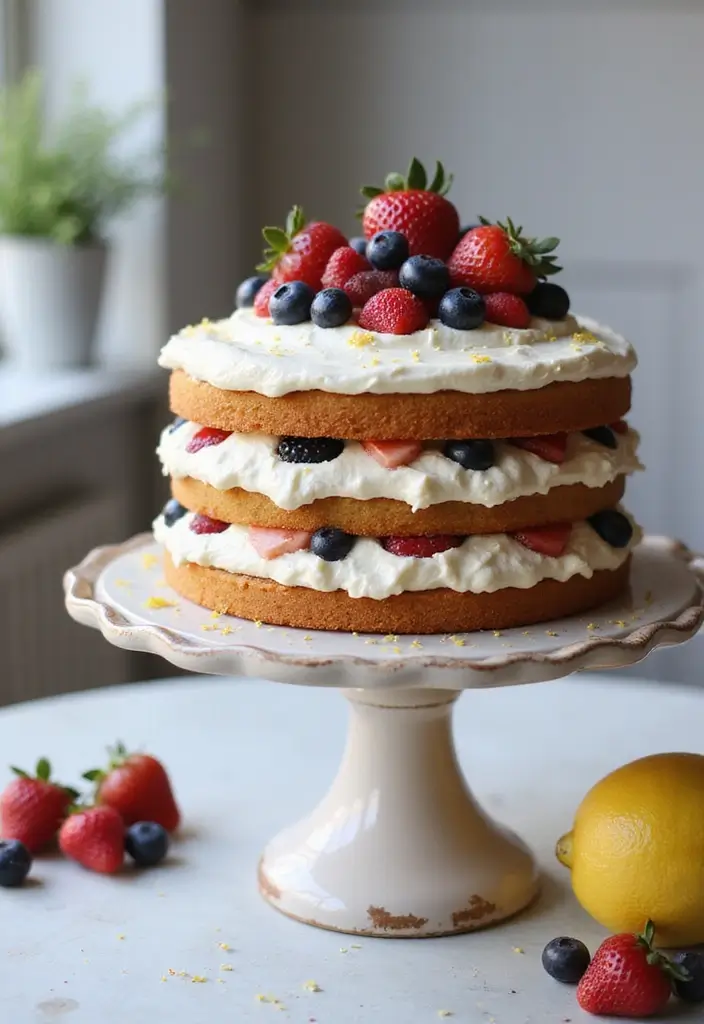
Indulge in the light, airy delight of a Berry Whipped Cream Cake! This charming naked cake features layers of fluffy whipped cream, fresh, juicy berries, and a refreshing hint of lemon zest. It’s not just a dessert; it’s a centerpiece that will steal the show at your summer gatherings.
Imagine the sweet and tart flavors of ripe strawberries, blueberries, and raspberries dancing on your palate. The whipped cream adds a cloud-like texture, keeping each bite light and satisfying. Perfect for family barbecues or a casual get-together, this cake makes every occasion feel special.
Ready to make this delicious masterpiece? Here’s how!
Recipe Overview:
– Servings: 10
– Prep Time: 30 minutes
– Cook Time: 0 minutes
– Total Time: 30 minutes
– Calories: Approximately 280 per serving
Nutritional Information:
– Total Fat: 15g
– Saturated Fat: 8g
– Cholesterol: 50mg
– Sodium: 200mg
– Total Carbohydrates: 35g
– Sugars: 20g
– Protein: 4g
Ingredients:
– 2 cups flour
– 1 cup sugar
– 1/2 cup unsalted butter, softened
– 1 cup milk
– 3 teaspoons baking powder
– 1 cup heavy cream
– 1 cup mixed berries (strawberries, blueberries, raspberries)
– Zest of 1 lemon
Instructions:
1. Preheat your oven to 350°F (175°C). Grease three 6-inch round cake pans.
2. In a mixing bowl, cream the softened butter and sugar until fluffy. Add eggs one by one, mixing well after each.
3. Gradually stir in the flour, baking powder, and milk until just combined.
4. Evenly divide the batter among the prepared pans and bake for 20-25 minutes.
5. Once baked, let the cakes cool completely. Then, frost them with whipped cream and layer on those fresh berries.
6. Finish with a sprinkle of lemon zest and serve!
Tips:
– Chill your mixing bowl and beaters to achieve perfect whipped cream consistency.
– Opt for seasonal berries to enhance flavor and freshness.
FAQs:
1. How do I store leftovers?
– Keep them in the fridge and enjoy within 2 days for the best taste.
2. Can I use store-bought cake?
– Yes! This can save you time while still allowing you to create a beautiful dessert.
This Berry Whipped Cream Cake is your go-to dessert for any summer festivity. With its fresh flavors and light texture, it’s sure to impress!
Berry Whipped Cream Cake
Editor’s Choice

EurKitchen Professional Aluminum Whipped Cream Dispenser – Leak-Free Whi…
 Amazon$42.99
Umite Chef Mixing Bowls with Airtight Lids Set, 8PCS Stainless Steel Kha…
 Amazon$29.99
Syntus 65 PCs Cake Decorating Kit with Cake Stand Turntable, Cake Baking…
 Amazon$15.99
12. Pistachio Whipped Cream Dip
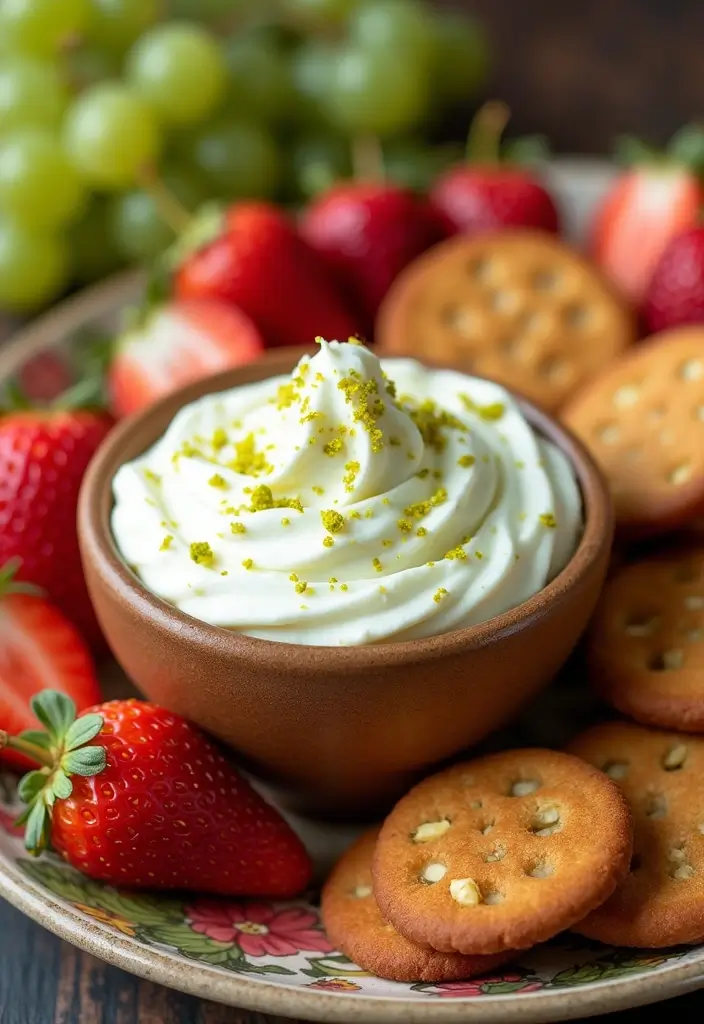
Whip up a delightful treat with this creamy Pistachio Whipped Cream Dip! This dessert offers a unique flavor twist that will impress your friends and family. The nutty taste of pistachios pairs wonderfully with fruits, cookies, or even cake. Imagine dipping fresh strawberries into this dreamy dip—it’s a match made in dessert heaven!
Making this dip is a breeze. With just a few simple ingredients, you can create a sweet and nutty delight in no time. This dish is perfect for parties, movie nights, or just when you want to treat yourself. Plus, it’s versatile enough to match any occasion!
Recipe Overview:
– Servings: 6
– Prep Time: 15 minutes
– Cook Time: 0 minutes
– Total Time: 15 minutes
– Calories: Approximately 160 per serving
Nutritional Information:
– Total Fat: 10g
– Saturated Fat: 4g
– Cholesterol: 15mg
– Sodium: 20mg
– Total Carbohydrates: 15g
– Sugars: 8g
– Protein: 2g
Ingredients:
– 1 cup heavy cream
– 1/2 cup powdered sugar
– 1/2 cup ground pistachios
– 1 teaspoon vanilla extract
Instructions:
1. In a large bowl, whip the heavy cream, powdered sugar, and vanilla together until soft peaks form.
2. Carefully fold in the ground pistachios until they are evenly mixed in.
3. Chill the dip in the refrigerator for at least 30 minutes before serving to let the flavors meld together.
Tips:
– Choose toasted pistachios for a richer flavor.
– Pair this dip with fresh fruits like apples or bananas for a refreshing snack.
FAQs:
1. Can I use other nuts?
– Absolutely! Almonds or hazelnuts can work beautifully too.
2. How long does the dip last in the fridge?
– It’s best to enjoy it within 2 days for optimal freshness.
With this Pistachio Whipped Cream Dip, you’ll not only satisfy your sweet tooth, but you’ll also surprise your guests with a unique and tasty dessert. Enjoy every fluffy bite!
Pistachio Whipped Cream Dip
Editor’s Choice

Hoosier Hill Farm Heavy Cream Powder, 2LB (Pack of 1)
 Amazon$28.99
365 by Whole Foods Market, Organic Powdered Sugar, 24 Ounce (Pack of 2)
 AmazonCheck Price
Aiva Pistachio Flour 2 LB (Ground Pistachio) – Finely Ground for Baking,…
 AmazonCheck Price
13. Choco-Banana Whipped Cream Roll
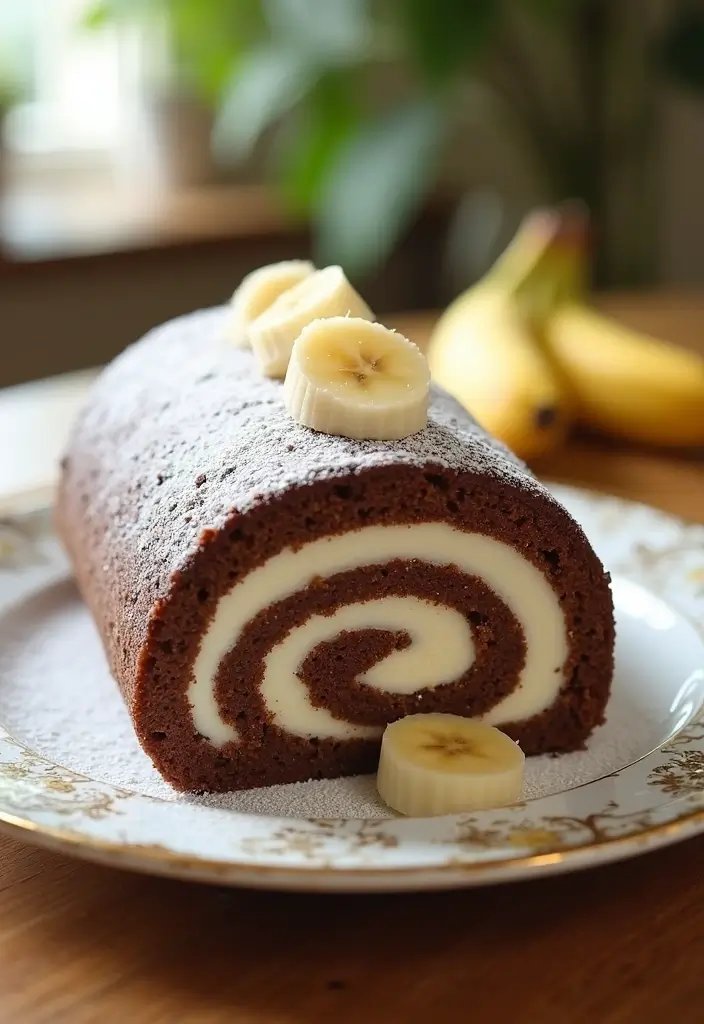
This Choco-Banana Whipped Cream Roll is a dessert that brings joy to any table. Imagine a fluffy chocolate cake rolled up with sweet bananas and creamy whipped cream. It’s not just delicious; it’s also a feast for the eyes. Whether you’re celebrating a birthday or having a cozy family gathering, this treat is sure to impress.
The combination of rich chocolate and fresh bananas creates a balance of flavors that everyone loves. Plus, the whipped cream adds a light, airy texture. It’s the perfect dessert to make you feel special anytime.
Recipe Overview:
– Servings: 6
– Prep Time: 30 minutes
– Cook Time: 15 minutes
– Total Time: 45 minutes
– Calories: About 350 per serving
Nutritional Information:
– Total Fat: 15g
– Saturated Fat: 5g
– Cholesterol: 100mg
– Sodium: 150mg
– Total Carbohydrates: 45g
– Sugars: 25g
– Protein: 4g
Ingredients:
– 4 eggs
– 1 cup sugar
– 1 teaspoon vanilla extract
– 1 cup flour
– 1/2 teaspoon baking powder
– 1 cup heavy cream
– 2 ripe bananas, sliced
Instructions:
1. Preheat your oven to 350°F (175°C) and grease a jelly roll pan.
2. In a large bowl, beat the eggs and sugar together until the mixture is thick and pale. Mix in the vanilla extract.
3. Gently fold in the flour and baking powder until just combined.
4. Pour the batter into the prepared pan and bake for 12-15 minutes until set.
5. After baking, let the cake cool slightly, then roll it up in a clean kitchen towel to keep its shape.
6. Once completely cool, unroll the cake and spread whipped cream and banana slices on top. Roll it back up gently.
7. Chill the roll in the fridge for about an hour before serving.
Tips:
– Dust the top with powdered sugar for a beautiful finish.
– Keep the roll chilled until you’re ready to serve it to ensure it holds its shape.
FAQs:
1. Can I use other fruits?
– Absolutely! Strawberries or kiwi can be great substitutes.
2. How should I store leftover cake?
– Cover it and keep it in the fridge for up to two days.
This Choco-Banana Whipped Cream Roll is an easy, delightful dessert that not only tastes great but also looks stunning on your table. Enjoy making it for your next occasion!
Choco-Banana Whipped Cream Roll
Editor’s Choice

Z Natural Foods Heavy Cream Powder – Nutrient-Dense, Delicious Powdered …
 AmazonCheck Price

14. Pumpkin Spice Whipped Cream Parfaits
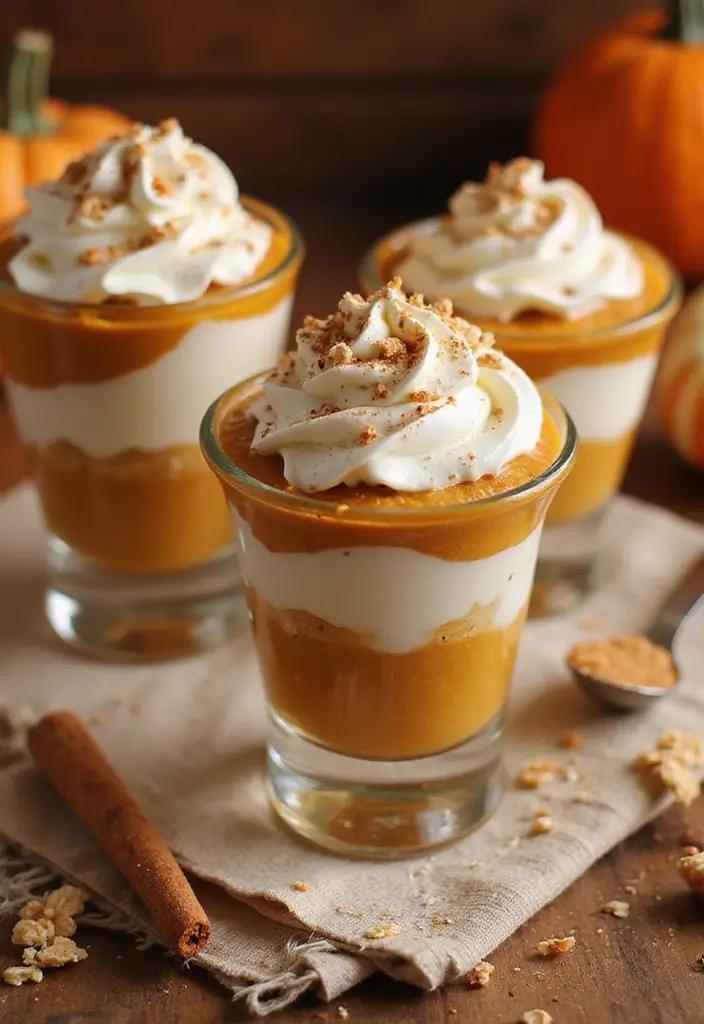
Embrace the cozy flavors of fall with these delightful Pumpkin Spice Whipped Cream Parfaits! Picture this: luscious layers of creamy pumpkin puree and fluffy whipped cream, all served in charming cups. This dessert is not just festive; it brings comfort and warmth to any gathering. Plus, it’s quick to make, allowing you to savor the season without spending hours in the kitchen.
These parfaits are a perfect blend of rich flavors and airy textures. You’ll love how easy they are to prepare. Just whip, layer, and chill, and you’ll have a stunning treat ready to impress your family and friends.
Recipe Overview:
– Servings: 4
– Prep Time: 15 minutes
– Cook Time: 0 minutes
– Total Time: 15 minutes
– Calories: Approximately 220 per serving
Nutritional Information:
– Total Fat: 12g
– Saturated Fat: 6g
– Cholesterol: 30mg
– Sodium: 200mg
– Total Carbohydrates: 30g
– Sugars: 15g
– Protein: 2g
Ingredients:
– 1 cup heavy cream
– 1/2 cup pumpkin puree
– 1/4 cup powdered sugar
– 1 teaspoon pumpkin pie spice
– 1 teaspoon vanilla extract
– 1 cup granola (optional)
Instructions:
1. In a mixing bowl, whip the heavy cream with powdered sugar, pumpkin pie spice, and vanilla until stiff peaks form. This creates a light and airy texture.
2. In individual cups or glasses, alternate layers of whipped cream and pumpkin puree. If you love a little crunch, top with granola.
3. Chill the parfaits in the refrigerator for about 30 minutes before serving. This helps the flavors meld beautifully.
Tips:
– Adjust the spices to match your taste. You can add more or less pumpkin pie spice.
– For an extra touch, sprinkle cinnamon on top before serving. It adds a lovely aroma and flavor.
FAQs:
1. Can I prepare these parfaits ahead of time?
– Yes, you can make them a day in advance. Just add the granola right before serving to keep it crunchy!
2. What if I don’t have pumpkin puree?
– No problem! You can use sweet potato puree as a tasty substitute.
Dig into these Pumpkin Spice Whipped Cream Parfaits and let the flavors of fall fill your home. They are not just desserts; they are little cups of joy that everyone will love!
Pumpkin Spice Whipped Cream Parfaits
Editor’s Choice
365 By Whole Foods Market, Organic Heavy Cream, 16 Fl Oz
 Amazon$4.49

Godinger Glass Dublin Tasters Trifle, Custom, Clear, 16 Pc Set
 Amazon$19.86
15. No-Bake Chewy Chocolate Bars
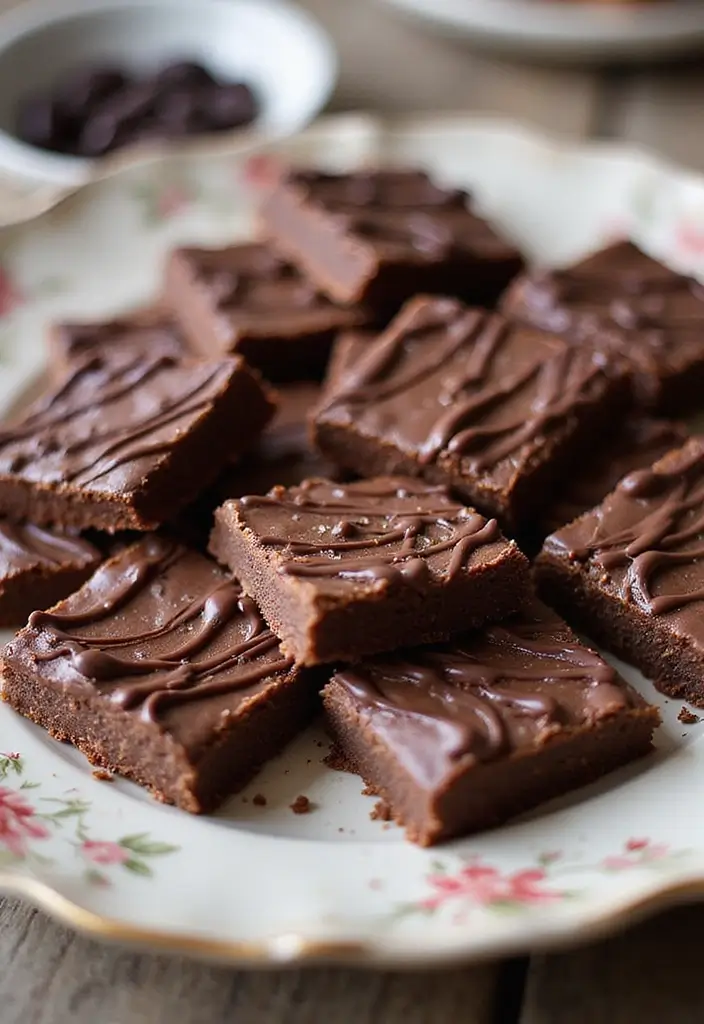
Craving something sweet and chocolatey without turning on the oven? Try these delightful no-bake chewy chocolate bars! They offer a perfect blend of rich chocolate flavor and a creamy touch from whipped cream. These bars are not only easy to whip up but also fun to personalize with your favorite mix-ins, like crunchy nuts or crispy rice. Whether it’s a casual snack or a party treat, these bars will surely impress your friends and family!
Recipe Overview:
– Servings: 12
– Prep Time: 15 minutes
– Cook Time: 0 minutes
– Total Time: 15 minutes
– Calories: About 210 per serving
Nutritional Information:
– Total Fat: 12g
– Saturated Fat: 7g
– Cholesterol: 15mg
– Sodium: 50mg
– Total Carbohydrates: 24g
– Sugars: 12g
– Protein: 3g
Ingredients:
– 1 cup chocolate chips
– 1/2 cup unsweetened cocoa powder
– 1 cup heavy cream
– 1/2 cup powdered sugar
– 1 cup mixed nuts or rice cereal (optional)
Instructions:
1. Start by melting the chocolate chips and cocoa powder together. You can do this in the microwave or over a double boiler.
2. Once melted, let it cool slightly. Then, mix in the powdered sugar and whipped cream until everything is smooth and creamy.
3. If you like, fold in the nuts or rice cereal for some added crunch.
4. Spread the mixture evenly into a lined baking dish. Refrigerate for at least one hour until firm. Then, slice it into bars.
Tips:
– Use darker chocolate for a deeper taste.
– Store these bars in an airtight container in the fridge to keep them fresh longer.
FAQs:
1. Can I add other flavors?
– Absolutely! Try adding dried fruits or different nuts for a unique twist.
2. How long will these last?
– These bars can stay fresh in the refrigerator for up to a week.
With these no-bake chocolate bars, you can enjoy a sweet treat anytime without the hassle of baking. They are quick to make and perfect for satisfying your chocolate cravings. Enjoy every chewy bite!
No-Bake Chewy Chocolate Bars
Editor’s Choice

Amazon Grocery, Heavy Whipping Cream, Ultra-Pasteurized, 16 Fl Oz (Previ…
 Amazon$2.96
Amazon Fresh, Chocolate Baking Chips, Semi Sweet, 24 Oz, 1.5 Lb (Pack of…
 AmazonCheck Price
Umite Chef Mixing Bowls with Airtight Lids Set, 8PCS Stainless Steel Kha…
 Amazon$29.99
16. Creamy Vanilla Pudding with Whipped Cream
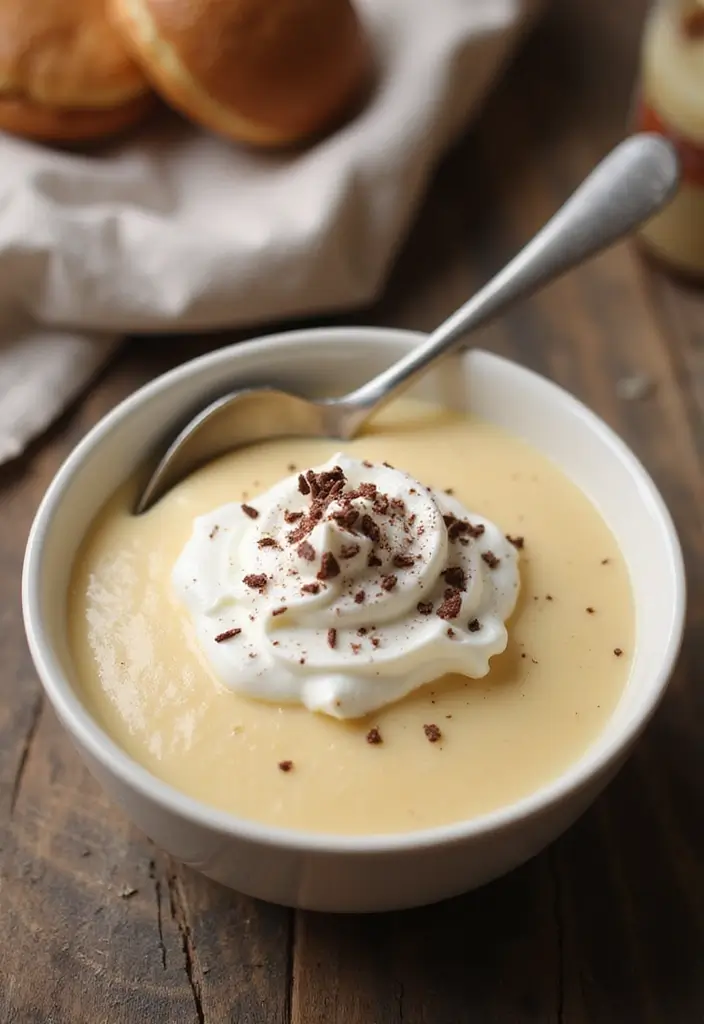
Dive into the delightful world of creamy vanilla pudding, a dessert that brings back sweet memories. Topped with a fluffy layer of homemade whipped cream, this treat is sure to charm your taste buds. There’s something special about making pudding from scratch. You can adjust the sweetness and flavor to your liking, creating a dessert that feels personalized just for you.
Serve this pudding in individual cups for a cozy dessert that everyone will love. Imagine the joy of spooning into that silky texture, enhanced by the lightness of whipped cream. It’s not just dessert; it’s a moment to treasure.
Recipe Overview:
– Servings: 4
– Prep Time: 10 minutes
– Cook Time: 10 minutes
– Total Time: 20 minutes
– Calories: Approximately 200 per serving
Nutritional Information:
– Total Fat: 8g
– Saturated Fat: 5g
– Cholesterol: 30mg
– Sodium: 150mg
– Total Carbohydrates: 28g
– Sugars: 18g
– Protein: 2g
Ingredients:
– 2 cups milk
– 1/2 cup sugar
– 1/4 cup cornstarch
– 1/4 teaspoon salt
– 1 tablespoon vanilla extract
– 1 cup heavy cream
Instructions:
1. In a medium saucepan, whisk together the milk, sugar, cornstarch, and salt over medium heat until smooth.
2. Keep stirring until the mixture thickens, which should take about 10 minutes.
3. Remove from heat and add the vanilla extract, stirring well.
4. Pour the pudding into serving cups and chill in the refrigerator until it sets.
5. While waiting, whip the heavy cream until it forms soft peaks. Top each pudding cup generously with whipped cream before serving.
Tips:
– Infuse the milk with a vanilla bean for a richer flavor.
– Add chocolate shavings on top for a fancy touch.
FAQs:
1. How long will the pudding last?
– Enjoy it within 3 days for the best flavor and texture.
2. Can I use almond milk instead?
– Absolutely! It’s a great dairy-free alternative.
Now you have a simple yet delicious dessert at your fingertips. Perfect for gatherings or a quiet night in, creamy vanilla pudding with whipped cream is sure to impress. Enjoy making it as much as you will enjoy eating it!
Creamy Vanilla Pudding with Whipped Cream
Editor’s Choice

Hamilton Beach 6-Speed Electric Hand Mixer with Whisk, Traditional Beate…
 Amazon$27.95
EASERCY 50 Pack 5 oz Plastic Dessert Cups with Lids, Yogurt Parfait/Appe…
 Amazon$16.99
Amazon Grocery, Heavy Whipping Cream, Ultra-Pasteurized, 16 Fl Oz (Previ…
 Amazon$3.37
17. No-Bake Apple Cream Delight
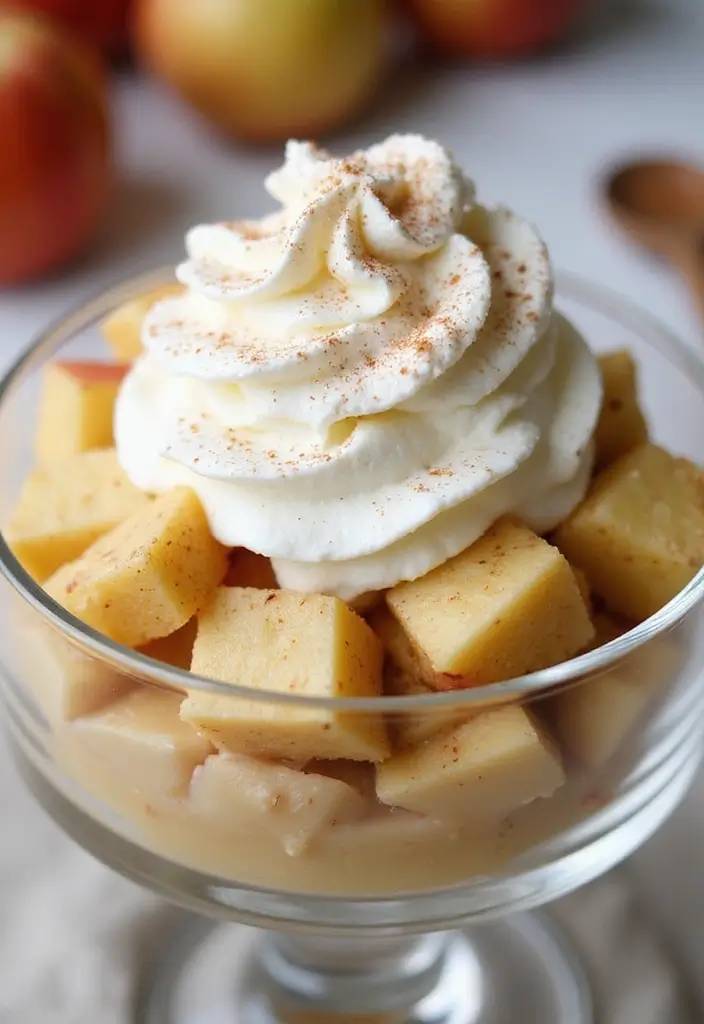
Indulge in the cozy flavors of fall with this delightful no-bake apple cream treat! Imagine layers of tender, spiced apples mingling with airy whipped cream. It’s a dessert that feels both refreshing and comforting, perfect for any gathering. Plus, it comes together in just 15 minutes, making it an ideal choice for last-minute guests. A sprinkle of cinnamon on top adds a warm touch!
Let’s dive into the recipe details so you can whip this up in no time.
Recipe Overview:
– Servings: 6
– Prep Time: 15 minutes
– Cook Time: 0 minutes
– Total Time: 15 minutes
– Calories: About 250 per serving
Nutritional Information:
– Total Fat: 10g
– Saturated Fat: 5g
– Cholesterol: 30mg
– Sodium: 80mg
– Total Carbohydrates: 40g
– Sugars: 20g
– Protein: 3g
Ingredients:
– 4 cups diced apples
– 1 cup heavy cream
– 1/2 cup powdered sugar
– 1 teaspoon cinnamon
– 1 tablespoon lemon juice
Instructions:
1. Toss the diced apples with lemon juice and cinnamon in a bowl. This adds a zesty kick!
2. In another bowl, whip the heavy cream and powdered sugar until soft peaks form. It should be fluffy and light.
3. Layer the spiced apples and whipped cream in a serving dish. Alternate between layers for a beautiful presentation.
4. Chill for at least 30 minutes before serving. This helps flavors meld together beautifully.
Tips:
– Use a mix of sweet and tart apples to create a balanced flavor.
– Top with extra cinnamon or chopped nuts for added texture.
FAQs:
1. Can I use canned apples?
– Fresh apples are best for flavor, but canned can work in a pinch.
2. How long will it last?
– Best enjoyed within 2 days for optimal freshness.
Now you’re ready to impress your friends and family with this easy, no-bake apple cream delight! Enjoy the sweet taste of autumn in every bite.
No-Bake Apple Cream Delight
Editor’s Choice

365 By Whole Foods Market, Organic Heavy Cream, 16 Fl Oz
 Amazon$4.99
365 by Whole Foods Market, Organic Powdered Sugar, 24 Ounce
 Amazon$5.79
Simply Organic Ceylon Ground Cinnamon, 2.08 Ounce, Non-GMO Organic Cinna…
 Amazon$6.11
18. Chocolate Covered Strawberry Whipped Cream Cups
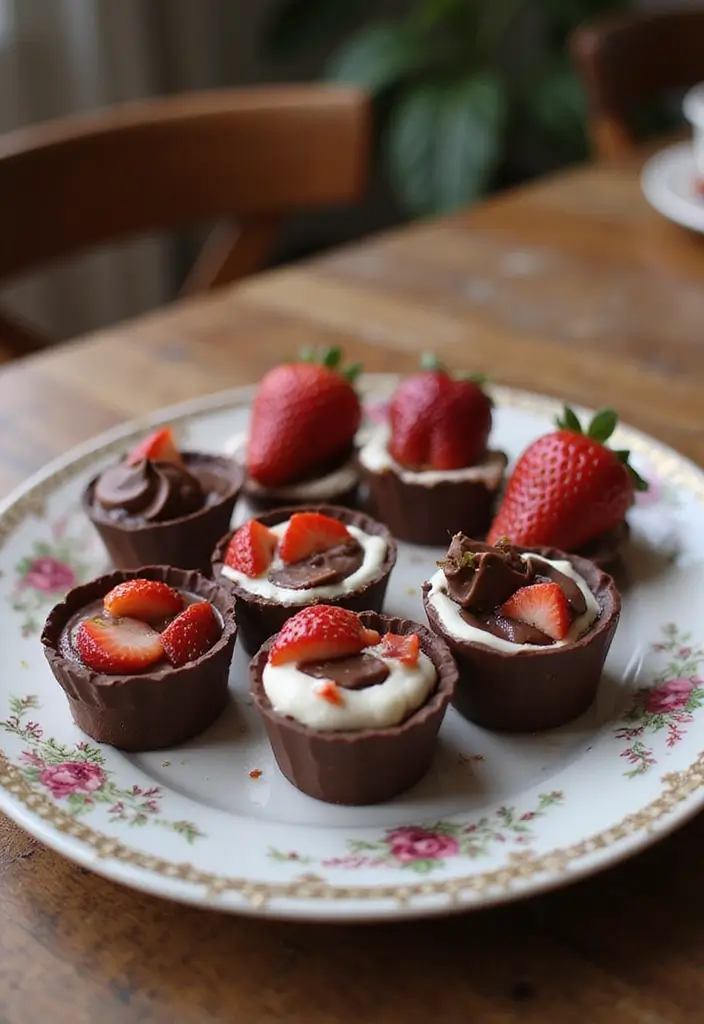
Treat yourself to a sweet delight with Chocolate Covered Strawberry Whipped Cream Cups! These elegant desserts pair the rich taste of chocolate with the freshness of strawberries, all enveloped in fluffy whipped cream. Perfect for impressing guests at a dinner party or simply enjoying a cozy night in, these cups are a feast for both the eyes and the taste buds.
Imagine biting into a crisp chocolate cup filled with creamy, sweet whipped cream, topped with juicy strawberries. It’s the ultimate indulgence, and best of all, it’s quick to prepare. You can whip these up in just 30 minutes, making them an easy yet impressive treat for any occasion.
Recipe Overview:
– Servings: 8
– Prep Time: 20 minutes
– Cook Time: 10 minutes
– Total Time: 30 minutes
– Calories: About 200 per serving
Nutritional Information:
– Total Fat: 13g
– Saturated Fat: 8g
– Cholesterol: 20mg
– Sodium: 50mg
– Total Carbohydrates: 20g
– Sugars: 10g
– Protein: 2g
Ingredients:
– 8 ounces semi-sweet chocolate
– 1 cup heavy cream
– 1 tablespoon powdered sugar
– Fresh strawberries for garnish
Instructions:
1. Melt the semi-sweet chocolate in a microwave or double boiler. Carefully coat the inside of silicone cupcake liners with the melted chocolate. Chill until firm.
2. In a bowl, whip the heavy cream and powdered sugar together until soft peaks form. This adds a lovely sweetness to your cream.
3. Once the chocolate cups are set, gently fill each with the whipped cream. Top with fresh strawberries for a burst of flavor and color.
4. Serve your creations right away for the best taste or refrigerate for up to an hour if needed.
Tips:
– Choose high-quality chocolate for a richer flavor.
– For an extra kick, add a splash of vanilla extract to your whipped cream.
FAQs:
1. Can I substitute with milk chocolate?
Yes, but keep in mind the sweetness will change.
2. How do I store leftovers?
Refrigerate for up to 2 days for freshness.
With these Chocolate Covered Strawberry Whipped Cream Cups, you’re just minutes away from a dessert that looks as delightful as it tastes. Enjoy the compliments that come your way!
Chocolate Covered Strawberry Whipped Cream Cups
Editor’s Choice

Amazon Basics Reusable Silicone Baking Cups, BPA Free Muffin Liners, Dis…
 Amazon$6.99
Baker’s Unsweetened Chocolate Premium Baking Bar with 100 % Cacao (4 oz …
 Amazon$1.12
Hamilton Beach 6-Speed Electric Hand Mixer with Whisk, Traditional Beate…
 Amazon$27.95
19. Whipped Cream Fruit Salad
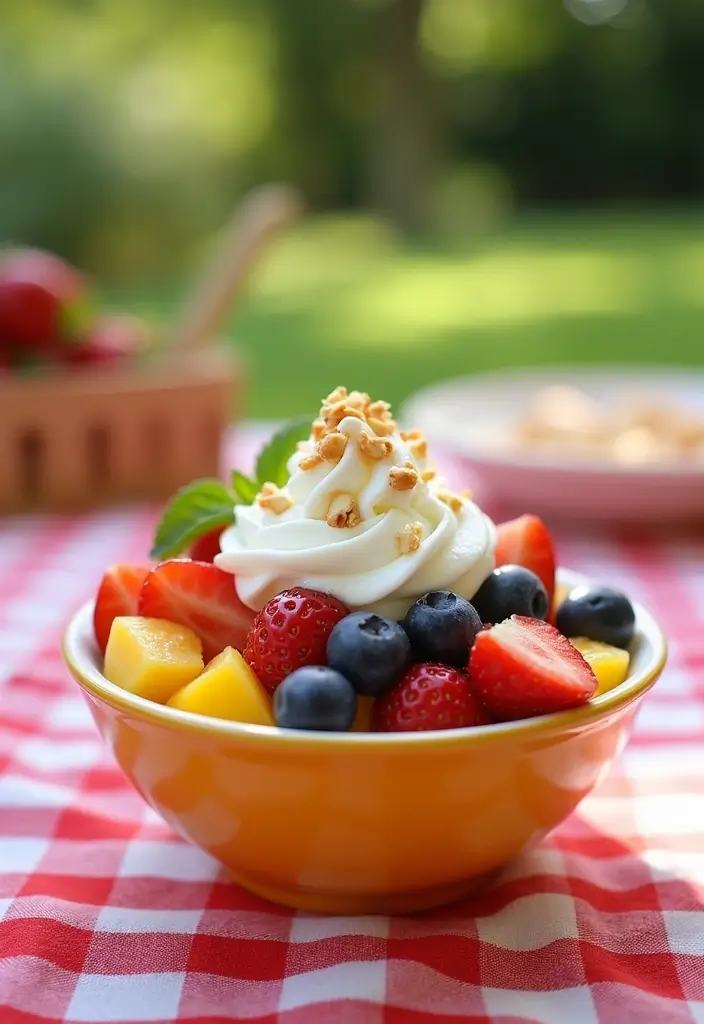
Elevate your fruit salad from ordinary to extraordinary with whipped cream! This Whipped Cream Fruit Salad is a colorful and inviting dessert that combines your favorite fruits into a fluffy treat. With every bite, you experience a refreshing burst of flavor and creamy goodness.
Imagine biting into sweet strawberries, juicy blueberries, and ripe bananas, all enveloped in luscious whipped cream. It’s perfect for those hot summer days or as a simple yet delightful breakfast. Plus, it’s a fantastic way to use up any leftover fruit you might have lying around. Drizzle it with a touch of honey or sprinkle some nuts on top for added crunch and flavor.
Recipe Overview:
– Servings: 6
– Prep Time: 15 minutes
– Cook Time: 0 minutes
– Total Time: 15 minutes
– Calories: Approximately 150 per serving
Nutritional Information:
– Total Fat: 8g
– Saturated Fat: 5g
– Cholesterol: 30mg
– Sodium: 40mg
– Total Carbohydrates: 18g
– Sugars: 12g
– Protein: 2g
Ingredients:
– 3 cups mixed fruit (like strawberries, blueberries, bananas)
– 1 cup heavy cream
– 1/4 cup powdered sugar
– 1 tablespoon vanilla extract
Instructions:
1. In a mixing bowl, whip the heavy cream with powdered sugar and vanilla until soft peaks form. You want it fluffy but not too stiff.
2. In a large bowl, toss your mixed fruits. Gently fold in the whipped cream, making sure everything is coated well.
3. Chill your fruit salad in the refrigerator for about 30 minutes before serving to let the flavors meld together.
Tips:
– Use seasonal fruits for the best taste and freshness.
– Add a sprinkle of cinnamon or crushed nuts for an extra delicious twist.
FAQs:
1. How long does it last?
– It’s best enjoyed within a day for optimal freshness.
2. Can I use frozen fruit?
– Yes! Just be sure to thaw it first and drain any excess liquid.
Whipped Cream Fruit Salad is not just a treat; it’s a simple way to bring joy to your table. Enjoy the delightful mix of flavors and textures, and feel free to get creative with your favorite fruits!
Whipped Cream Fruit Salad
Editor’s Choice

Hoosier Hill Farm Heavy Cream Powder, 2LB (Pack of 1)
 Amazon$28.99
Domino Confectioners Sugar 10X Powdered Pure Cane Sugar, 4 Lb
 Amazon$12.46
Umite Chef Mixing Bowls with Airtight Lids Set, 8PCS Stainless Steel Kha…
 Amazon$29.99
20. Mocha Whipped Cream Popsicles
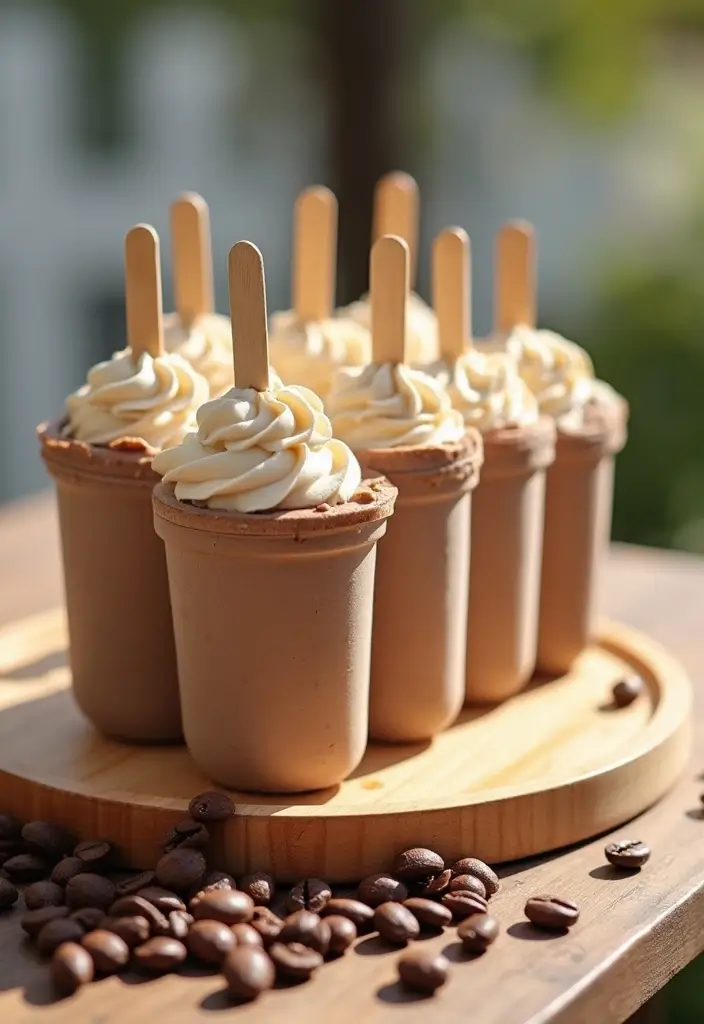
Get ready to cool off with a treat that’s both delicious and easy to make: mocha whipped cream popsicles! These popsicles combine the rich flavors of coffee and chocolate into a creamy, dreamy dessert that’s perfect for summertime. If you’re craving something sweet that gives you a little caffeine boost, look no further!
These popsicles are not just refreshing; they are also simple to whip up. You can make them in just a few minutes, and they require no baking at all. With just a handful of ingredients, you can enjoy a unique way to savor whipped cream.
Recipe Overview:
– Servings: 6
– Prep Time: 15 minutes
– Total Time: 15 minutes
– Calories: About 100 per popsicle
Nutritional Information:
– Total Fat: 6g
– Saturated Fat: 4g
– Cholesterol: 25mg
– Sodium: 30mg
– Total Carbohydrates: 10g
– Sugars: 8g
– Protein: 2g
Ingredients:
– 1 cup brewed coffee, cooled
– 1 cup heavy cream
– 1/4 cup cocoa powder
– 1/4 cup sugar
– 1 teaspoon vanilla extract
Instructions:
1. In a mixing bowl, combine the cooled brewed coffee, heavy cream, cocoa powder, sugar, and vanilla extract.
2. Whisk the mixture until it’s smooth and well combined.
3. Pour the creamy mixture into popsicle molds.
4. Freeze for at least 4 hours or until solid.
5. When you’re ready to enjoy, run warm water over the molds to help release the popsicles.
Tips:
– Add chocolate chips for a delightful crunch.
– Use flavored coffee for a fun twist on the classic mocha.
FAQs:
1. Can I use decaf coffee?
Yes! Just adjust the sugar to taste.
2. How long will they last in the freezer?
They’re best enjoyed within a month for optimal flavor.
These mocha whipped cream popsicles are not just a treat; they’re a delightful way to beat the heat while enjoying your favorite coffee flavors. Grab your ingredients and start blending up some blissful pops today!
Mocha Whipped Cream Popsicles
Editor’s Choice

Silicone Popsicle Molds 10-cavity, DIY Ice Pop Mold for Kids Adult Teens…
 Amazon$11.99
OCTANDRA Professional Whipped Cream Dispenser – 1 Pint Aluminum Whipper …
 Amazon$39.99
Amazon Fresh, Unsweetened Cocoa Powder, 8 Oz (Pack of 3)
 AmazonCheck Price
21. Cinnamon Roll Whipped Cream Dessert
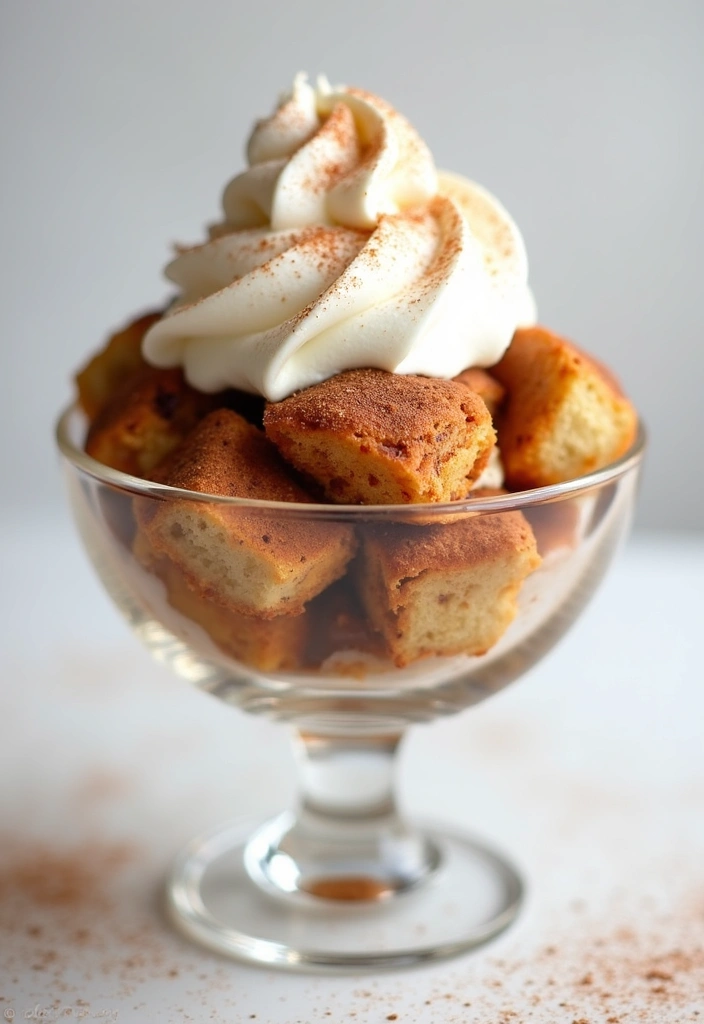
Treat yourself to a delightful dessert that combines the comfort of cinnamon rolls with the lightness of whipped cream! This Cinnamon Roll Whipped Cream Dessert brings together layers of fluffy goodness that will make your taste buds dance. It’s a perfect choice for brunch gatherings or a sweet end to your dinner. When served chilled, it becomes an irresistible treat that everyone will rave about.
Recipe Overview:
– Servings: 8
– Prep Time: 20 minutes
– Cook Time: 0 minutes
– Total Time: 20 minutes
– Calories: Approximately 300 per serving
Nutritional Information:
– Total Fat: 18g
– Saturated Fat: 10g
– Cholesterol: 50mg
– Sodium: 200mg
– Total Carbohydrates: 35g
– Sugars: 20g
– Protein: 3g
Ingredients:
– 8 cinnamon rolls, baked and cut into pieces
– 2 cups heavy cream
– 1/2 cup powdered sugar
– 1 teaspoon vanilla extract
– Cinnamon for dusting
Instructions:
1. In a mixing bowl, whip the heavy cream, powdered sugar, and vanilla extract together until soft peaks form.
2. In a serving dish, layer pieces of cinnamon rolls followed by a generous spread of whipped cream.
3. Repeat the layering until you’ve used all your ingredients, finishing with a fluffy layer of whipped cream on top.
4. Dust the top with a sprinkle of cinnamon and chill in the refrigerator for at least an hour before serving.
Tips:
– Use store-bought cinnamon rolls to save time!
– Add chopped nuts or a drizzle of caramel for an extra flavor twist.
FAQs:
1. Can I make this ahead of time?
Yes, but for the best texture, serve it fresh.
2. How should I store leftovers?
Keep it in the fridge and enjoy within two days.
Now you have a dessert that’s not only easy to make but also a crowd-pleaser. Enjoy the fluffy, creamy goodness of this Cinnamon Roll Whipped Cream Dessert at your next meal!
Cinnamon Roll Whipped Cream Dessert
Editor’s Choice

PHLUR Vanilla Skin & Heavy Cream Body Mist – Hair & Body Mist Fragrance …
 AmazonCheck Price

Amazon Grocery, Ground Cinnamon, 2.5 Oz (Previously Happy Belly, Packagi…
 Amazon$1.03
22. Easy Chocolate Mousse Cups
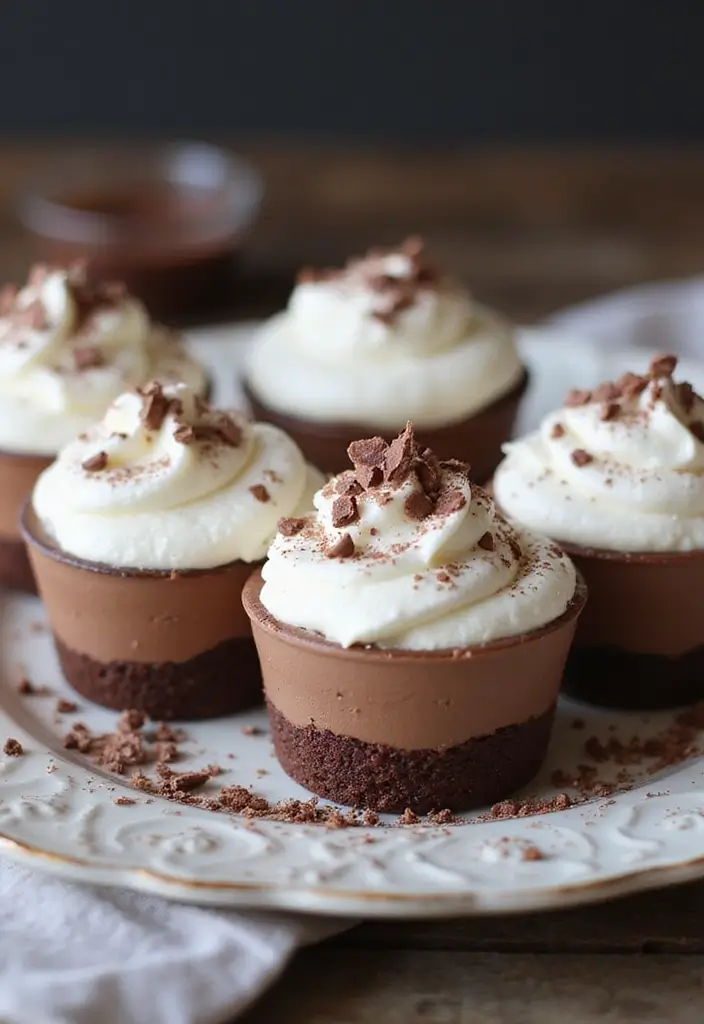
Looking for a show-stopping dessert that’s easy to whip up? Look no further than these delightful Easy Chocolate Mousse Cups! They’re rich, creamy, and topped with fluffy whipped cream, making them a perfect treat for your next dinner party or special occasion. With just a few simple ingredients, you can create a dessert that feels luxurious without spending hours in the kitchen.
Imagine digging into a cup of velvety chocolate goodness. These mousse cups are not only indulgent but also surprisingly quick to make. You’ll impress your guests and satisfy your sweet tooth with each spoonful.
Recipe Overview:
– Servings: 6
– Prep Time: 20 minutes
– Cook Time: 0 minutes
– Total Time: 20 minutes
– Calories: Approximately 280 per serving
Nutritional Information:
– Total Fat: 20g
– Saturated Fat: 12g
– Cholesterol: 50mg
– Sodium: 50mg
– Total Carbohydrates: 20g
– Sugars: 15g
– Protein: 4g
Ingredients:
– 1 cup dark chocolate chips
– 1 cup heavy cream
– 2 tablespoons sugar
– 1 teaspoon vanilla extract
Instructions:
1. Start by melting the dark chocolate. You can use a double boiler or microwave. Stir until it’s smooth. Let it cool for a bit.
2. In a mixing bowl, whip the heavy cream, sugar, and vanilla together until soft peaks form. This should take a few minutes.
3. Gently fold the melted chocolate into the whipped cream until well blended. Be careful not to deflate the cream.
4. Spoon the mousse into individual serving cups. Chill them in the fridge for at least one hour before serving.
Tips:
– Add a dollop of whipped cream and sprinkle chocolate shavings on top for a fancy finish.
– Experiment with flavors by mixing in a little milk chocolate or a splash of espresso for a twist.
FAQs:
1. Can I prepare these ahead of time?
– Yes! Store them in the fridge for up to 2-3 days.
2. What if I want a sweeter mousse?
– You can use milk chocolate instead of dark chocolate for a sweeter taste.
With these Easy Chocolate Mousse Cups, you’ll have a delicious dessert that’s sure to impress. Enjoy the simplicity and the rich flavors that make this treat a must-try!
Want dessert recipes with whipped cream that wow guests without hours in the kitchen? Easy Chocolate Mousse Cups deliver velvety chocolate and a cloud of whipped topping. Stir, chill, and serve—it’s elegant, practical, and always a crowd-pleaser.
Easy Chocolate Mousse Cups
Editor’s Choice

Amazon Grocery, Heavy Whipping Cream, Ultra-Pasteurized, 16 Fl Oz (Previ…
 Amazon$3.69
Enjoy Life Baking Dark Chocolate Morsels, Dairy Free, Soy Free, Nut Free…
 AmazonCheck Price
Umite Chef Mixing Bowls with Airtight Lids Set, 8PCS Stainless Steel Kha…
 Amazon$29.99
23. No-Bake Tropical Fruit Tart
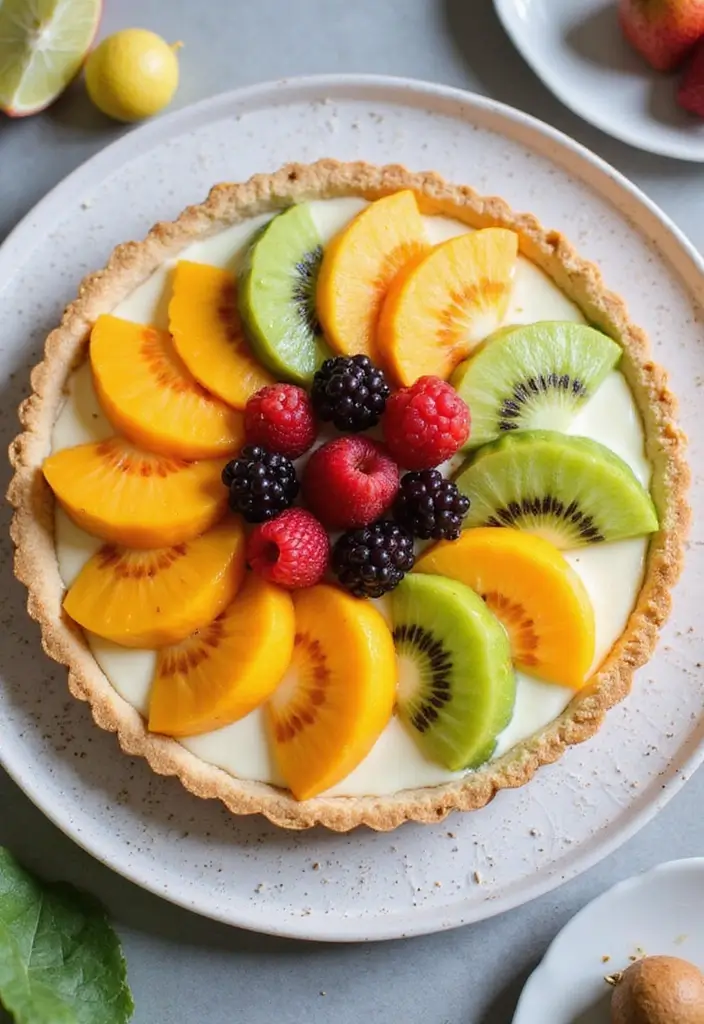
Treat yourself to a slice of paradise with this delightful no-bake tropical fruit tart! Imagine a crunchy graham cracker crust filled with a light, fluffy whipped cream layer. Topped with vibrant, fresh fruits like mango, pineapple, and kiwi, this dessert is as colorful as it is delicious. It’s the ultimate way to celebrate summer gatherings and showcase seasonal flavors.
This refreshing tart is not just about looks; it’s simple to make, taking only 25 minutes of your time. You won’t even need to turn on the oven! Perfect for those hot days when you crave something sweet yet light.
Recipe Overview:
– Servings: 10
– Prep Time: 25 minutes
– Cook Time: 0 minutes
– Total Time: 25 minutes
– Calories: About 230 per slice
Nutritional Information:
– Total Fat: 12g
– Saturated Fat: 7g
– Cholesterol: 40mg
– Sodium: 120mg
– Total Carbohydrates: 30g
– Sugars: 15g
– Protein: 3g
Ingredients:
– 1 1/2 cups crushed graham crackers
– 1/2 cup unsalted butter, melted
– 2 cups heavy cream
– 1/4 cup powdered sugar
– 1 teaspoon vanilla extract
– 2 cups mixed tropical fruits (like mango, pineapple, and kiwi)
Instructions:
1. Start by mixing the crushed graham crackers and melted butter in a bowl. Press this mixture firmly into the bottom of a tart pan to form your crust.
2. In another bowl, whip the heavy cream with powdered sugar and vanilla extract until soft peaks form. This will give your filling a lovely lightness.
3. Spread the whipped cream evenly over the crust.
4. Arrange the tropical fruits on top in a beautiful pattern.
5. Chill the tart in the refrigerator for at least 2 hours before serving to let the flavors meld.
Tips:
– Use your favorite seasonal fruits for a personalized touch.
– Add lime zest to the whipped cream for an extra citrusy kick.
FAQs:
1. Can I use a store-bought crust?
– Absolutely! It saves time and still tastes great.
2. How long can I keep the tart?
– It’s best enjoyed within 2 days for freshness.
This no-bake tropical fruit tart is perfect for summer BBQs, picnics, or just a sweet treat at home. Enjoy the burst of flavors, and let your taste buds travel to the tropics!
No-Bake Tropical Fruit Tart
Editor’s Choice

Amazon Grocery, Heavy Whipping Cream, Ultra-Pasteurized, 16 Fl Oz (Previ…
 Amazon$3.37
HONEY MAID Graham Crackers, Lunch Snacks, Party Size, 28.8 oz
 Amazon$6.48
Tart Pan, 9 Inch Tart Pans, Non-Stick Removable Loose Bottom Carbon Stee…
 Amazon$14.99
24. Whipped Cream Cheesecake Cups
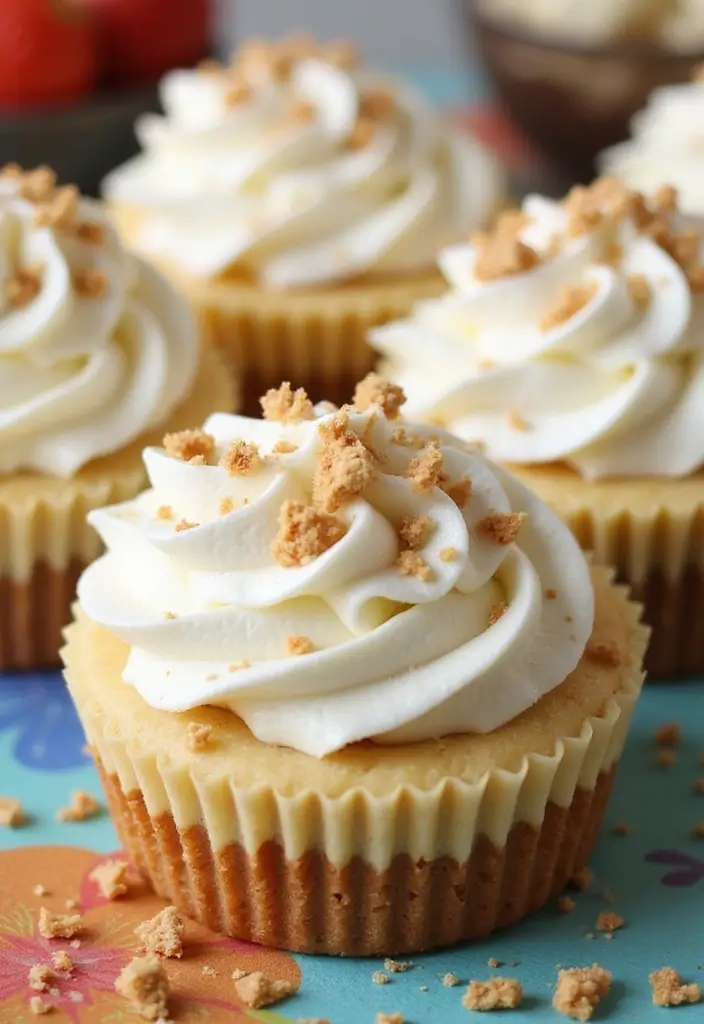
Indulge in the dreamy delight of Whipped Cream Cheesecake Cups! If you crave cheesecake but want a fun, individual serving, these cups are your answer. Each layer of creamy cheesecake paired with fluffy whipped cream creates a heavenly experience. They are perfect for celebrations, potlucks, or just a sweet treat after dinner.
The best part? You don’t need to bake a thing! In just 20 minutes, you can whip up these delicious cups and chill them until you’re ready to serve. Each spoonful delivers a perfect blend of creaminess and lightness that is simply irresistible.
Recipe Overview:
– Servings: 8
– Prep Time: 20 minutes
– Cook Time: 0 minutes
– Total Time: 20 minutes
– Calories: Approximately 250 per serving
Nutritional Information:
– Total Fat: 14g
– Saturated Fat: 8g
– Cholesterol: 60mg
– Sodium: 200mg
– Total Carbohydrates: 30g
– Sugars: 18g
– Protein: 4g
Ingredients:
– 8 ounces cream cheese, softened
– 1/2 cup powdered sugar
– 1 teaspoon vanilla extract
– 1 cup heavy cream
– 1/2 cup crushed graham crackers (for topping)
Instructions:
1. In a mixing bowl, blend the cream cheese, powdered sugar, and vanilla until smooth and creamy.
2. In a separate bowl, whip the heavy cream until it forms stiff peaks. Gently fold this into the cream cheese mixture until well combined.
3. Layer the cheesecake filling and whipped cream into individual serving cups. Finish with a sprinkle of crushed graham crackers on top.
4. Chill in the fridge for at least 1 hour before serving to let the flavors meld together.
Tips:
– Add fruit preserves between layers for a fruity twist.
– Experiment with flavored cream cheese for a unique taste.
FAQs:
1. How long can I store these? Keep them in the fridge for up to 3 days.
2. Can I make these in advance? Absolutely! They’re perfect for prepping ahead of time.
These Whipped Cream Cheesecake Cups are a delightful dessert that everyone will love. Enjoy making them, and watch as they disappear in no time!
Whipped Cream Cheesecake Cups
Editor’s Choice

PHLUR Vanilla Skin & Heavy Cream Body Mist – Hair & Body Mist Fragrance …
 AmazonCheck Price
WHYSKO Meal Prep Stainless Steel Mixing Bowl (5-Piece Set) Home, Refrige…
 AmazonEUR 21.60
320-Pack Dessert Cups with Spoons 5 oz Mini Plastic Dessert Cups for Par…
 Amazon$29.99
25. Strawberry Cheesecake Mousse
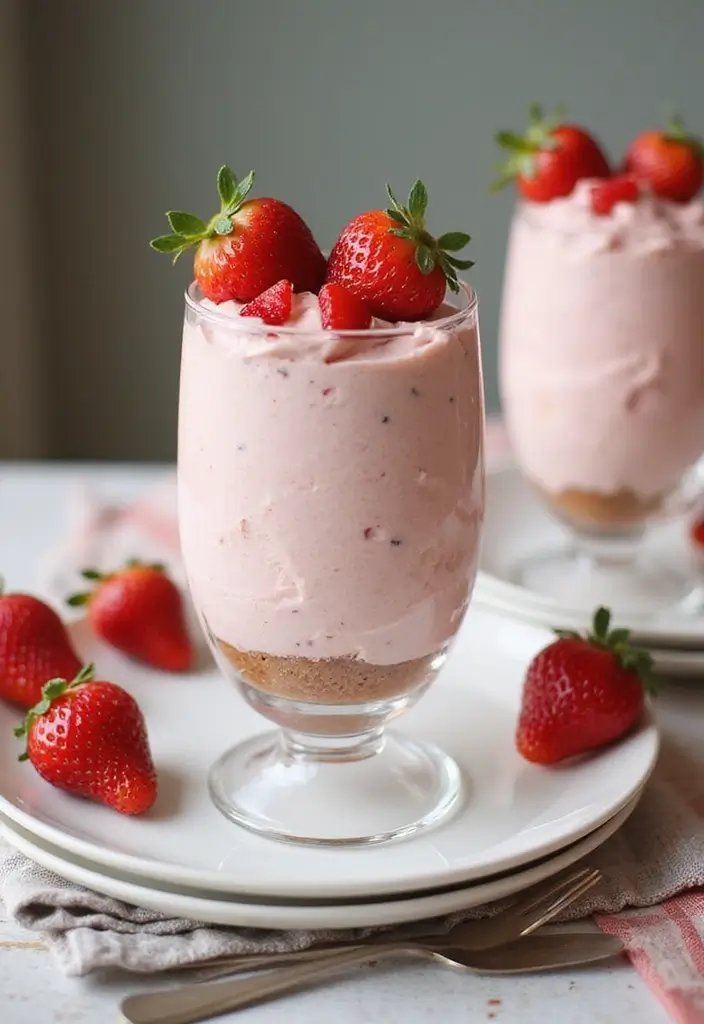
Indulge in the light and luscious delight of Strawberry Cheesecake Mousse! This dessert takes the beloved flavors of cheesecake and pairs them with fresh strawberries and airy whipped cream. It’s the kind of treat that feels like a cloud on your palate, making it perfect for summer gatherings or cozy family dinners. Plus, it’s straightforward to whip up and can be made ahead of time, so you can enjoy more time with your loved ones.
Recipe Overview:
– Servings: 6
– Prep Time: 15 minutes
– Cook Time: 0 minutes
– Total Time: 15 minutes
– Calories: About 220 per serving
Nutritional Information:
– Total Fat: 12g
– Saturated Fat: 7g
– Cholesterol: 30mg
– Sodium: 150mg
– Total Carbohydrates: 25g
– Sugars: 15g
– Protein: 4g
Ingredients:
– 8 ounces cream cheese, softened
– 1/2 cup powdered sugar
– 1 cup heavy cream
– 1 cup fresh strawberries, diced
– 1 teaspoon vanilla extract
Instructions:
1. In a mixing bowl, beat the softened cream cheese and powdered sugar together until smooth and creamy.
2. In another bowl, whip the heavy cream until it forms stiff peaks. Gently fold this into the cream cheese mixture for a fluffy texture.
3. Carefully add the diced strawberries, folding them in until evenly distributed.
4. Spoon the mousse into individual serving dishes and refrigerate for at least 1 hour before serving.
Tips:
– Top with extra strawberries for a pop of color.
– Use a hand mixer to speed up the whipping process.
FAQs:
1. How long does the mousse stay fresh?
– It’s best to enjoy it within 2 days for optimal flavor and texture.
2. Can I substitute with frozen strawberries?
– Absolutely! Just be sure to thaw and drain them first.
This Strawberry Cheesecake Mousse is not just a treat for your taste buds; it’s also a feast for the eyes. Serve it in elegant glass dishes to make any occasion feel special. Enjoy the refreshing burst of strawberries combined with the creamy cheesecake essence, and watch your guests swoon with delight!
Strawberry Cheesecake Mousse
Editor’s Choice


Godinger Glass Dublin Tasters Trifle, Custom, Clear, 16 Pc Set
 Amazon$19.86
365 By Whole Foods Market, Organic Heavy Cream, 16 Ounce
 Amazon$4.79
26. Whipped Cream Coffee Cake
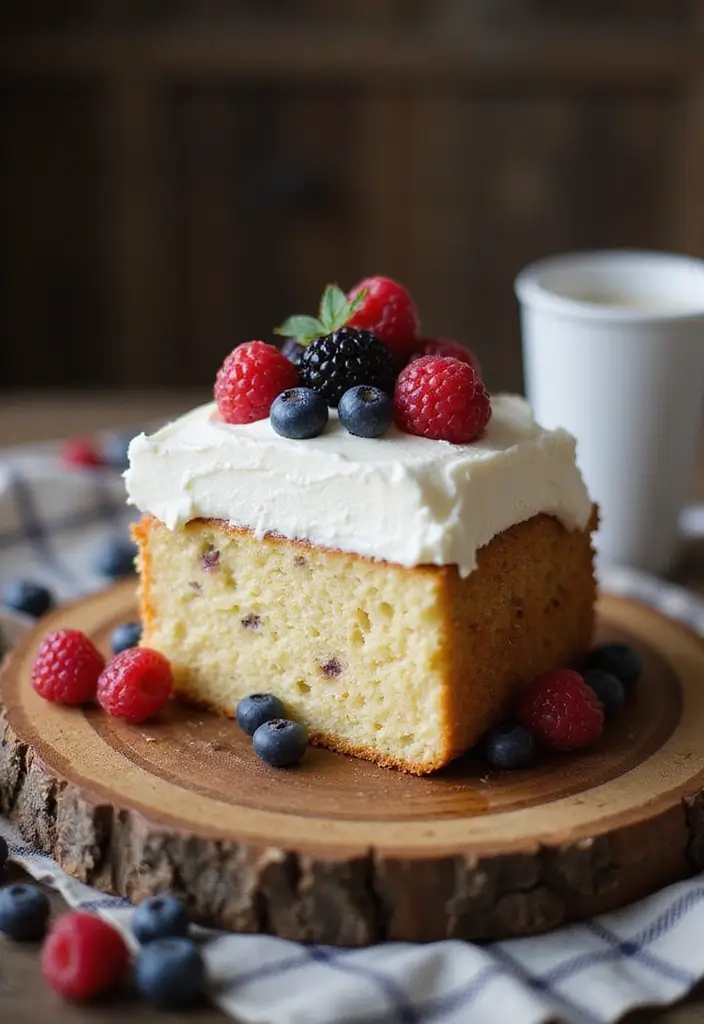
Let’s get right into how you can make this delightful cake. You’ll need simple ingredients that you might already have at home. The whipped cream gives it a heavenly texture, making it the perfect dessert for any occasion.
Recipe Overview:
– Servings: 10
– Prep Time: 15 minutes
– Cook Time: 30 minutes
– Total Time: 45 minutes
– Calories: Approximately 270 per serving
Nutritional Information:
– Total Fat: 10g
– Saturated Fat: 4g
– Cholesterol: 50mg
– Sodium: 200mg
– Total Carbohydrates: 42g
– Sugars: 20g
– Protein: 4g
Ingredients:
– 2 cups all-purpose flour
– 1 cup sugar
– 1/2 cup unsalted butter, softened
– 1 cup milk
– 3 teaspoons baking powder
– 1 teaspoon vanilla extract
– 1 cup heavy cream for topping
Instructions:
1. Preheat your oven to 350°F (175°C) and grease a bundt or round cake pan.
2. In a mixing bowl, cream the butter and sugar together until it’s light and fluffy. Add in eggs and vanilla, mixing well.
3. Gradually stir in the flour, baking powder, and milk until the batter is smooth.
4. Pour the batter into the prepared pan and bake for 30 minutes, or until a toothpick comes out clean.
5. Allow the cake to cool completely before adding the whipped cream on top.
Tips:
– Dust the finished cake with powdered sugar for a sweet touch.
– Experiment with flavored extracts like almond for a unique twist.
FAQs:
1. Can I freeze the cake?
– Yes, wrap the cake tightly and freeze for up to a month.
2. What can I serve it with?
– It pairs beautifully with fresh fruits or flavored syrups.
Now you have a recipe that’s not just easy but also delicious. Enjoy the fluffy texture and sweet flavors with every bite!
Whipped Cream Coffee Cake
Editor’s Choice

Horizon Organic Heavy Whipping Cream, Great for Making Organic Whipped C…
 Amazon$5.99
9.5″ Non-stick Cake Pan, Heavy Duty Carbon Steel Fluted Tube Round Bakin…
 Amazon$9.99
365 by Whole Foods Market, Organic Powdered Sugar, 24 Ounce
 Amazon$5.79
27. No-Bake Peanut Butter Cream Pie
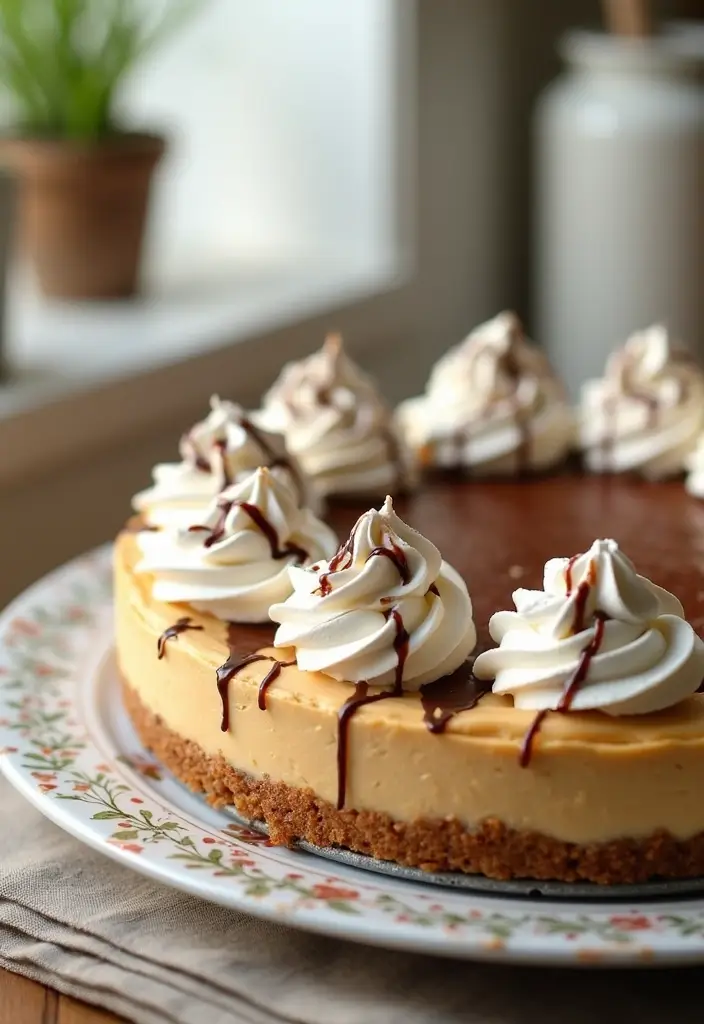
Indulge your sweet tooth with this scrumptious no-bake peanut butter cream pie! It’s a creamy, dreamy dessert that blends rich peanut butter and fluffy whipped cream, creating a treat that peanut butter enthusiasts will adore. With a simple graham cracker crust, this pie is perfect for any occasion—from casual dinners to festive gatherings. Plus, it requires no baking, making it a breeze to whip up!
Recipe Overview:
– Servings: 8
– Prep Time: 15 minutes
– Cook Time: 0 minutes
– Total Time: 15 minutes
– Calories: About 320 per serving
Nutritional Information:
– Total Fat: 22g
– Saturated Fat: 10g
– Cholesterol: 20mg
– Sodium: 150mg
– Total Carbohydrates: 30g
– Sugars: 12g
– Protein: 6g
Ingredients:
– 1 1/2 cups graham cracker crumbs
– 1/2 cup unsalted butter, melted
– 1 cup creamy peanut butter
– 1 cup heavy cream
– 1/4 cup powdered sugar
– 1 teaspoon vanilla extract
Instructions:
1. Start by mixing the graham cracker crumbs with melted butter until combined. Press this mixture into the bottom of a pie dish to form your crust.
2. In a separate bowl, blend the peanut butter, powdered sugar, and vanilla extract until smooth and creamy.
3. Next, whip the heavy cream in another bowl until you see stiff peaks. Gently fold this whipped cream into the peanut butter mixture until well mixed.
4. Pour this luscious filling into your prepared crust and chill it in the fridge for at least 2 hours before serving.
Tips for Serving:
– Drizzle with chocolate sauce for an even richer flavor.
– Top with additional whipped cream for a beautiful presentation.
FAQs:
1. How long can I store the pie?
– It stays fresh for about 3 days in the refrigerator.
2. Can I use crunchy peanut butter?
– Absolutely! It adds a delightful texture that enhances the pie.
This pie is not just a dessert; it’s a showstopper. You can easily impress your family and friends with this dreamy treat that’s sure to satisfy any sweet cravings. Enjoy every creamy bite!
No-Bake Peanut Butter Cream Pie
Editor’s Choice

EurKitchen Professional Aluminum Whipped Cream Dispenser – Leak-Free Whi…
 Amazon$42.99
Amazon Brand, Happy Belly Cinnamon Graham Crackers, 14.4 Oz (Pack of 3)
 AmazonCheck Price
Amazon Grocery, Heavy Whipping Cream, Ultra-Pasteurized, 16 Fl Oz (Previ…
 Amazon$3.37
28. Lavender Honey Whipped Cream
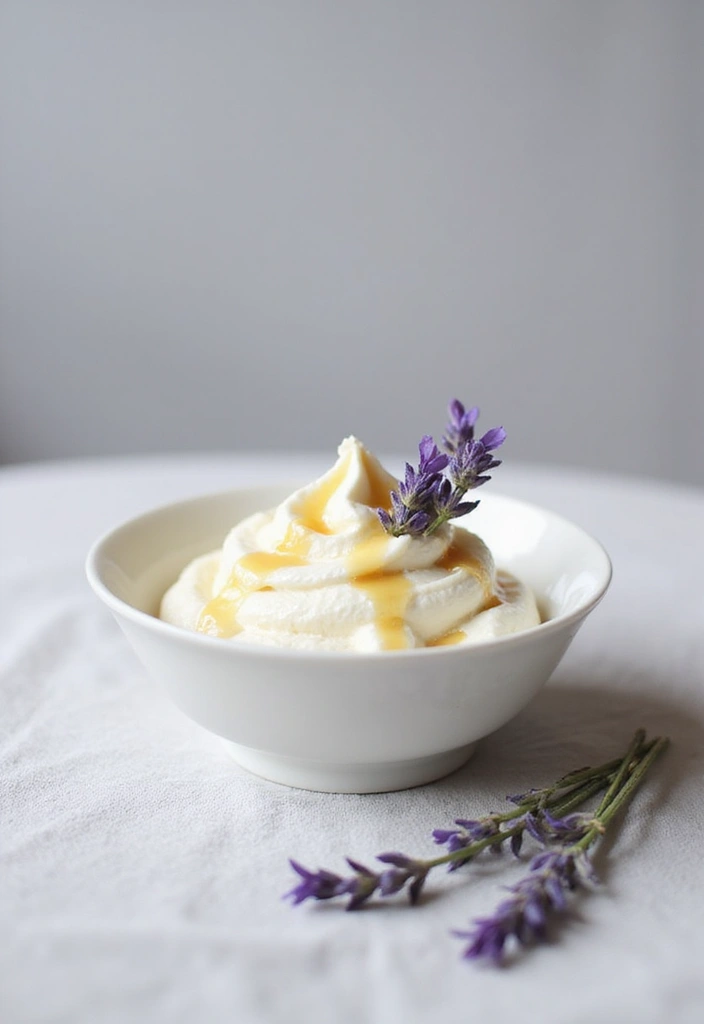
Indulge your senses with Lavender Honey Whipped Cream! This delightful topping combines the soothing floral notes of lavender with the rich sweetness of honey. It’s not just a treat; it’s an experience that transforms ordinary desserts into something extraordinary.
Imagine this whipped cream on a slice of cake, a scoop of ice cream, or drizzled over fresh berries. Whether you’re celebrating a special occasion or simply treating yourself, this creamy concoction adds a unique flair. It’s perfect for impressing guests or simply enjoying a quiet moment of bliss.
Recipe Overview:
– Servings: 4
– Prep Time: 10 minutes
– Cook Time: 0 minutes
– Total Time: 10 minutes
– Calories: Approximately 70 per serving
Nutritional Information:
– Total Fat: 3g
– Saturated Fat: 2g
– Cholesterol: 10mg
– Sodium: 5mg
– Total Carbohydrates: 8g
– Sugars: 6g
– Protein: 0g
Ingredients:
– 1 cup heavy cream
– 2 tablespoons honey
– 1 teaspoon dried lavender
Instructions:
1. Start by pouring the heavy cream into a mixing bowl. Add honey and dried lavender.
2. Whip the mixture on medium speed until soft peaks form, which takes about 3-5 minutes.
3. Chill the whipped cream in the refrigerator for a bit to let the flavors blend beautifully.
Tips:
– Choose culinary-grade lavender for the best taste.
– For an extra touch, drizzle more honey on top just before serving.
FAQs:
1. How long does it last?
– Enjoy it fresh! Best used within 2 days for the best flavor.
2. Can I use fresh lavender?
– Yes! Just use less, as fresh lavender has a stronger flavor.
Elevate your desserts with this stunning whipped cream. It’s not just about taste; it’s about creating moments of joy with every spoonful. Enjoy the journey of flavors and let Lavender Honey Whipped Cream take your desserts to new heights!
Lavender Honey Whipped Cream
Editor’s Choice

The Spice Way Lavender Flowers – (2 oz) dried flower buds for tea and cu…
 Amazon$6.99
Amazon Grocery, Heavy Whipping Cream, Ultra-Pasteurized, 16 Fl Oz (Previ…
 Amazon$2.96
Hunnibi 8oz No Drip Glass Honey Dispenser with Plastic Top – Honeycomb-S…
 Amazon$18.99
29. S’mores Whipped Cream Dip
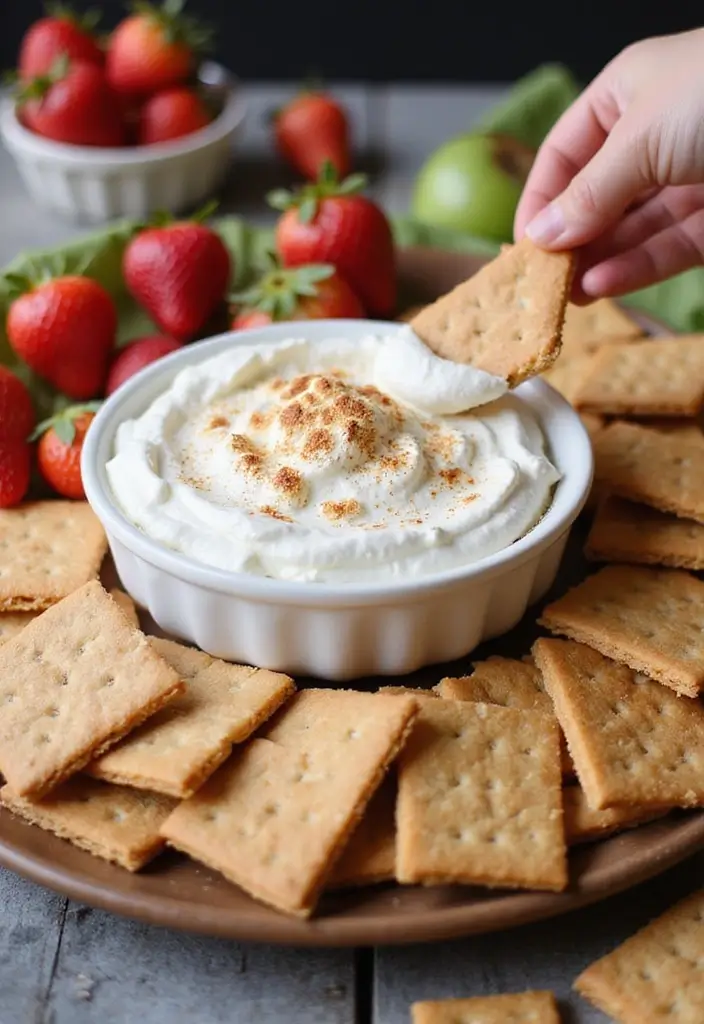
Step into a world of deliciousness with this S’mores Whipped Cream Dip! You can savor the classic taste of s’mores right in your home. Combining smooth whipped cream, rich chocolate, and crunchy graham crackers, this dessert brings back those fun camping memories without the need for a campfire.
This dip is perfect for sharing. You can pair it with fresh fruit, crispy cookies, or just dig in with a spoon! With its creamy texture and sweet flavors, it’s sure to be the star of any gathering. Plus, it’s super easy to whip up in just 10 minutes.
Recipe Overview:
– Servings: 6
– Prep Time: 10 minutes
– Cook Time: 0 minutes
– Total Time: 10 minutes
– Calories: About 150 per serving
Nutritional Information:
– Total Fat: 9g
– Saturated Fat: 5g
– Cholesterol: 20mg
– Sodium: 30mg
– Total Carbohydrates: 16g
– Sugars: 12g
– Protein: 2g
Ingredients:
– 1 cup heavy cream
– 1/2 cup chocolate chips
– 1/2 cup mini marshmallows
– 1/4 cup powdered sugar
Instructions:
1. Melt the chocolate chips in a bowl and let them cool slightly.
2. In another mixing bowl, whip the heavy cream and powdered sugar until soft peaks form.
3. Gently fold in the melted chocolate and mini marshmallows until everything is well mixed.
4. Serve with graham crackers, fruit, or just enjoy it straight from the bowl!
Tips:
– Choose mini chocolate chips for a delightful texture.
– Add a spoonful of peanut butter for a tasty twist!
FAQs:
1. How long will this dip last?
– It’s best to enjoy it within a day for the freshest taste.
2. Can I use store-bought whipped cream?
– Sure! But homemade whipped cream gives a richer flavor and fluffier texture.
Treat your taste buds to this easy and nostalgic dessert that everyone will love! Enjoy every fluffy bite!
Sweet, no-fuss S’mores Whipped Cream Dip proves dessert recipes with whipped cream can be cozy and crowd-pleasing in minutes. Dip, share, repeat—the creamy texture and chocolatey kiss make any gathering feel like a campsite memory, minus the fuss.
S’mores Whipped Cream Dip
Editor’s Choice

Z Natural Foods Heavy Cream Powder – Nutrient-Dense, Delicious Powdered …
 AmazonCheck Price
Hershey’s Premier White Baking Chips – 12 oz – 2 pk
 AmazonCheck Price
Honey Maid Graham Crackers, Party Size, 28.8 oz Box (Pack of 2)
 AmazonCheck Price
30. Berry Lemonade Whipped Cream Floats
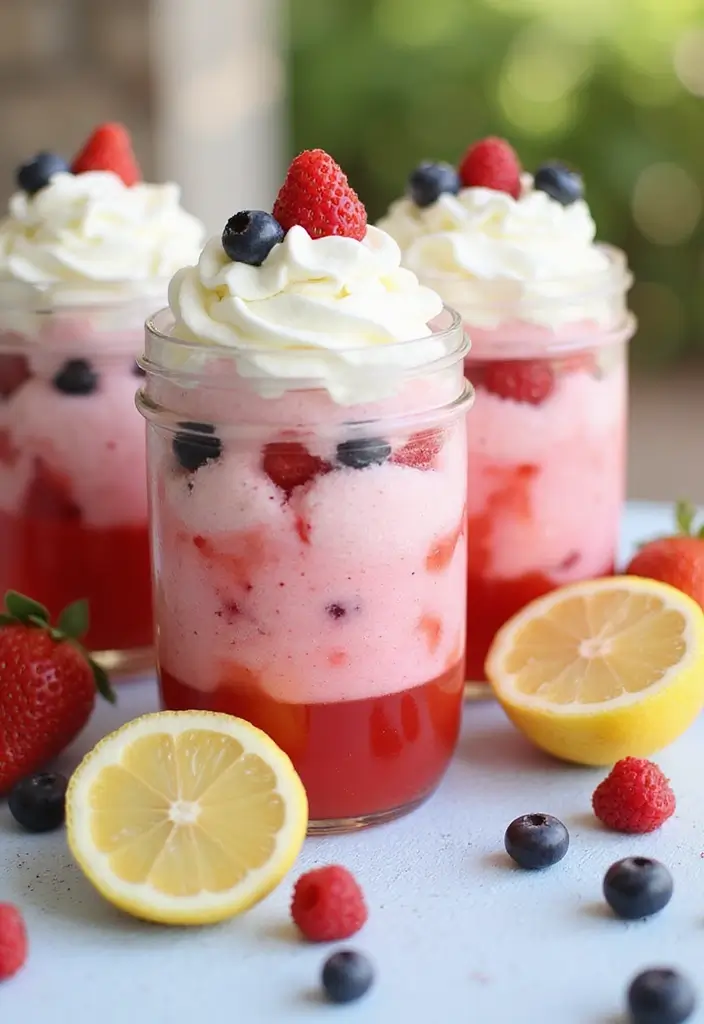
Imagine sipping on a cool, refreshing float that combines zesty lemonade with sweet berries and a cloud of whipped cream. That’s exactly what you get with these Berry Lemonade Whipped Cream Floats! They are not just delicious; they’re a feast for the eyes, too. Perfect for summer gatherings or just a casual afternoon treat, these floats are a delightful way to end any meal.
Making them is a breeze, and you can whip them up in just 10 minutes. Your friends and family will love the colorful layers and the fluffy whipped cream on top—it’s bound to be a hit!
Recipe Overview:
– Servings: 4
– Prep Time: 10 minutes
– Cook Time: 0 minutes
– Total Time: 10 minutes
– Calories: About 150 per float
Nutritional Information:
– Total Fat: 7g
– Saturated Fat: 4g
– Cholesterol: 20mg
– Sodium: 30mg
– Total Carbohydrates: 22g
– Sugars: 12g
– Protein: 1g
Ingredients:
– 4 cups lemonade
– 1 cup mixed berries (strawberries, blueberries)
– 1 cup heavy cream
– 1/4 cup powdered sugar
Instructions:
1. Grab four glasses and pour in the lemonade. Add a handful of mixed berries to each glass.
2. In a bowl, whisk the heavy cream and powdered sugar together until soft peaks form. This will be your fluffy topping!
3. Spoon a generous amount of whipped cream over the lemonade and berries in each glass. Add a few extra berries on top for a beautiful garnish.
4. Serve these delightful floats right away and enjoy every sip!
Tips:
– Use sparkling lemonade for a fun fizzy twist.
– Squeeze in a bit of lemon juice to the whipped cream for an extra zing.
FAQs:
1. Can I make these in advance?
– It’s best to keep the components separate until you’re ready to serve.
2. What other fruits can I add?
– Consider peaches, raspberries, or kiwi for a fruity mix!
These floats are sure to bring joy to your table. Enjoy making and sharing this dreamy dessert!
Berry Lemonade Whipped Cream Floats
Editor’s Choice

PHLUR Vanilla Skin & Heavy Cream Body Mist – Hair & Body Mist Fragrance …
 AmazonCheck Price
365 by Whole Foods Market, Organic Powdered Sugar, 24 Ounce
 Amazon$5.49
18 Inch Artificial Blueberry Fruits Branches Fake Berries Blue Decorativ…
 AmazonCheck Price
Conclusion

With these 30+ dessert recipes featuring whipped cream, your dessert game is sure to impress! From classic treats to innovative concoctions, there’s something for everyone to enjoy.
These easy-to-make, no-bake desserts are perfect for any occasion, whether you’re hosting a gathering or simply satisfying a sweet craving.
Now is the time to gather your ingredients and get creative in the kitchen – you won’t regret it!
Note: We aim to provide accurate product links, but some may occasionally expire or become unavailable. If this happens, please search directly on Amazon for the product or a suitable alternative.
This post contains Amazon affiliate links, meaning I may earn a small commission if you purchase through my links, at no extra cost to you.
Frequently Asked Questions
What Are the Best Dessert Recipes with Whipped Cream for Beginners?
If you’re just starting your baking journey, don’t worry! There are plenty of easy dessert ideas that incorporate whipped cream. Recipes like no-bake cheesecake or whipped cream fruit parfaits are perfect for beginners. They require minimal ingredients and effort while delivering maximum flavor! Plus, you can experiment with different fruits or toppings to make them your own.
How Can I Make My Whipped Cream Desserts Even More Indulgent?
To elevate your whipped cream desserts, consider adding flavor extracts like vanilla or almond to your whipped cream, or folding in ingredients like chocolate ganache or fruit purees for an extra layer of taste. Drizzling with caramel or chocolate sauce before serving can also create a truly indulgent experience. The possibilities are endless!
Are There Any Tips for Perfectly Whipping Cream?
Absolutely! To achieve perfectly fluffy whipped cream, start with cold heavy cream and use a chilled mixing bowl. Beat it on medium speed and gradually add sugar and vanilla extract for flavor. Keep an eye on it; you want soft peaks, not stiff peaks, for a delightful fluffiness. This ensures your creamy treats have that dream-like texture everyone loves!
Can I Use Store-Bought Whipped Cream for My Dessert Recipes?
Certainly! Using store-bought whipped cream is a great time-saver for your fluffy dessert recipes. Just make sure to choose a high-quality brand that fits your taste. It’s perfect for layering in desserts or dolloping on top of pies and cakes. However, if you have the time, homemade whipped cream often offers a fresher taste and can be customized to your liking!
What Are Some Creative Ways to Use Whipped Cream in Desserts?
Get ready to unleash your creativity! Whipped cream can be used in various ways, like filling for cakes, topping for brownies, or even as a base for mousse. You can also swirl it into ice cream or use it as a dip for fruits. The versatility of whipped cream makes it a key ingredient in many indulgent whipped cream recipes that will impress your guests!
Related Topics
whipped cream desserts
no-bake treats
fluffy dessert recipes
easy dessert ideas
indulgent whipped cream
creamy treats
quick desserts
summer desserts
party desserts
beginner friendly
decadent desserts
dessert recipes with whipped cream

