
Are you suddenly hit with a sweet craving and have no time to bake? Don’t worry; you’re not alone! I know how it feels when you need a little something sweet but don’t want to spend hours in the kitchen. That’s why I created this post. I wanted to share a collection of 30+ quick no-bake dessert recipes that require just three ingredients. Yes, you heard that right—just three!
If you love desserts but dread the long prep time or complicated recipes, this one’s for you. Whether you’re a busy parent, a college student, or someone who simply enjoys a sweet treat now and then, these recipes are designed to be quick and easy. You don’t need to be a master baker to whip these up. Just a few ingredients and a little creativity is all it takes.
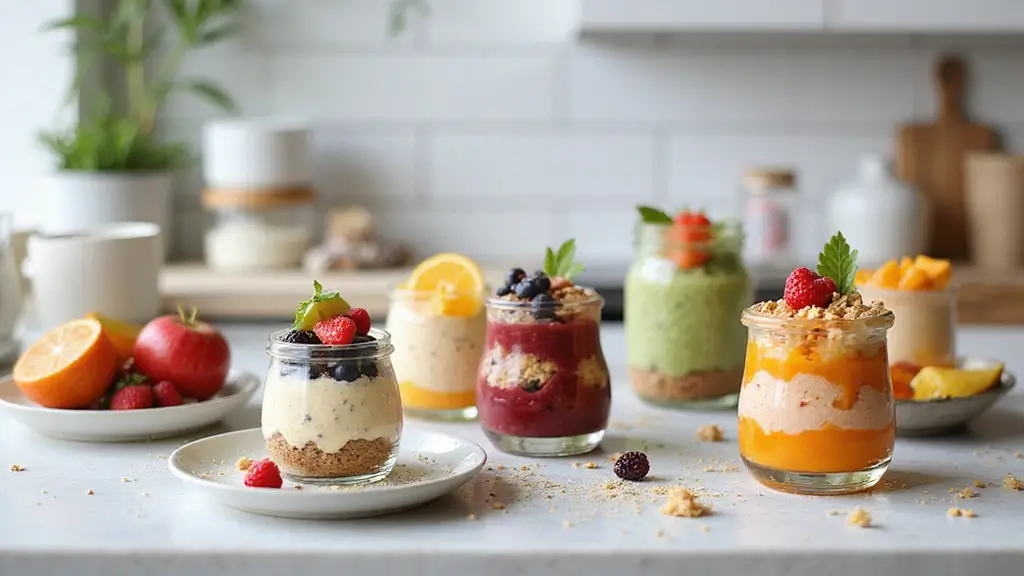
In this post, you’ll find a variety of ideas that are not only simple but also delicious. From creamy desserts to crunchy bites, there’s something here for everyone. These recipes will satisfy your sweet tooth while saving you time and effort. Plus, they’re perfect for unexpected guests or a last-minute treat for yourself.
Say goodbye to complicated baking techniques and hello to instant gratification. You’ll discover how easy it is to make delightful desserts without turning on the oven. So grab your mixing bowls and let’s dive into these quick, tasty recipes that will have you indulging in no time!
1. Chocolate Peanut Butter Energy Bites

Indulge your sweet tooth without the fuss! These Chocolate Peanut Butter Energy Bites are the quick fix you need for those sudden cravings. With just three simple ingredients—oats, peanut butter, and honey—you can whip up a delicious treat in under 10 minutes. Imagine the rich, creamy taste of peanut butter perfectly mingled with a hint of sweetness. It’s a flavor combination that keeps you reaching for more!
Here’s how to make them:
Recipe Overview:
– Servings: 12 bites
– Prep Time: 10 minutes
– Total Time: 10 minutes
– Calories: 90 per bite
Ingredients:
– 1 cup rolled oats
– ½ cup peanut butter
– ¼ cup honey
Instructions:
1. Grab a mixing bowl and combine oats, peanut butter, and honey.
2. Stir until everything is well mixed.
3. Roll the mixture into bite-sized balls.
4. Pop them in the fridge for 30 minutes to set before enjoying!
These bites are not just easy to make; they’re also perfect for busy days. You can make a batch and store them in an airtight container for up to a week. Want to add a little extra delight? Just toss in some chocolate chips for an indulgent twist!
Tips:
– Use almond butter if you want a nut-free treat!
– Experiment with toppings like shredded coconut or chia seeds for a fun texture.
This recipe is a fantastic way to satisfy your sweet cravings without a lot of effort. Make them for yourself or share with friends. Either way, they’re sure to be a hit!
Chocolate Peanut Butter Energy Bites
Editor’s Choice

Airtight Food Storage Containers with Lids, Vtopmart 24 pcs Plastic Kitc…

GLAD Mixing Bowls with Pour Spout, Set of 3 | Nesting Design Saves Space…
2. No-Bake Strawberry Cheesecake Parfaits

Dive into the delicious world of no-bake strawberry cheesecake parfaits! These delightful treats combine creamy layers of cheesecake with fresh strawberries, creating a dessert that looks stunning and tastes amazing. Perfect for warm days or family gatherings, they are sure to satisfy your sweet tooth without any baking hassle.
Here’s what you need to know about this easy recipe:
Recipe Overview:
– Servings: 4
– Prep Time: 15 minutes
– Total Time: 15 minutes
– Calories: 210 per serving
Nutrition Information:
– Carbs: 25g
– Protein: 4g
– Fat: 10g
Ingredients:
– 1 cup cream cheese
– 1 cup Greek yogurt
– 1 cup strawberries, chopped
– 1 cup crushed graham crackers
Instructions:
1. Start by beating the cream cheese in a bowl until it’s smooth and creamy.
2. Gently fold in the Greek yogurt until the mixture is fully blended.
3. In serving glasses, layer the cream cheese mixture, crushed graham crackers, and chopped strawberries.
4. Repeat the layers until the glasses are filled. Chill them in the fridge for at least an hour before serving.
Tips:
– Use different berries like blueberries or raspberries for a fun twist.
– Top your parfaits with whipped cream for an extra touch of sweetness.
FAQ:
– Can I use regular yogurt? Yes, you can swap in regular yogurt if you prefer that taste.
With just three ingredients and a little bit of time, you can create a dessert that is both easy and elegant. Enjoy the fresh flavors and creamy texture, and watch everyone go back for seconds!
No-Bake Strawberry Cheesecake Parfaits
Editor’s Choice

Godinger Glass Dublin Tasters Trifle, Custom, Clear, 16 Pc Set


Honey Maid Graham Crackers, Party Size, 28.8 oz Box (Pack of 2)
3. Mango Coconut Bliss Balls

Indulge in the tropical goodness of Mango Coconut Bliss Balls. These delightful bites are perfect for satisfying your sweet tooth without the hassle of baking. With just three simple ingredients—dried mango, shredded coconut, and almond flour—you’ll have a delicious treat ready in no time. Imagine the sweet, chewy texture complimented by the rich flavor of coconut. It’s like a mini-vacation for your taste buds!
Here’s how to whip up these easy bliss balls:
Recipe Overview:
– Servings: 10
– Prep Time: 15 minutes
– Total Time: 15 minutes
– Calories: 70 per ball
Nutrition Information:
– Carbs: 9g
– Protein: 2g
– Fat: 4g
Ingredients:
– 1 cup dried mango
– 1 cup shredded coconut
– ¼ cup almond flour
Instructions:
1. Start by blending the dried mango until it’s finely chopped. This will help create a smooth texture.
2. In a bowl, mix the chopped mango, shredded coconut, and almond flour together until well combined.
3. Roll the mixture into small balls, about the size of a tablespoon.
4. Place the balls in the fridge for about 20 minutes to firm up before enjoying.
Tips:
– For a fresh twist, try using fresh mango instead of dried.
– Want to impress? Roll the balls in extra shredded coconut for a beautiful finish.
FAQ:
– How do I store them? Keep your bliss balls in an airtight container in the fridge for up to a week to maintain freshness.
These Mango Coconut Bliss Balls are not only quick to make but also a fantastic energy boost. Perfect for a mid-morning snack or a quick dessert, they’ll satisfy your cravings while keeping things simple. Enjoy your tropical escape!
Mango Coconut Bliss Balls
Editor’s Choice

Philippine Brand Dried Mangoes Fruit Snacks- All Naturally Gluten Free, …

365 by Whole Foods Market, Organic Shredded Coconut, 8 Ounce

Blue Diamond Almonds Almond Flour, Gluten Free, Blanched, Finely Sifted,…
4. Chocolate Avocado Mousse

Indulge in the creamy delight of Chocolate Avocado Mousse, a dessert that feels rich but stays light! This treat will wow your taste buds while keeping things healthy. The secret? Ripe avocados give it a silky texture, while cocoa powder adds a deep chocolate flavor. With just a hint of maple syrup, you’ll enjoy a vegan dessert that’s both satisfying and nutritious.
Recipe Overview:
– Servings: 4
– Prep Time: 10 minutes
– Total Time: 10 minutes
– Calories: 150 per serving
Nutrition Information:
– Carbs: 15g
– Protein: 2g
– Fat: 9g
Ingredients:
– 2 ripe avocados
– ½ cup cocoa powder
– ¼ cup maple syrup
Instructions:
1. Cut the avocados in half and scoop out the flesh into a blender.
2. Blend the avocados until they are smooth and creamy.
3. Add the cocoa powder and maple syrup, then blend again until completely mixed.
4. Spoon the mousse into individual bowls and chill in the refrigerator for 30 minutes before serving. Enjoy this delicious dessert chilled!
Tips:
– Top your mousse with fresh berries for a colorful finish!
– Feel free to adjust the sweetness by adding more or less maple syrup to suit your taste.
FAQ:
– Will it taste like avocado? Not at all! The cocoa powder beautifully masks the avocado flavor, making it a delicious surprise.
This dessert is perfect for those sudden sweet cravings. Plus, it’s quick to whip up, making it an excellent choice for last-minute gatherings or cozy nights at home. Now you can enjoy dessert guilt-free!
Fun fact: This Chocolate Avocado Mousse switches up dessert with 3 ingredients and 10 minutes, delivering a creamy 150-calorie treat. Great news for busy families seeking easy dessert recipes quick 3 ingredients no bake.
Chocolate Avocado Mousse
Editor’s Choice

Amazon Fresh, Unsweetened Cocoa Powder, 8 Oz (Pack of 3)

Butternut Mountain Farm Pure Vermont Maple Syrup, Grade A, Dark Color, R…

Ninja BR201AMZ Professional Blender 2.0, 1200 Watts, Auto-iQ Program, To…
5. Banana Oatmeal Cookies

Craving something sweet but short on time? These delicious banana oatmeal cookies are your answer! With just three simple ingredients—ripe bananas, rolled oats, and a dash of cinnamon—you can whip up a treat that is both satisfying and guilt-free. They’re soft, chewy, and perfect for kids who love a sweet snack!
Imagine the aroma of warm cinnamon filling your kitchen as you bake these cookies. It’s a simple recipe that brings joy without the fuss. Whether you need a quick dessert or a tasty snack, these cookies fit the bill perfectly.
Recipe Overview:
– Servings: 15 cookies
– Prep Time: 10 minutes
– Bake Time: 15 minutes
– Total Time: 25 minutes
– Calories: 60 per cookie
Nutrition Information:
– Carbs: 10g
– Protein: 1g
– Fat: 2g
Ingredients:
– 2 ripe bananas
– 1 cup rolled oats
– 1 tsp cinnamon
Instructions:
1. Preheat your oven to 350°F (175°C).
2. In a bowl, mash the ripe bananas until smooth.
3. Stir in the oats and cinnamon until everything is well mixed.
4. Use a spoon to scoop the mixture onto a baking sheet lined with parchment paper.
5. Bake for about 15 minutes or until the edges are golden.
Tips:
– Add extras! You can include chocolate chips or chopped nuts for a fun twist.
– Watch closely! Keep an eye on the cookies to prevent overbaking.
FAQ:
– Can I freeze these cookies? Yes, they freeze beautifully for later enjoyment!
Now, you have a quick and easy recipe that satisfies your sweet tooth. Enjoy making these delightful cookies and share them with friends and family!
Banana Oatmeal Cookies
Editor’s Choice

Amazon Basics Silicone Rectangular Baking Mat, Non-Stick Reusable Oven B…

Umite Chef Mixing Bowls with Airtight Lids Set, 8PCS Stainless Steel Kha…

Spring Chef Heavy Duty Ice Cream Scoop with Comfortable Handle – Profess…
6. Peanut Butter Chocolate Chip Dip

Craving something sweet but don’t want to bake? Look no further! This Peanut Butter Chocolate Chip Dip is your answer. With just three simple ingredients—peanut butter, Greek yogurt, and chocolate chips—you can whip up a creamy delight in minutes. Imagine dipping crisp apple slices or crunchy graham crackers into this luscious dip. It’s a treat that’s not only delicious but also packed with protein, making it a satisfying snack for everyone!
Recipe Overview:
– Servings: 6
– Prep Time: 5 minutes
– Total Time: 5 minutes
– Calories: 150 per serving
Nutrition Information:
– Carbs: 10g
– Protein: 5g
– Fat: 10g
Ingredients:
– ½ cup peanut butter
– ¼ cup Greek yogurt
– ½ cup chocolate chips
Instructions:
1. In a medium bowl, combine peanut butter and Greek yogurt. Stir until you achieve a smooth, creamy consistency.
2. Gently fold in the chocolate chips, ensuring they are evenly distributed.
3. Serve your dip with fresh fruit like apples or bananas, or with graham crackers for a crunchy contrast.
Tips:
– Try adding a splash of vanilla extract for an extra flavor boost!
– Store any leftovers in the fridge for up to a week for a quick snack anytime.
FAQ:
– Can I use other nut butters? Absolutely! Almond butter is a great alternative and will give a slightly different flavor.
This Peanut Butter Chocolate Chip Dip not only satisfies your sweet tooth but also offers a nutritious twist. Perfect for parties, movie nights, or a simple afternoon treat, it’s sure to become a favorite in your home! Enjoy every rich, creamy bite!
Peanut Butter Chocolate Chip Dip
Editor’s Choice

Barney Butter Peanut Butter, Bare Smooth, 16 Ounce Jar, Natural, No Stir…


Amazon Fresh, Chocolate Baking Chips, Semi Sweet, 24 Oz, 1.5 Lb (Pack of…
7. Coconut Chocolate Bars

Indulge your sweet tooth with these easy no-bake coconut chocolate bars! Made with just three ingredients, this delightful treat combines rich chocolate, chewy coconut, and creamy almond butter. They’re perfect for satisfying those sudden cravings, and you can whip them up in no time. Plus, they require no baking, making them an ideal choice for hot days or when you just want a quick dessert fix.
Here’s how to make these delicious bars. In just 15 minutes, you’ll have a batch ready to chill in your fridge. Each bar packs a tasty punch, with a balance of sweet and nutty flavors that everyone will love. Whether you’re serving them at a party or enjoying them solo, these bars will surely bring smiles!
Recipe Overview:
– Servings: 12 bars
– Prep Time: 15 minutes
– Total Time: 15 minutes
– Calories: 180 per bar
Nutrition Information:
– Carbs: 15g
– Protein: 3g
– Fat: 12g
Ingredients:
– 1 cup shredded coconut
– 1 cup chocolate chips
– ½ cup almond butter
Instructions:
1. Melt the chocolate chips using a microwave or double boiler until smooth.
2. In a mixing bowl, combine the shredded coconut and almond butter until well mixed.
3. Pour the melted chocolate into the coconut mixture and stir until fully combined.
4. Spread the mixture into a lined baking dish, smoothing the top evenly.
5. Refrigerate for about 30 minutes or until firm, then cut into bars and enjoy!
Tips:
– Add chopped nuts for an extra crunch!
– Store your bars in an airtight container in the fridge for up to two weeks, but they likely won’t last that long!
With this simple recipe, you’ll have a crowd-pleaser that’s both satisfying and easy to make. So go ahead, treat yourself to these coconut chocolate bars and enjoy every bite!
“These coconut chocolate bars prove that easy dessert recipes quick 3 ingredients no bake can satisfy cravings in minutes. With just three ingredients: coconut, chocolate, and almond butter, you whip up a batch in 15 minutes, no oven needed. Perfect for busy families and hot days.”
Coconut Chocolate Bars
Editor’s Choice

Pyrex Essentials (3-Piece) Glass Mixing Bowls Set For Prepping, Baking a…
8. Raspberry Yogurt Parfaits

Indulge your sweet tooth with these delightful raspberry yogurt parfaits. They’re not just a treat; they’re a feast for the eyes and the palate! Imagine layers of creamy Greek yogurt, juicy fresh raspberries, and crunchy granola coming together in a stunning glass. This colorful dessert is perfect for breakfast or as a light finish to any meal. Plus, it’s packed with nutrients to kickstart your day or satisfy your cravings.
Here’s how to whip up this delicious parfait in no time. You can prepare it in just 10 minutes, making it a great choice for busy mornings or unexpected guests. It’s also a fantastic opportunity to get creative! You can easily substitute other berries if you want to mix things up. The best part? You can make it in advance and chill it until you’re ready to serve.
Recipe Overview:
– Servings: 4
– Prep Time: 10 minutes
– Total Time: 10 minutes
– Calories: 140 per serving
Nutrition Information:
– Carbs: 18g
– Protein: 6g
– Fat: 5g
Ingredients:
– 1 cup Greek yogurt
– 1 cup fresh raspberries
– ½ cup granola
Instructions:
1. Start by taking a glass and adding a layer of Greek yogurt at the bottom.
2. Next, add a layer of fresh raspberries on top.
3. Sprinkle some granola over the raspberries for that delightful crunch.
4. Repeat the layers until the glass is full, finishing with granola on top for an extra touch.
5. Enjoy immediately or cover and chill until you’re ready to serve.
Tips:
– Choose any berry you like for fun variations!
– Prepare these parfaits the night before for quick breakfasts.
– Consider using flavored yogurt for a twist on taste.
FAQ:
– Can I use flavored yogurt? Absolutely! Flavored yogurt adds another layer of taste.
Dive into this easy and tasty recipe that satisfies your sweet cravings while being good for you too! Enjoy making these parfaits and impress your family and friends.
Raspberry Yogurt Parfaits
Editor’s Choice

Chefcaptain Set Of 4 Tulip Parfait Glasses, 7 Oz Glass Ice Cream Sundae …

365 By Whole Foods Market, Greek Yogurt, Plain Nonfat, 32 Ounce

Nature Valley Protein Granola, Oats and Honey Granola, Resealable Snack …
9. No-Bake Chocolate Mint Bars

Indulge your taste buds with these delightful No-Bake Chocolate Mint Bars! If you love the refreshing combination of chocolate and mint, this easy recipe is your ticket to a satisfying dessert. Perfect for parties, family gatherings, or even a cozy night in, these bars are a treat you’ll crave again and again. Plus, they come together in just 20 minutes with only three ingredients!
Recipe Overview:
– Servings: 16 bars
– Prep Time: 20 minutes
– Total Time: 20 minutes
– Calories: 120 per bar
Nutrition Information:
– Carbs: 12g
– Protein: 2g
– Fat: 8g
Ingredients:
– 1 cup dates, pitted
– ½ cup cocoa powder
– ½ tsp peppermint extract
Instructions:
1. Start by blending the pitted dates in a food processor until they become smooth.
2. Next, add in the cocoa powder and peppermint extract. Mix until everything is well combined.
3. Spread the chocolate mint mixture evenly into a lined baking dish.
4. Refrigerate for about 30 minutes until set.
5. Once firm, cut into bars and enjoy!
Tips:
– Adjust the mint flavor to suit your taste. Add a little more peppermint extract if you want a stronger minty kick!
– Store your bars in an airtight container in the fridge for freshness. They make a great snack anytime!
FAQ:
– Can I use other extracts? Absolutely! Vanilla works beautifully if you want a different flavor twist.
With these simple steps, you can whip up a batch of these delicious bars in no time. They’re not only quick and easy but also satisfy your sweet cravings in a healthy way. Enjoy making and sharing them!
No-Bake Chocolate Mint Bars
Editor’s Choice

Hamilton Beach Food Processor & Vegetable Chopper for Slicing, Shredding…
Airtight Food Storage Containers with Lids, Vtopmart 24 pcs Plastic Kitc…

10. Nutella Fruit Dip

Indulge your sweet tooth with a delightful treat that’s simple to whip up: Nutella Fruit Dip! This creamy dip takes just three ingredients and transforms your favorite fruits into a decadent dessert. Whether you’re looking to satisfy a craving or impress guests, this dip is a hit with both kids and adults. Pair it with fresh strawberries, crisp apples, or ripe bananas for a flavor explosion that’s hard to resist!
Here’s how to make it:
Recipe Overview:
– Servings: 6
– Prep Time: 5 minutes
– Total Time: 5 minutes
– Calories: 160 per serving
Nutrition Information:
– Carbs: 18g
– Protein: 3g
– Fat: 8g
Ingredients:
– ½ cup Nutella
– ½ cup cream cheese, softened
– 2 tablespoons milk
Instructions:
1. In a mixing bowl, beat the cream cheese until it’s nice and smooth.
2. Add the Nutella and milk, then mix until you achieve a creamy consistency.
3. Serve your dip with an array of fresh fruits for dipping.
Tips:
– Use a hand mixer to create a fluffier texture!
– Don’t hesitate to try different fruits like peaches or oranges for new flavors.
– This dip can be made ahead of time; just store it in the fridge until you’re ready to serve.
FAQ:
– Can I substitute low-fat cream cheese? Absolutely! It works wonderfully and keeps the dip lighter.
This Nutella Fruit Dip is not just a dessert; it’s a fun way to enjoy healthy fruits while treating yourself. Quick, easy, and oh-so-satisfying, it’s perfect for parties, movie nights, or a simple afternoon snack. Dive into this luscious treat and watch it disappear in no time!
Nutella Fruit Dip
Editor’s Choice
Umite Chef Mixing Bowls with Airtight Lids Set, 8PCS Stainless Steel Kha…

11. Chocolate Covered Almonds

Craving something sweet but don’t want to spend hours in the kitchen? These chocolate-covered almonds are your go-to solution! With just three simple ingredients, you can whip up a delicious treat that satisfies your sweet tooth and provides a nice crunch. Plus, they’re packed with protein, making them a smart snack choice.
Imagine biting into a crunchy almond, coated in rich chocolate, with a hint of coconut. This delightful treat is perfect for movie nights, afternoon snacks, or even as a homemade gift. Pinterest is buzzing with these easy recipes, and for good reason—they’re quick, delicious, and versatile!
Ready to make your own? Here’s how to get started. This recipe is budget-friendly and can be made in just 40 minutes. You’ll love how easy it is!
Ingredients:
– 1 cup almonds
– ½ cup chocolate chips
– 1 tsp coconut oil
Instructions:
1. Melt the chocolate chips and coconut oil together in a microwave-safe bowl until smooth.
2. Dip each almond into the chocolate mixture, ensuring they’re fully coated.
3. Place the chocolate-covered almonds on a sheet of parchment paper.
4. Chill them in the fridge for about 30 minutes or until the chocolate hardens.
Tips:
– Add a sprinkle of sea salt on top for a gourmet touch!
– Store leftovers in an airtight container to keep them fresh.
FAQ:
– Can I use dark chocolate? Yes! Dark chocolate will give your almonds a deeper flavor.
These chocolate-covered almonds are not just easy to make; they also make a fantastic snack for busy days or a sweet treat to share. Enjoy the crunch and richness without any fuss!
Chocolate Covered Almonds
Editor’s Choice

Blue Diamond Almonds Whole Natural Raw Snack Nuts, 100 Calorie Travel Ba…

365 by Whole Foods Market, Dark Chocolate Baking Chunks, 12 Ounce

Viva Naturals Organic Coconut Oil – Unrefined, Cold-Pressed Extra Virgin…
12. Blueberry Banana Popsicles

Cool off this summer with delightful blueberry banana popsicles! These treats are not only refreshing but also packed with nutrition. With just three simple ingredients—bananas, blueberries, and yogurt—you can whip up a batch that your kids will adore. Plus, you’ll appreciate how healthy they are!
Recipe Overview:
– Servings: 6 popsicles
– Prep Time: 10 minutes
– Freeze Time: 4 hours
– Total Time: 4 hours 10 minutes
– Calories: 50 per popsicle
Nutrition Information:
– Carbs: 12g
– Protein: 2g
– Fat: 1g
Ingredients:
– 2 ripe bananas
– 1 cup blueberries
– 1 cup yogurt
Instructions:
1. Start by blending the ripe bananas, fresh blueberries, and creamy yogurt until the mixture is smooth and well combined.
2. Carefully pour the mixture into your popsicle molds, filling each mold nearly to the top.
3. Place the molds in the freezer and let them sit for at least 4 hours or until frozen solid.
Tips:
– Get creative! Use different fruits like strawberries or mangoes for a twist.
– When ready to enjoy, let the popsicles sit out for a few minutes to make removal easier.
FAQ:
– How do I store them? Keep your popsicles in the freezer for up to a month for a quick snack anytime!
These blueberry banana popsicles are perfect for warm days and can serve as a nutritious dessert or snack. You’ll love how easy they are to make, and the kids will love the taste!
Blueberry Banana Popsicles
Editor’s Choice

Silicone Popsicle Molds 10-cavity, DIY Ice Pop Mold for Kids Adult Teens…

Ninja BL660 Professional Compact Smoothie & Food Processing Blender, 110…
13. Vanilla Pudding Fruit Cups

Craving something sweet and refreshing? Try these Vanilla Pudding Fruit Cups! They are a delightful treat, perfect for satisfying your sweet tooth in just minutes. With creamy vanilla pudding, colorful fruit, and a crunchy granola topping, this dessert is not only tasty but also easy to customize for your family’s preferences. Imagine the vibrant colors and textures of fresh berries and bananas layered perfectly in a cup—irresistible!
Creating these cups is as simple as it gets. In just ten minutes, you can whip up a delicious dessert that looks fancy but requires minimal effort. You can even prepare the pudding ahead of time. Just layer the ingredients when it’s time to serve. This way, you can enjoy a quick and satisfying treat whenever those sweet cravings kick in.
Recipe Overview:
– Servings: 4
– Prep Time: 10 minutes
– Total Time: 10 minutes
– Calories: 200 per serving
Nutrition Information:
– Carbs: 30g
– Protein: 5g
– Fat: 6g
Ingredients:
– 1 cup vanilla pudding mix
– 2 cups milk
– 1 cup mixed fruit (such as berries, bananas, or peaches)
– 1 cup granola
Instructions:
1. In a bowl, whisk together the vanilla pudding mix and milk until it thickens, about 2 minutes.
2. In serving cups, start by adding a layer of pudding to the bottom.
3. Next, add a layer of your mixed fruit on top of the pudding.
4. Sprinkle a layer of granola over the fruit for a satisfying crunch.
5. Repeat the layers until the cups are full, finishing with granola on top.
6. Serve immediately or chill for later enjoyment!
Tips:
– Use seasonal fruits for the freshest taste!
– Consider making the pudding the night before for easy assembly later.
– Get creative with your toppings—try nuts or coconut for added flavor!
FAQ:
– Can I use instant pudding? Yes, instant pudding works great for this recipe! Just follow the package instructions for mixing.
With these Vanilla Pudding Fruit Cups, you have a dessert that is not only quick and easy but also packed with flavor. Enjoy making them your own and watch them disappear in no time!
Vanilla Pudding Fruit Cups
Editor’s Choice

Jell-O Cook & Serve Vanilla Pudding & Pie Filling Mix, 4.6 oz Box
Nature Valley Protein Granola, Oats and Honey Granola, Resealable Snack …
14. No-Bake Lemon Bars

Craving something refreshing and sweet? These no-bake lemon bars are your answer! With only three simple ingredients, they offer a zesty burst of flavor that’s perfect for any warm day. Just imagine biting into these creamy, tangy bars. They’re a delightful treat that can brighten anyone’s mood!
Here’s what you need for this easy recipe:
Recipe Overview:
– Servings: 12 bars
– Prep Time: 10 minutes
– Chill Time: 2 hours
– Total Time: 2 hours 10 minutes
– Calories: 130 per bar
Nutrition Information:
– Carbs: 20g
– Protein: 2g
– Fat: 6g
Ingredients:
– 1 cup lemon juice
– 1 cup sweetened condensed milk
– 1 cup crushed graham crackers
Instructions:
1. Start by mixing the lemon juice and sweetened condensed milk in a bowl.
2. Next, fold in the crushed graham crackers until everything is well combined.
3. Pour this mixture into a lined baking dish and spread it out evenly.
4. Chill it in the refrigerator for about 2 hours until it’s set.
5. Once chilled, cut into bars and enjoy!
Tips:
– Garnish with lemon zest to add a pop of color and flavor!
– For the best taste, serve them cold straight from the fridge.
FAQ:
– How long do these bars last? Keep them in the fridge for up to five days for freshness.
Now you have a quick and easy recipe for no-bake lemon bars that will satisfy your sweet tooth! Enjoy making and sharing these delightful treats any time you need a pick-me-up.
No-Bake Lemon Bars
Editor’s Choice


Medley Hills Farm Graham cracker crumbs – in Resealable Bag – 1.5 lbs

Elite Gourmet ETS740 BPA-Free Electric Citrus Juicer with 2 Cones, Compa…
15. Chocolate Chip Cookie Dough Truffles

Indulge your sweet tooth with these delicious Chocolate Chip Cookie Dough Truffles! They are a quick fix for your cravings and perfect for when you want something sweet without the hassle of baking. Made with just three simple ingredients, these truffles are safe to eat raw and deliver a creamy, dreamy taste that melts in your mouth. Imagine the rich flavor of cookie dough combined with little bursts of chocolate in every bite.
Recipe Overview:
– Servings: 12 truffles
– Prep Time: 15 minutes
– Chill Time: 30 minutes
– Total Time: 45 minutes
– Calories: 120 per truffle
Nutrition Information:
– Carbs: 15g
– Protein: 2g
– Fat: 6g
Ingredients:
– 1 cup almond flour
– ½ cup maple syrup
– ½ cup mini chocolate chips
Instructions:
1. In a medium bowl, mix the almond flour and maple syrup until a dough forms.
2. Fold in the mini chocolate chips until they are evenly distributed.
3. Roll the mixture into small bite-sized balls.
4. Chill the truffles in the fridge for about 30 minutes to firm up.
5. Enjoy these delightful treats as a snack or dessert!
Tips:
– Coat in chocolate for an extra layer of sweetness and crunch!
– Store in an airtight container in the fridge to keep them fresh.
FAQ:
– Can I use regular flour? Yes, but make sure it’s heat-treated for safety if you plan to eat it raw.
These truffles are not only easy to make, but they also hit the spot when you want something sweet. They’re great for sharing or keeping all to yourself. Enjoy the creamy goodness and the satisfaction of making a treat that’s both delicious and simple!
Chocolate Chip Cookie Dough Truffles
Editor’s Choice

Blue Diamond Almonds Almond Flour, Gluten Free, Blanched, Finely Sifted,…

Butternut Mountain Farm Pure Maple Syrup From Vermont, Grade A (Prev. Gr…
16. Almond Joy Energy Balls

You’re craving something sweet but don’t want the guilt that comes with candy bars. Meet the Almond Joy Energy Balls! These tasty treats combine the classic flavors of almonds, coconut, and chocolate. They’re not just delicious; they’re also a healthy snack option that you can whip up in no time.
Imagine popping one of these energy balls into your mouth and enjoying that rich, satisfying taste. Each bite feels like a moment of indulgence, yet they’re packed with nutrition. Perfect for a mid-afternoon pick-me-up or a post-workout snack, these energy balls will keep your cravings at bay.
Recipe Overview:
– Servings: 12 balls
– Prep Time: 10 minutes
– Total Time: 10 minutes
– Calories: 110 per ball
Nutrition Information:
– Carbs: 14g
– Protein: 3g
– Fat: 5g
Ingredients:
– 1 cup almonds
– 1 cup shredded coconut
– ½ cup dark chocolate chips
Instructions:
1. Start by placing the almonds in a food processor. Blend them until they are finely ground.
2. Add the shredded coconut and dark chocolate chips. Pulse until everything is well mixed and crumbly.
3. Use your hands to roll the mixture into bite-sized balls.
4. For the best flavor and texture, refrigerate the balls for about 30 minutes before enjoying.
Tips:
– Add a pinch of salt to bring out the flavors even more!
– Store these energy balls in an airtight container in the fridge. They’ll stay fresh for about a week.
FAQ:
– Can I use other nuts? Absolutely! Feel free to swap in your favorites like cashews or walnuts.
These Almond Joy Energy Balls are not only quick to make but also a delightful way to satisfy your sweet tooth without the sugar crash. Give them a try and enjoy the deliciousness!
Almond Joy Energy Balls
Editor’s Choice
Hamilton Beach Food Processor & Vegetable Chopper for Slicing, Shredding…

Rubbermaid Brilliance Pantry Airtight Food Storage Container, BPA-Free 7…
365 by Whole Foods Market, Dark Chocolate Baking Chunks, 12 Ounce
17. Simple Maple Pecan Fudge

Indulge your sweet tooth with this creamy and rich Maple Pecan Fudge. Made with just three simple ingredients—maple syrup, cream cheese, and chopped pecans—this no-bake treat is perfect for satisfying your cravings without any fuss. The warm notes of maple syrup blend beautifully with the rich cream cheese, while the pecans add a delightful crunch. It’s a quick, delicious dessert that brings the taste of the season right to your kitchen!
Recipe Overview:
– Servings: 16 squares
– Prep Time: 15 minutes
– Chill Time: 1 hour
– Total Time: 1 hour 15 minutes
– Calories: 150 per square
Nutrition Information:
– Carbs: 18g
– Protein: 2g
– Fat: 7g
Ingredients:
– 1 cup maple syrup
– 1 cup cream cheese, softened
– ½ cup chopped pecans
Instructions:
1. In a mixing bowl, blend the cream cheese and maple syrup until smooth and creamy.
2. Fold in the chopped pecans until they are evenly distributed.
3. Pour the mixture into a lined baking dish, spreading it evenly.
4. Chill in the refrigerator for about an hour until set.
5. Cut into squares and serve to your family and friends.
Tips:
– Use toasted pecans for a deeper flavor!
– Store leftovers in an airtight container in the fridge for up to two weeks.
FAQ:
– How long does it last? Enjoy this fudge for up to two weeks when stored properly in the fridge!
This Maple Pecan Fudge is not only quick to make but also a delightful way to impress guests. It’s perfect for parties, holiday gatherings, or just a cozy night in. Enjoy the sweet and nutty flavors, and watch this treat disappear in no time!
Simple Maple Pecan Fudge
Editor’s Choice
Amazon Basics Silicone Rectangular Baking Mat, Non-Stick Reusable Oven B…
Umite Chef Mixing Bowls with Airtight Lids Set, 8PCS Stainless Steel Kha…
Airtight Food Storage Containers with Lids, Vtopmart 24 pcs Plastic Kitc…
18. Apple Cinnamon Oat Bars

Craving something sweet yet healthy? These Apple Cinnamon Oat Bars are just the treat you need! With a delightful blend of tender apples, hearty oats, and fragrant cinnamon, they’re soft and chewy, making them a perfect snack or breakfast option that the whole family will adore. Plus, they’re incredibly quick and simple to whip up!
Recipe Overview:
– Servings: 8 bars
– Prep Time: 15 minutes
– Bake Time: 25 minutes
– Total Time: 40 minutes
– Calories: 120 per bar
Nutrition Information:
– Carbs: 19g
– Protein: 3g
– Fat: 4g
Ingredients:
– 2 cups rolled oats
– 2 apples, grated
– 1 tsp cinnamon
Instructions:
1. Preheat your oven to 350°F (175°C).
2. In a large bowl, mix together the rolled oats, grated apples, and cinnamon until combined.
3. Press the mixture firmly into a greased baking dish.
4. Bake for 25 minutes or until the edges are golden brown.
5. Allow the bars to cool, then cut them into squares and enjoy!
These bars are not just tasty; they’re also a healthy choice! You can even elevate their sweetness with a drizzle of honey if you like.
Tips:
– Store them in an airtight container to keep them fresh for up to a week!
– Want to add a crunch? Mix in your favorite nuts for extra texture.
This recipe is versatile, making it easy to personalize to your taste. Whether you want a quick breakfast or a satisfying snack, these Apple Cinnamon Oat Bars will hit the spot!
Apple Cinnamon Oat Bars
Editor’s Choice

Quaker Old Fashioned Rolled Oats, Non GMO Project Verified, Two 64oz Bag…

Amazon Grocery, Ground Cinnamon, 2.5 Oz (Previously Happy Belly, Packagi…

Rubbermaid Brilliance 16-Cup Airtight Food Storage Container with Lid Cl…
19. Chocolate Strawberry Bites

Imagine biting into a juicy strawberry, coated in rich chocolate, and drizzled with creamy yogurt. These Chocolate Strawberry Bites are the perfect answer to your sweet cravings. They’re quick to make, require only three ingredients, and are sure to impress at any gathering. Whether it’s a family get-together or a cozy movie night, these treats fit right in.
Recipe Overview:
– Servings: 12 bites
– Prep Time: 10 minutes
– Chill Time: 30 minutes
– Total Time: 40 minutes
– Calories: 80 per bite
Nutrition Information:
– Carbs: 10g
– Protein: 1g
– Fat: 4g
Ingredients:
– 1 cup fresh strawberries
– ½ cup chocolate chips
– ¼ cup Greek yogurt
Instructions:
1. Start by melting the chocolate chips in a microwave-safe bowl. Heat them in 30-second intervals, stirring until smooth.
2. Dip each strawberry into the melted chocolate, coating it generously.
3. Place the chocolate-covered strawberries on a sheet of parchment paper.
4. Drizzle the Greek yogurt over the strawberries for a creamy finish.
5. Chill the bites in the fridge for about 30 minutes, or until the chocolate hardens.
Tips:
– Use white chocolate for a fun and sweet variation!
– Serve with whipped cream on the side for an extra touch of indulgence.
FAQ:
– How long do they last? These bites are best enjoyed fresh, but you can keep them in the fridge for up to a day.
These Chocolate Strawberry Bites are not just tasty; they’re easy on the wallet too. Perfect for when you need a quick dessert fix, they bring a delightful mix of flavors and textures. So next time you’re craving something sweet, give these bites a try!
Chocolate Strawberry Bites
Editor’s Choice

HOTEC BPA Free Unbreakable Wheat Straw Cereal Bowls – Microwave & Dishwa…

Wilton Candy Melts Melting Pot, Perfect for Dipping, Drizzling & Decorat…
20. No-Bake Chocolate Rice Crispy Treats

Craving something sweet but don’t want to turn on the oven? These no-bake chocolate rice crispy treats are just what you need! With only three simple ingredients—chocolate chips, rice cereal, and peanut butter—you can whip up a delightful snack in no time. They’re perfect for when those late-night cravings hit or when you need a quick dessert for guests.
Recipe Overview:
– Servings: 12 treats
– Prep Time: 10 minutes
– Chill Time: 30 minutes
– Total Time: 40 minutes
– Calories: 130 per treat
Nutrition Information:
– Carbs: 15g
– Protein: 3g
– Fat: 7g
Ingredients:
– 2 cups rice cereal
– 1 cup chocolate chips
– ½ cup peanut butter
Instructions:
1. In a microwave-safe bowl, melt the chocolate chips and peanut butter together until smooth. Stir well to combine.
2. Gently fold in the rice cereal until every piece is evenly coated.
3. Press the mixture firmly into a lined baking dish to create an even layer.
4. Refrigerate for about 30 minutes or until set. Once firm, cut into squares and enjoy!
Tips:
– For an extra flavor kick, sprinkle some sea salt on top before chilling!
– Store your treats in an airtight container for up to a week for fresh snacking.
FAQ:
– Can I make them gluten-free? Absolutely! Just swap in gluten-free rice cereal for a tasty treat that everyone can enjoy.
These chocolate rice crispy treats are not only easy to make but also customizable! Try adding nuts or dried fruit for more texture. They are a great way to satisfy your sweet tooth without a lot of fuss. Enjoy your delicious creation!
No-Bake Chocolate Rice Crispy Treats
Editor’s Choice
Pyrex Essentials (3-Piece) Glass Mixing Bowls Set For Prepping, Baking a…
Rubbermaid Brilliance 16-Cup Airtight Food Storage Container with Lid Cl…
21. Coconut Lime Energy Bites

Dive into a burst of flavor with these Coconut Lime Energy Bites! They’re the perfect snack when you’re craving something sweet and refreshing. The combination of coconut, zesty lime, and naturally sweet dates creates a treat that’s not only delicious but also gives you a quick energy boost. These bites are easy to make and packed with nutrients, making them a go-to for busy days or after workouts.
Recipe Overview:
– Servings: 10 bites
– Prep Time: 10 minutes
– Total Time: 10 minutes
– Calories: 90 per bite
Nutrition Information:
– Carbs: 11g
– Protein: 1g
– Fat: 4g
Ingredients:
– 1 cup shredded coconut
– 1 cup pitted dates
– Zest of 1 lime
Instructions:
1. Start by placing the pitted dates in a food processor. Blend until they form a smooth paste.
2. Next, add the shredded coconut and lime zest into the processor. Blend until all ingredients are well combined.
3. Scoop out the mixture and roll it into bite-sized balls.
4. For the best texture, refrigerate your energy bites for about 20 minutes before enjoying them.
Tips:
– Always use fresh lime for the most vibrant flavor!
– Store your bites in an airtight container in the fridge to keep them fresh longer.
FAQ:
– Want to mix things up? Add your favorite nuts for added crunch and flavor!
These Coconut Lime Energy Bites make snacking a joy. They’re quick to prepare and fit right into a busy lifestyle. Enjoy them as a midday pick-me-up or a post-workout treat. You’ll love how easy they are to make and how great they taste!
Coconut Lime Energy Bites
Editor’s Choice
Hamilton Beach Food Processor & Vegetable Chopper for Slicing, Shredding…

365 by Whole Foods Market, Organic Shredded Coconut, 8 Ounce (Pack of 2)

22. No-Bake Cheesecake Balls

Indulge your sweet tooth with these delightful no-bake cheesecake balls! They’re the ultimate treat when you crave something creamy and sweet. With just three ingredients—cream cheese, powdered sugar, and graham cracker crumbs—you can whip these up in no time. Perfect for parties or cozy nights at home, these little bites of joy will leave everyone asking for more!
Recipe Overview:
– Servings: 12 balls
– Prep Time: 15 minutes
– Chill Time: 30 minutes
– Total Time: 45 minutes
– Calories: 100 per ball
Nutrition Information:
– Carbs: 15g
– Protein: 2g
– Fat: 5g
Ingredients:
– 1 cup cream cheese, softened
– ½ cup powdered sugar
– ½ cup graham cracker crumbs
Instructions:
1. In a mixing bowl, blend the cream cheese and powdered sugar until you achieve a smooth texture.
2. Gradually stir in the graham cracker crumbs until everything is well combined.
3. Use your hands to roll the mixture into small bite-sized balls.
4. Place them on a plate and refrigerate for 30 minutes to firm up before serving.
Tips:
– For a fun twist, dust the balls with cocoa powder or crushed nuts!
– Store any extras in an airtight container in the fridge for a quick sweet fix later.
FAQ:
– Can I use low-fat cream cheese? Yes, low-fat cream cheese works just fine!
These cheesecake balls are not just easy to make; they also look great on any dessert table. Give them a try, and enjoy a little slice of heaven anytime you need a sweet treat!
Fun fact: these No-Bake Cheesecake Balls show that easy dessert recipes quick 3 ingredients no bake can be ultra-delicious. In about 15 minutes of prep (plus a 30-minute chill), you get 12 creamy bites perfect for busy families.
No-Bake Cheesecake Balls
Editor’s Choice
Umite Chef Mixing Bowls with Airtight Lids Set, 8PCS Stainless Steel Kha…
23. Raspberry Coconut Chia Pudding

Raspberry coconut chia pudding is the perfect solution for your sweet cravings. This delightful treat combines creamy coconut milk, crunchy chia seeds, and tart raspberries. It’s not just delicious—it’s also packed with nutrients! Enjoy it for breakfast or as a light dessert. Plus, it’s incredibly easy to make and looks stunning in a glass. You’ll impress your friends and family without breaking a sweat.
Recipe Overview:
– Servings: 4
– Prep Time: 10 minutes
– Chill Time: 2 hours
– Total Time: 2 hours 10 minutes
– Calories: 180 per serving
Nutrition Information:
– Carbs: 20g
– Protein: 4g
– Fat: 9g
Ingredients:
– 1 cup coconut milk
– ¼ cup chia seeds
– 1 cup raspberries
Instructions:
1. In a mixing bowl, combine coconut milk, chia seeds, and raspberries.
2. Stir well to ensure everything is mixed together.
3. Let the mixture sit for 10 minutes to allow the chia seeds to absorb some liquid.
4. Transfer the bowl to the refrigerator and let it chill for at least 2 hours until it thickens.
5. Serve chilled, garnished with a few extra raspberries on top.
Tips:
– Use honey or maple syrup for a touch of sweetness!
– Add shredded coconut on top for some extra crunch and flavor.
– Experiment with other berries like blueberries or strawberries for a twist.
– If you prefer a smoother texture, blend the mixture before chilling.
FAQ:
– Can I use almond milk? Yes, you can substitute with almond milk for a dairy-free option!
This raspberry coconut chia pudding is not just easy to make; it’s also a feast for the eyes. The vibrant colors and creamy texture make it a delightful dish for any occasion. Enjoy making it and share it with your loved ones!
Raspberry Coconut Chia Pudding
Editor’s Choice

BetterBody Foods Organic Chia Seeds 2 lbs, 32 Oz, with Omega-3, Non-GMO,…

Simply Asia Unsweetened Coconut Milk, 13.66 fl oz – One 13.66 Ounce Can …
24. Chocolate Coconut Cups

Treat yourself to the rich flavors of Chocolate Coconut Cups—a simple yet satisfying no-bake dessert. These little delights combine the sweetness of chocolate with the tropical taste of coconut. With just three ingredients, you can create a treat that’s perfect for any time of day. Whether you need a quick snack or a sweet finish after dinner, these cups will hit the spot!
Recipe Overview:
– Servings: 12 cups
– Prep Time: 10 minutes
– Chill Time: 1 hour
– Total Time: 1 hour 10 minutes
– Calories: 100 per cup
Nutrition Information:
– Carbs: 10g
– Protein: 2g
– Fat: 7g
Ingredients:
– 1 cup chocolate chips
– ½ cup shredded coconut
– 2 tbsp coconut oil
Instructions:
1. Begin by melting the chocolate chips and coconut oil together in a microwave-safe bowl. Stir until smooth.
2. Pour a small amount of the melted mixture into muffin liners, just enough to cover the bottom.
3. Sprinkle shredded coconut on top and gently press it down.
4. Finish by topping with more melted chocolate. Place in the refrigerator until set, about one hour.
Tips:
– Use silicone molds for easy removal and a fun shape!
– For a gourmet look, drizzle additional melted chocolate on top before chilling.
FAQ:
– How long do they last? Store your Chocolate Coconut Cups in the fridge for up to a week.
These Chocolate Coconut Cups are not just easy to make; they’re a fantastic way to indulge your sweet tooth without the fuss of baking. Enjoy each bite and share them with friends or keep them all to yourself!
Chocolate Coconut Cups
Editor’s Choice

Redfly 2 Pack Silicone Muffin Pan & Cupcake Pans for Baking – 12 Cup Reg…

CHIPS AHOY! Original Chocolate Chip Cookies, 20 Snack Packs (2 Cookies P…
Viva Naturals Organic Coconut Oil – Unrefined, Cold-Pressed Extra Virgin…
25. Nut Butter Granola Clusters

Craving a quick and tasty snack that won’t derail your healthy eating goals? These Nut Butter Granola Clusters are just what you need! With only three simple ingredients—nut butter, oats, and honey—you can whip up these delightful clusters in no time. They’re perfect for busy mornings or as a grab-and-go treat for your family. Picture biting into a chewy, sweet morsel that’s both satisfying and nutritious.
Making these clusters is easy and budget-friendly. You don’t need fancy equipment, just a bowl and a baking sheet. Plus, they keep well, so you can enjoy them throughout the week. As trends show, healthy snacking is on the rise, and these clusters fit right in. They not only fuel your body but also please your taste buds, making snack time feel special.
Here’s how to make your own Nut Butter Granola Clusters:
Ingredients:
– 1 cup oats
– ½ cup nut butter (your choice!)
– ¼ cup honey
Instructions:
1. Start by preheating your oven to 350°F (175°C).
2. In a mixing bowl, combine the oats, nut butter, and honey until well mixed.
3. Scoop out the mixture and form clusters on a baking sheet lined with parchment paper.
4. Bake for about 15 minutes or until golden brown. Let them cool before enjoying!
Tips for Success:
– Experiment with different nut butters like almond or cashew for new flavors!
– Store your clusters in an airtight container for up to one week to maintain freshness.
– Feel free to add extras like chocolate chips or dried fruit for an added twist!
FAQ:
– Can I substitute maple syrup for honey? Yes, maple syrup works great too!
Nut Butter Granola Clusters
Editor’s Choice

Fueled by AF Nut Butter Variety pack, Pistachio, Dubai, Maple Pecan nut …

Bob’s Red Mill Organic Old Fashioned Rolled Oats, 32oz (Pack of 4) – Non…

Nate’s Texas 100% Pure, Raw & Unfiltered Honey – 16 oz. Squeeze Bottle -…
26. Peanut Butter Banana Smoothie

Craving a sweet treat that’s both delicious and nutritious? This Peanut Butter Banana Smoothie is your perfect solution! With just three simple ingredients—bananas, creamy peanut butter, and almond milk—you can whip up a satisfying drink that’s great for breakfast or a quick snack. It’s smooth, filling, and sure to please the whole family!
Here’s what you need to get started:
Recipe Overview:
– Servings: 2
– Prep Time: 5 minutes
– Total Time: 5 minutes
– Calories: 250 per serving
Nutritional Breakdown:
– Carbs: 30g
– Protein: 8g
– Fat: 12g
Ingredients:
– 2 ripe bananas
– ½ cup peanut butter
– 1 cup almond milk
Instructions:
1. Peel the bananas and break them into chunks.
2. Add the banana chunks, peanut butter, and almond milk to your blender.
3. Blend on high until the mixture is smooth and creamy.
4. Pour into glasses and enjoy immediately!
Want to take your smoothie to the next level? Here are some quick tips:
Tips:
– Add a handful of spinach for an extra boost of nutrients without changing the flavor!
– Use frozen bananas to make your smoothie thicker and colder.
FAQ:
– Can I use regular milk instead of almond milk? Absolutely! Feel free to swap in your favorite milk for a different taste.
Enjoy this smoothie as a quick energy booster or a delightful dessert. It’s not just tasty; it’s a smart choice for your health too!
Peanut Butter Banana Smoothie
Editor’s Choice
Ninja BR201AMZ Professional Blender 2.0, 1200 Watts, Auto-iQ Program, To…

SKIPPY Natural Creamy Peanut Butter Spread Twin Pack 2-Pack, 5 LB

Silk Shelf-Stable Almond Milk, Unsweetened Vanilla, Dairy-Free, Vegan, N…
27. Strawberry Chocolate Chip Muffins

Craving something sweet but don’t want to spend hours in the kitchen? These Strawberry Chocolate Chip Muffins are your perfect solution! With just three ingredients, you can whip up a batch that’s both delightful and satisfying. Picture warm muffins filled with juicy strawberries and pockets of melted chocolate—ideal for breakfast or a midday treat.
Recipe Overview:
– Servings: 12 muffins
– Prep Time: 15 minutes
– Bake Time: 20 minutes
– Total Time: 35 minutes
– Calories: 180 per muffin
Nutrition Information:
– Carbs: 25g
– Protein: 4g
– Fat: 7g
Ingredients:
– 2 cups all-purpose flour
– 1 cup strawberries, chopped
– ½ cup chocolate chips
Instructions:
1. Preheat your oven to 350°F (175°C). This step is crucial for even baking!
2. In a mixing bowl, combine the flour, chopped strawberries, and chocolate chips. Stir until well mixed.
3. Spoon the mixture into muffin tins, filling each cup about two-thirds full.
4. Bake for 20 minutes or until a toothpick inserted in the center comes out clean. Let them cool before you dig in!
Tips:
– Add nuts for a delightful crunch!
– Store leftovers in an airtight container to keep them fresh.
– Feel free to use frozen strawberries if fresh ones aren’t available; they work just as well!
These muffins are not just tasty; they’re also quick and budget-friendly. You’ll love how simple it is to make them. Perfect for busy mornings or as an easy snack, these muffins will surely become a favorite in your home. Enjoy the sweet aroma and the delicious taste with every bite!
Strawberry Chocolate Chip Muffins
Editor’s Choice

2Pack Silicone Muffin Pan for Baking with Metal Reinforced Frame, 12 Cup…

TILUCK Stainless Steel Measuring Cups & Spoons Set, Cups and Spoons,Kitc…

Ankou Airtight Food Storage Container Sets with Lids 6Pcs Pop Containers…
28. Peanut Butter Chocolate Bars

Indulge your sweet tooth with these quick and delicious no-bake peanut butter chocolate bars! If you crave chocolate but want something simple, this recipe is perfect for you. With just three ingredients—peanut butter, oats, and cocoa powder—you can whip up a satisfying treat in no time. These bars are great for snacking or as a dessert after dinner, and trust me, they’ll vanish quickly from your kitchen!
Recipe Overview:
– Servings: 12 bars
– Prep Time: 10 minutes
– Chill Time: 1 hour
– Total Time: 1 hour 10 minutes
– Calories: 160 per bar
Nutrition Information:
– Carbs: 18g
– Protein: 5g
– Fat: 9g
Ingredients:
– 1 cup peanut butter
– 1 cup oats
– ¼ cup cocoa powder
Instructions:
1. Grab a bowl and mix the peanut butter, oats, and cocoa powder together until well combined.
2. Line a baking dish with parchment paper and press the mixture firmly into the bottom.
3. Pop it in the fridge for about an hour to let it firm up.
4. Once set, cut into bars and enjoy!
Tips:
– For a touch of sweetness, add a drizzle of honey to the mix!
– Keep these bars fresh by storing them in a sealed container in the fridge.
FAQ:
– Can I use crunchy peanut butter? Absolutely! Crunchy peanut butter will give your bars a delightful texture.
These no-bake peanut butter chocolate bars are not just easy to make; they’re also packed with flavor. Perfect for when you need a quick sweet fix or want to impress friends with a homemade treat without the fuss of baking. Enjoy every bite!
Peanut Butter Chocolate Bars
Editor’s Choice

Amazon Basics Parchment Paper for Baking, Non-Stick, 90 Sq Ft Roll, 1 Pack
29. Cacao Energy Bites

Satisfy your sweet tooth and boost your energy with delicious cacao energy bites! These little treats pack a punch with rich cacao powder, crunchy nuts, and sweet dates. They’re perfect for snacking anytime or even before a workout. Plus, they’re super easy to whip up, making them a go-to option for quick homemade snacks.
Let’s break down the recipe so you can enjoy these bites in no time. You’ll need just three simple ingredients: nuts for crunch, dates for sweetness, and cacao powder for a rich chocolate flavor. Not only do these bites taste amazing, but they also give you a healthy boost, with each bite containing around 100 calories.
Recipe Overview:
– Servings: 10 bites
– Prep Time: 10 minutes
– Chill Time: 20 minutes
– Total Time: 30 minutes
– Calories: 100 per bite
Nutrition Information:
– Carbs: 12g
– Protein: 3g
– Fat: 5g
Ingredients:
– 1 cup nuts (almonds or walnuts)
– ½ cup dates, pitted
– ¼ cup cacao powder
Instructions:
1. Start by placing your nuts in a food processor. Blend them until they’re finely chopped.
2. Next, add the pitted dates and cacao powder to the processor. Pulse the mixture until it all sticks together.
3. Roll the mixture into bite-sized balls.
4. Chill the bites in the fridge for 20 minutes before enjoying.
Tips:
– Use a mix of nuts for different flavors and textures!
– Store your energy bites in an airtight container in the fridge to keep them fresh.
FAQ:
– Can I use cocoa powder instead? Yes! Cocoa powder works just fine as a substitute.
Now you’re ready to make these tasty cacao energy bites anytime you crave a sweet snack. Enjoy the flavor and the health benefits!
Cacao Energy Bites
Editor’s Choice
Hamilton Beach Food Processor & Vegetable Chopper for Slicing, Shredding…

Viva Naturals Organic Cacao Powder, 1lb – Unsweetened Cacao Powder With …
Rubbermaid Brilliance Pantry Airtight Food Storage Container, BPA-Free 7…
30. No-Bake Orange Creamsicle Bars

Dive into a refreshing treat with these no-bake orange creamsicle bars! They are the perfect solution for your sweet cravings, especially on hot summer days. With just three simple ingredients—orange juice, cream cheese, and crushed graham crackers—you’ll create a dessert that is not just easy but also incredibly delicious. Imagine biting into a creamy, citrus-flavored bar that takes you back to childhood summer days. These bars are great for parties and family gatherings, guaranteed to impress everyone!
Here’s how to whip them up quickly:
Recipe Overview:
– Servings: 12 bars
– Prep Time: 15 minutes
– Chill Time: 2 hours
– Total Time: 2 hours 15 minutes
– Calories: 150 per bar
Ingredients:
– 1 cup fresh orange juice
– 1 cup cream cheese, softened
– 1 cup crushed graham crackers
Instructions:
1. In a mixing bowl, combine the orange juice and softened cream cheese. Mix until smooth and creamy.
2. Gently fold in the crushed graham crackers until fully incorporated.
3. Pour the mixture into a lined baking dish, spreading it evenly.
4. Chill in the refrigerator for at least 2 hours until firm.
5. Once set, cut into bars and serve cold. Enjoy!
Tips:
– Use freshly squeezed orange juice for a brighter flavor.
– Top with a sprinkle of orange zest for a colorful finish.
FAQ:
– How long do these bars last? Store them in the fridge for up to five days for the best taste.
Now you have a delightful dessert that’s quick, easy, and bursting with orange flavor. Perfect for satisfying your sweet tooth anytime!
No-Bake Orange Creamsicle Bars
Editor’s Choice

HONEY MAID Graham Crackers, Lunch Snacks, Party Size, 28.8 oz

Good Culture Organic Classic Cottage Cheese, 16 oz
Conclusion

With these 30+ quick 3-ingredient no-bake dessert recipes, satisfying your sweet cravings has never been easier! These delightful treats are perfect for busy families looking for something simple yet delicious. Whether it’s a quick snack, a sweet ending to a meal, or a fun treat to share, these recipes are sure to delight everyone!
Try them out and let your family enjoy the tasty results!
Note: We aim to provide accurate product links, but some may occasionally expire or become unavailable. If this happens, please search directly on Amazon for the product or a suitable alternative.
This post contains Amazon affiliate links, meaning I may earn a small commission if you purchase through my links, at no extra cost to you.
Frequently Asked Questions
What Are Some Easy 3-Ingredient No-Bake Dessert Recipes for Busy Families?
If you’re looking for quick sweet treats, you’re in luck! Some fantastic 3-ingredient no-bake dessert recipes include chocolate peanut butter bars, yogurt parfaits with granola and berries, and simple coconut macaroons. These recipes are not only easy to make but also perfect for busy families who want delightful desserts without the fuss.
These desserts can be whipped up in no time, satisfying your sweet cravings while keeping the prep simple!
Can I Substitute Ingredients in 3-Ingredient No-Bake Desserts?
Absolutely! One of the best things about easy dessert recipes is their flexibility. If you’re out of an ingredient or want to make it healthier, feel free to substitute.
For example, if a recipe calls for cream cheese, you can use Greek yogurt for a healthier twist. Or swap out sugar for honey or maple syrup to keep things natural. Just ensure that the substitutes align with the overall flavor profile of your dessert!
How Long Do No-Bake Desserts Typically Need to Set?
Setting times can vary depending on the recipe, but most no-bake desserts generally require about 1 to 2 hours in the refrigerator to firm up. Some recipes might need overnight chilling for optimal texture.
Always check the specific recipe for guidance, but rest assured, the wait is worth it when you finally get to enjoy your delicious creation!
Are 3-Ingredient No-Bake Desserts Healthy?
Many 3-ingredient no-bake desserts can be quite healthy, especially if you choose wholesome ingredients. For instance, using natural sweeteners, whole grains, and fruits can add nutritional value to your sweet treats.
However, it’s important to be mindful of portion sizes and ingredients. Check out recipes that focus on healthy no-bake desserts for options that satisfy your sweet tooth without compromising your wellness goals.
What Are Some Popular Variations of Quick Sweet Treats?
The beauty of quick sweet treats is that they can be easily customized! Popular variations include adding nuts or seeds for crunch, using different flavors of extracts, or incorporating seasonal fruits for freshness.
Experimenting with your favorite ingredients can lead to unique twists on classic recipes, making your no-bake desserts even more exciting and delicious!
Related Topics
no-bake desserts
3-ingredient sweets
quick sweet treats
easy dessert recipes
simple dessert recipes
healthy desserts
family-friendly
instant cravings
busy lifestyles
time-saving recipes
quick snacks
dessert hacks